
Spotlight on the sewing table
/
Let's talk a little about the lovely sewing machine table that arrived with the rest of our new furniture.
Many folks my age - my fiancee Navah included - have never seen a sewing table, so there's a little confusion about where exactly the sewing machine goes when it's not sitting up on top. If my grandmother had not had a sewing table (or cabinet, as they're also called), I probably never would've seen one either. But since, as a child, I watched her set it up and sew the tiniest little dresses for my Barbie dolls, I have been forever fascinated with them. Even though I know exactly how they work, they still seem magical to me and like a sign of a craftier time - where sewing was such a normal part of your life that you needed a whole piece of furniture devoted to it. Yes indeed.
So, for those who haven't seen one before, here's a play-by-play of mine:
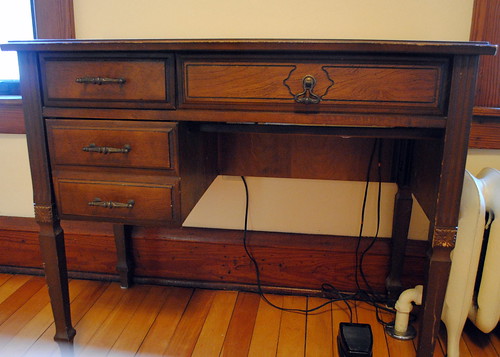
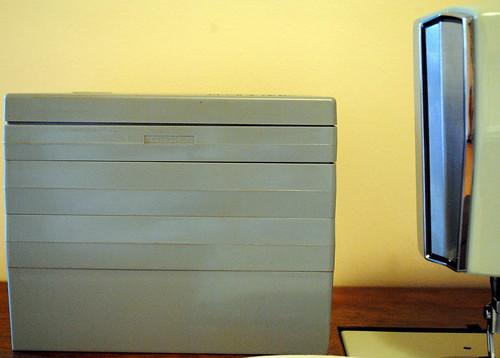
When it's just hanging out like a desk, it looks like this...
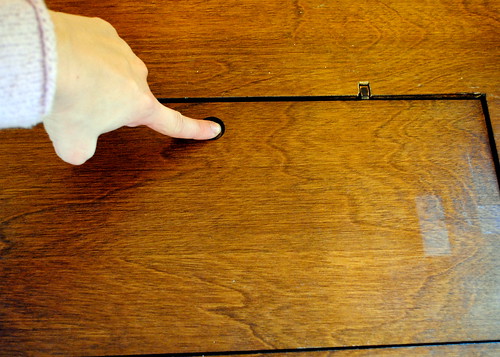
And on the top of the desk, there's a little wooden button (it's normally flush with the surface). In the next photo, I'm pressing that button down, which will release the piece of wood covering the machine.
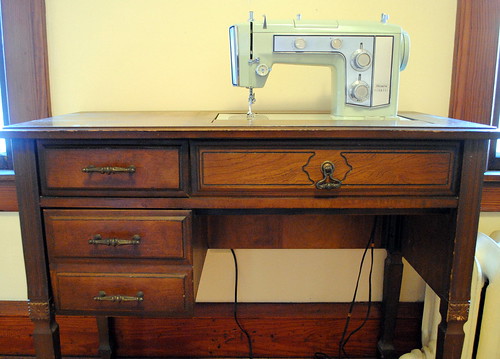
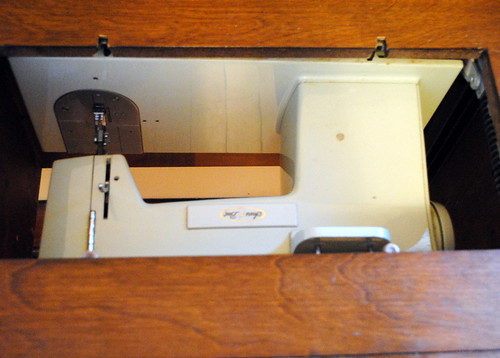
When I lift the piece of wood, you see the machine there on its side, which is how it's always situated when not in use. So the drawer across the front of the desk is just for show.
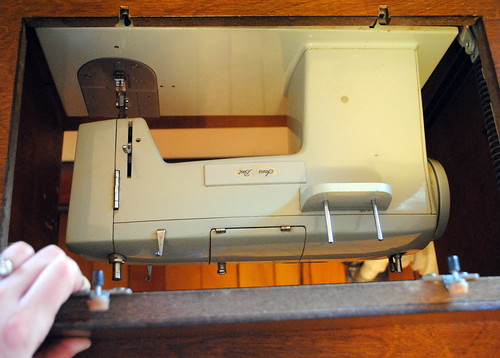
You can see here that the machine is partially obscured by another piece of wood.
That's on a hinge so I can lift it up. Later, when I get the machine all the way out, I'll put that little piece of wood back down, and the machine will rest on those two little peg-like things that you see at the bottom of the photo below.
Pulling the machine out...
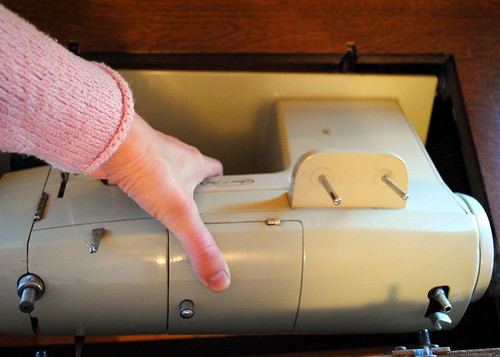
I put that little piece of wood back down, and now I'm lowering the machine onto the little pegs, which you can't see in this photo.

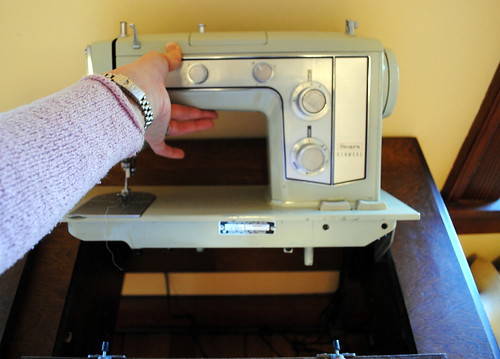
And tada.
There it is, a pretty little machine ready for sewing.
At the used furniture store where I bought the machine, they also had a gorgeous vintage Singer table that looked a bit like this but perhaps older. I passed on that one because the condition of the table itself wasn't as good and because I wasn't sure I could figure out how to use the machine, which didn't come with an instruction manual.
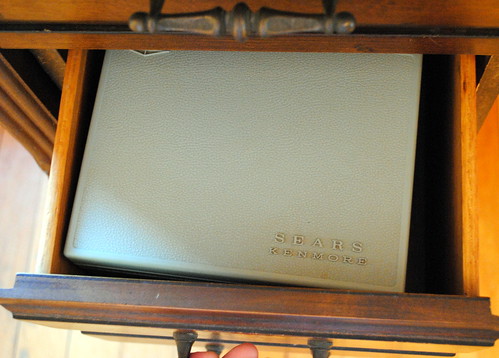
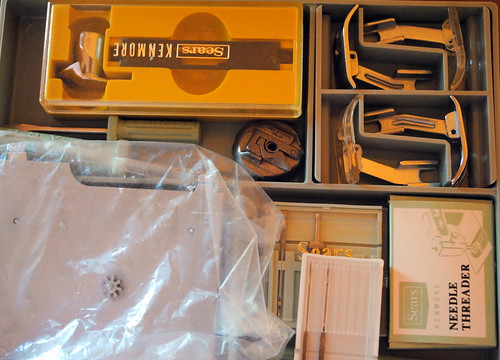
Which brings me to the next bit of fabulous. The machine is in impeccable condition - all the way down to the accessories. That's right, in the drawers of the desk, I found these:
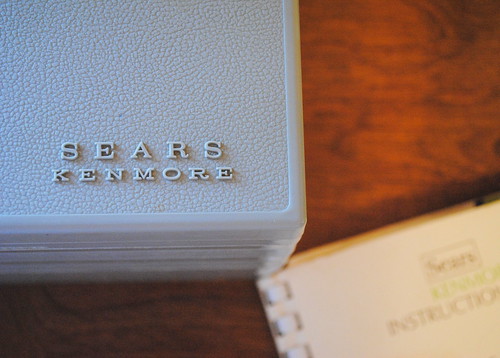
A full instruction manual for the machine

A box filled with bobbins (the only indication I have that the machine was actually used) and a button-hole sizer
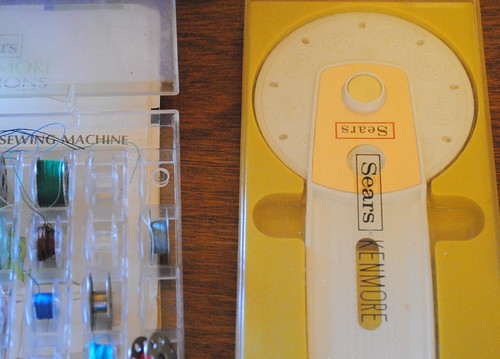
As well as a meticulously-kept box of accessories.
Let's dig into that a bit.
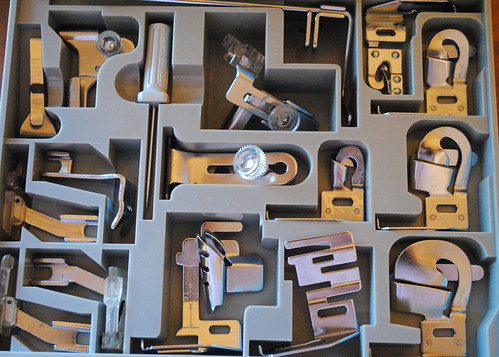
It's a multi-layered box. As you take off each section, you reveal a layer of neatly organized accessories for the machine.
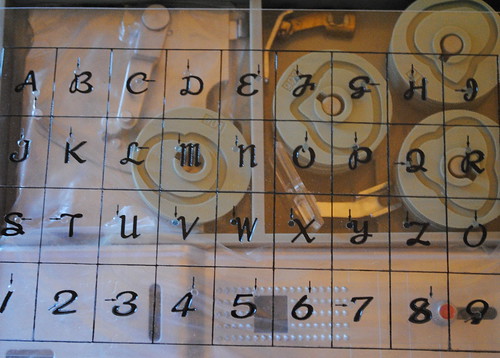
Yep, it monograms!
So, though I think the sewing cabinet is delightful enough to buy just for the fun of it, there was actually a purpose for me. My sewing machine has been giving me fits. Fits, I tell you. The zig zag stitch (and, in fact, any stitch other than a straight stitch) works only intermittently, generally for the guy at the sewing machine repair shop when I'm there trying to show him how it's not working. And then not for me when I get home and try to sew something. It's brilliant that way. It was also giving me a lot of trouble in the tension department.
It's a Singer machine that I bought about 10 years ago at Walmart for $125. I started doing research to prepare for buying a new machine. I learned that, though Singer has a traditionally good name in the sewing machine world, more recent Singer machines, and particularly those that are made to sell on the cheap to folks like me, have a pretty bad reputation. Having spent on repairs almost as much as the machine originally cost, I decided it didn't make sense to sink any more money into it. I was going to buy a new machine that would last. But those machines aren't cheap. Though I wasn't planning to go with a top model, like a Bernina, that can cost thousands of dollars, I figured I'd be spending in the $500 range. I was saving up.
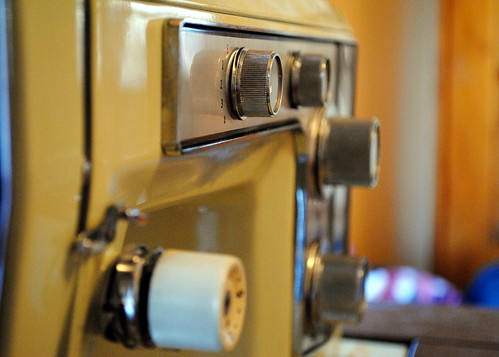
And then I found this beautiful Kenmore for $90. These older machines, like most types of older machines, were built to last. Unlike the plastic machines now, they were made from metal. The paperwork with the one I just bought says that the warranty on the sewing machine head was for 30 years. I know several people who happily sew on their mother's machines, purchased in the 1950s. So, while this one doesn't have some of the fancy electronic features that I may have opted for with a new machine, I am really excited about working on something that's not going to break on me every two seconds. (And, if you're concerned, I tried it out in the store before I bought it.)
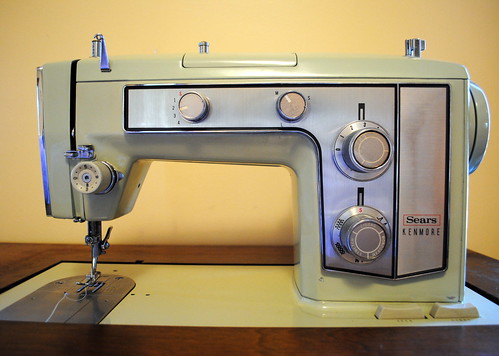
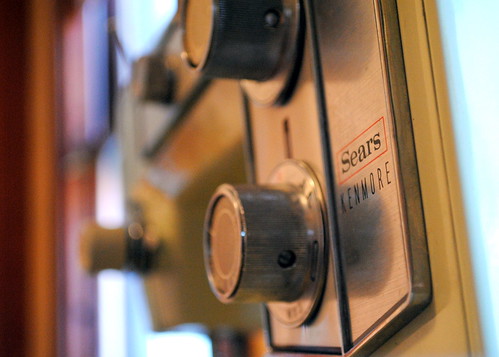
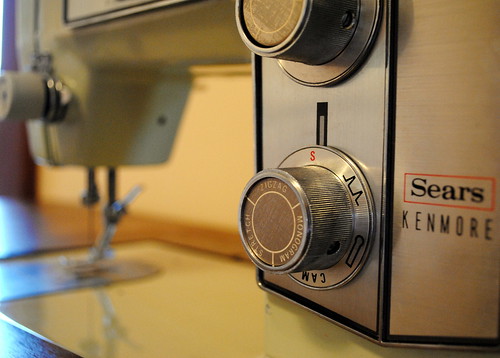
As for the specifics on her - she's a Sears Kenmore Model 158.18023. A little online research revealed that this particular model was produced in 1970 and 1971.
And now....some sewing machine porn. Avert your eyes if you're not of age.
Sigh.
If I weren't bar studying right now (as in, after I finish writing this post), I'd be all over this baby. But for now, she's just going to have to wait a bit.
Katie


