
Stenciling the Bathroom
/
Sometimes you envision a project, and you get so excited about it that you immediately rush to the internet and buy all the materials you need. Then you start to work out the details and you realize...maybe it's not possible.
If you're lucky, your mom comes to visit and while she's telling you that you're insane and that there's no way it can be done, she still figures out all the ways to make it happen and works alongside you so that at the end of the weekend, you're left with perhaps your favorite DIY project ever.
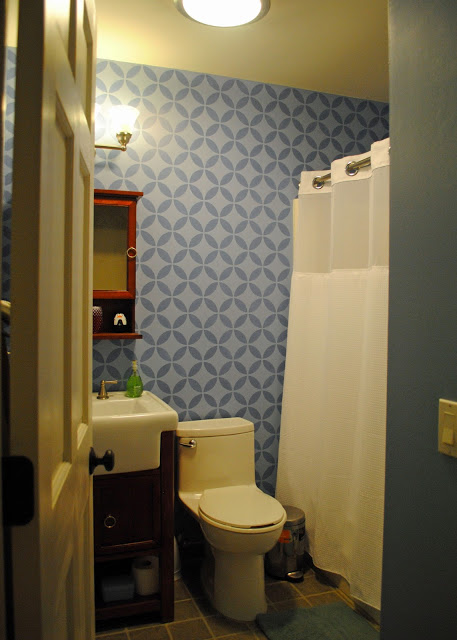
If you're looking for a stenciling project, you might not want to start in the bathroom. But then again, I love how this turned out. Of course, it meant taking the medicine cabinet and light fixture off the wall, standing in an awkwardly hunched position on the sink, balancing on the edges of the tub, and getting cozier with the toilet than I'd ever like to be. So, just keep that in mind.

What my mom suggested instead - and what ended up being the bright idea that made it all possible - was that we cut the borders off two sides of the stencils. We measured and cut carefully, and then we had the straight lines we could press right up against the wall or the ceiling with no border. It was simple enough to cut and made everything so much easier. (I did use their method of pushing it into the corners for the opposite side where the stenciled wall met the other non-stenciled wall, but the big benefit was that I didn't have to do that on the ceiling at all.)

The basic painting of the bathroom took me about 4 hours, and then the stenciling took me and my mom together about 5 hours. I love it so very much that it was 100% worth the time. Every time I walk by, I smile.
For the background paint color (the lighter color on all the walls), I used Benjamin Moore Riviera Azure. For the darker accent color, I used True Value Wanderlust. For that accent color, I used a $3.99 can of sample paint, and I still have half the can left.
For as challenging as it was, I would recommend a stenciling project to anyone because the outcome is so stunning - like wallpaper but without all the yuckiness of wallpapering and without the difficulty of changing the wall later if you grow out of the design. Not that I can ever imagine that happening here.


