
Easy DIY Instagram Magnets
/
I have taken thousands of photos on my phone. Tens of thousands. And I've shared many of them with the world through my Instagram feed. But once I put them out there, they get shuffled to my Instagram archive and out of my mind.
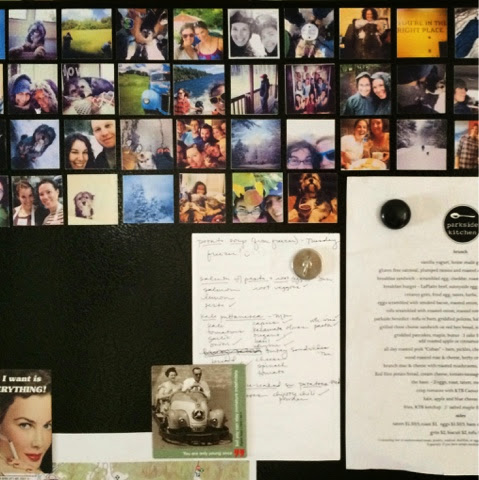
I wanted some way to display a bunch of them in my house because so many inspire happy memories of fun times. Or adorable pictures of my dog that should be visible as a reminder not to murder him when he's being a jerk. Magnets came to mind because the side of our refrigerator is a big blank magnetic canvas that sits in the middle of our primary living space.
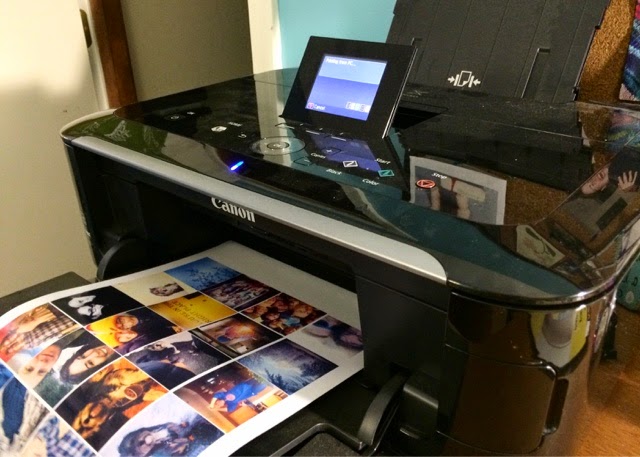
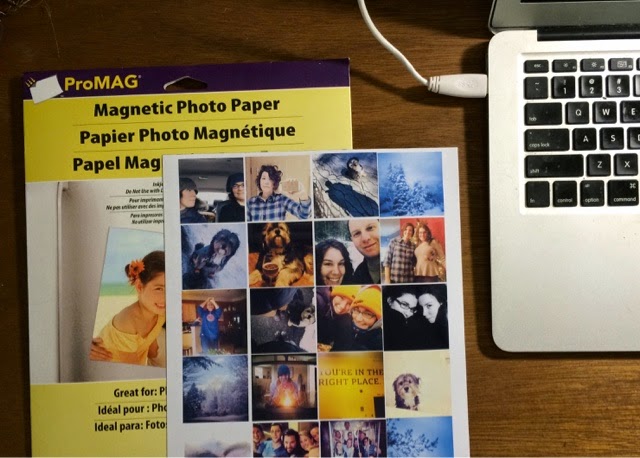
I went to Michaels to see about the magnet situation and was absolutely delighted to find entire sheets of magnetic paper that can simply be run through a printer. Hence began the absolute easiest DIY Instagram magnet project. The biggest amount of time went to figuring out which pictures I wanted to use.
Easy DIY Instagram Magnets
Important Note: You can make these even if you think you are not "creative" or "a crafter." Go make some.
1. Choose your photos. If they're not already on your computer, you might need to use an Instagram photo downloader. Most of mine were already on my laptop because it syncs automatically with my camera roll when I plug in my phone. But for some reason, a few were missing, and I used Instagrabbr to get those photos.
2. Once you've chosen your photos, pull them all up in a photo editor. I used Photoshop, but you can use PicMonkey or Picasa or another similar free editor. Begin to make a contact sheet by dragging and dropping the photos onto a blank 8 1/2 x 11 page.

3. Resize all of the photos. I sized mine 2 inches x 2 inches. To do this in Photoshop, hit control + t to select the image and then set your width and height up in the top left corner. Then fill up your page with your images.

4. Once you have your contact sheet(s) made, load the magnetic paper into your printer and print each sheet out according to your printer settings. You'll likely need to load the paper into a side or back feed rather than the normal paper tray.
5. Voila - sheets of magnetic photos!
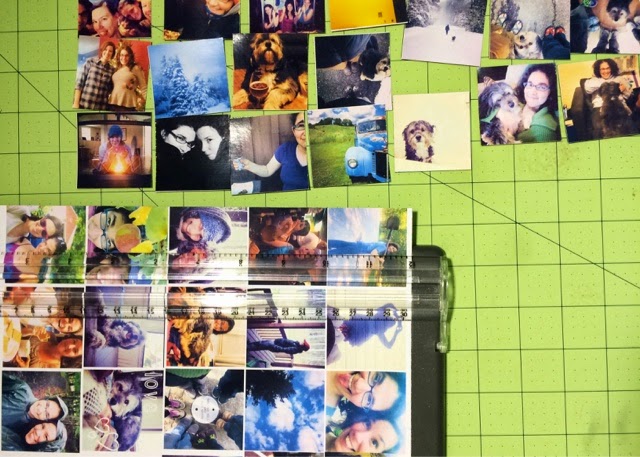
6. Cut out each square magnet using a paper cutter, scissors, or an exacto knife. My little Fiskars paper cutter worked perfectly to cut out each square.
7. Once all of your squares are cut out, hang them somewhere you'll see them everyday!
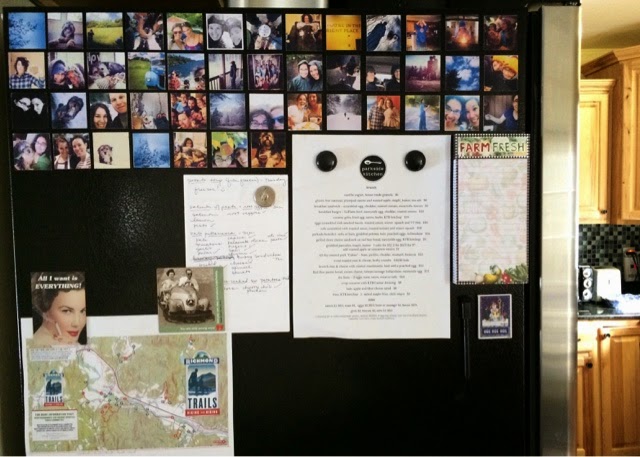
I adore having these photos out in the open and seeing them as I walk through the house. And I'll definitely be making more because now I have a vision of the entire side of the refrigerator covered in these little happy tiles.
The whole project only took about 2 hours, and that was mostly because I labored over which pictures to use. Even so, time well spent!
p.s. Back when I was using an Android phone
Like what you just read? Share it with a friend! You can also follow ktmade on Twitter, Facebook, or Instagram so you'll never miss a post. And you'll earn my undying affection!


