Brokenness and Community

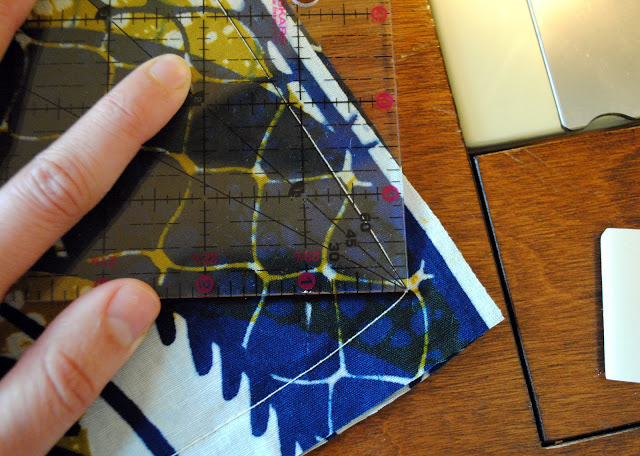
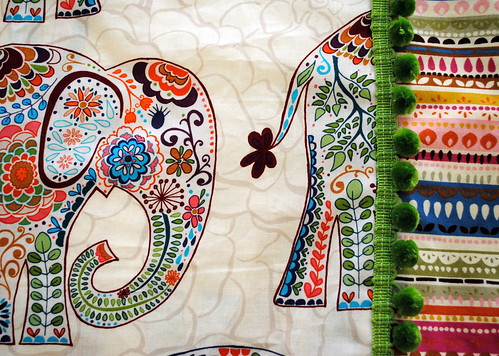
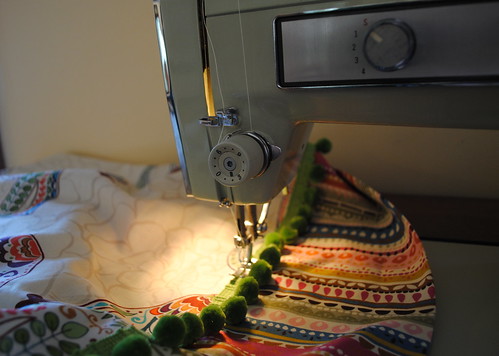
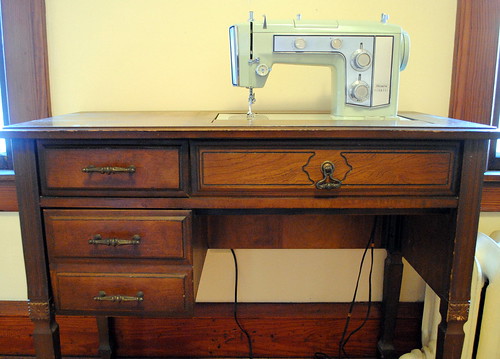
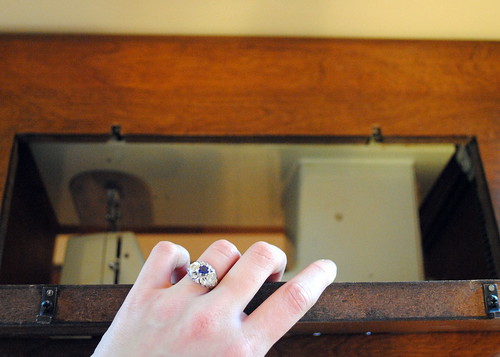
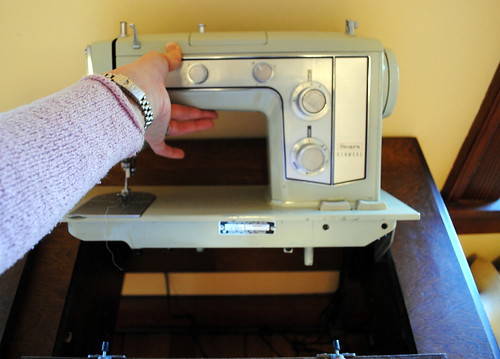
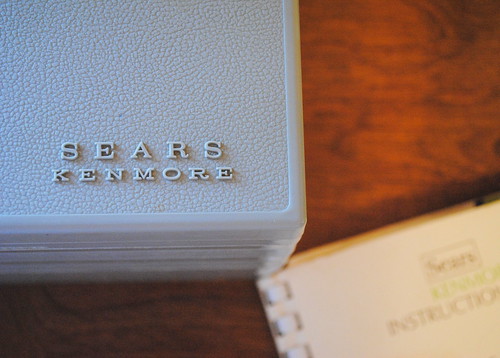
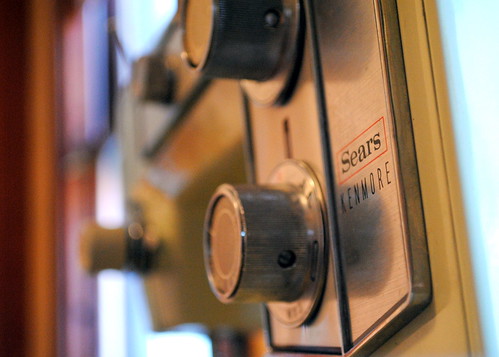
My sewing machine is broken. Or its user is. Maybe both.

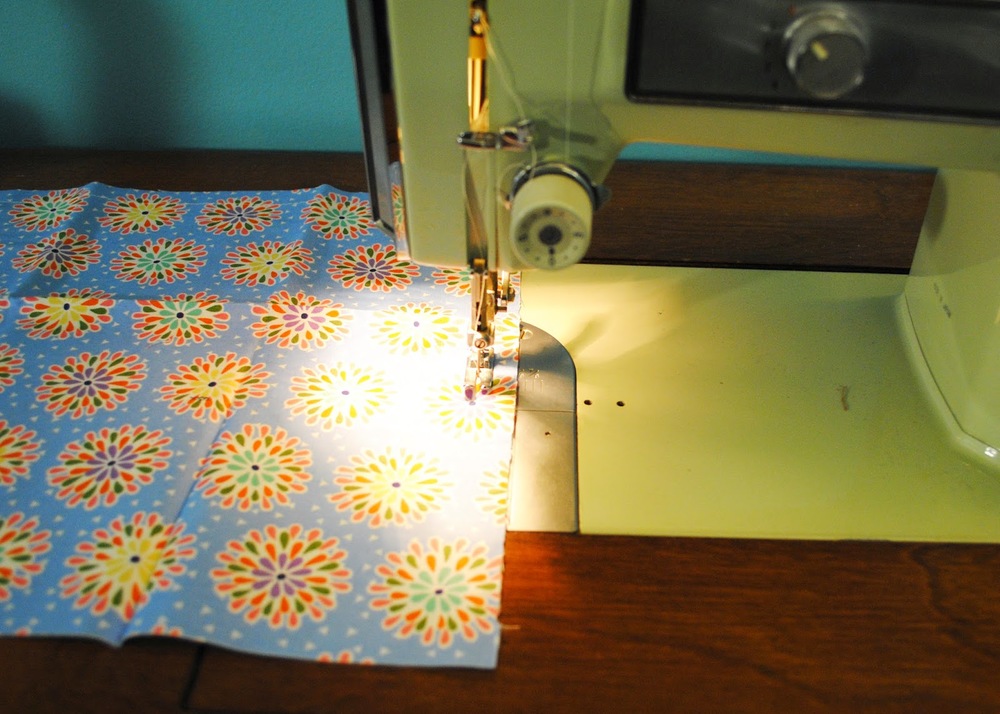
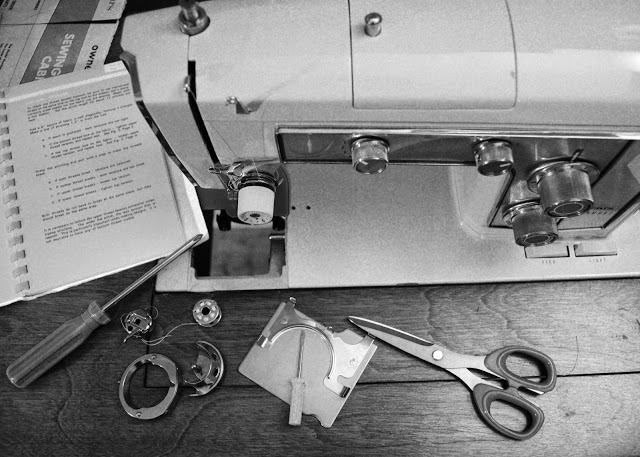
I figured out how to change the foot and the needle. So proud of myself, I pressed it down onto the knit fabric - my first time sewing on anything other than cotton - and it jammed up. Thread stuck in the bobbin and wrapped around it and held firm, and the needle wouldn't budge. I pulled out the manual and took apart the bobbin case and put it back together and tried again. Jammed again. 

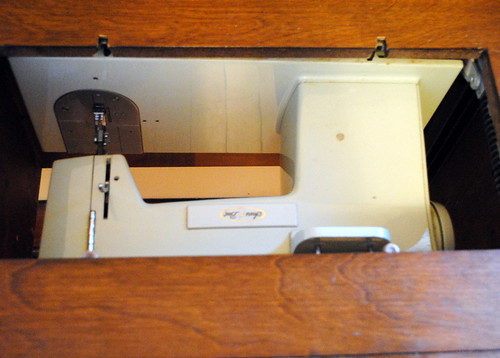
I took the manual back out and removed the machine from its table. Nothing I said to the man at the repair shop seemed to ring a bell. Not the "I know exactly what the problem is" I'd been hoping for. He said he'd give it a tune up, and when I returned for the machine four days later, that's what he'd done. He found no problems, just adjusted the bobbin tension a bit. 

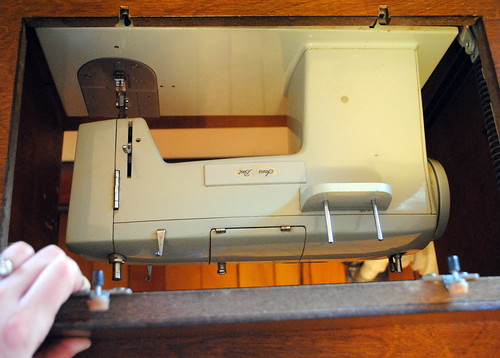
I brought it home, screwed it back to the table, sat in my chair, put the fabric back under there. Jammed. 

I cursed and put my hands over my face and tried again with the same result, the sewing project I had planned for the blog thwarted for the second week in a row. 

* * * 

There's this thing that happens as a blogger, where you spend a lot of time typing some part of yourself into the keys of your computer, and no matter how much you try to be "real," the story that comes out is inaccurate. At least it seems that way as you see it mirrored back to you in the words of friends or readers, when people start using phrases like "do it all" or "have it all together."

In a world where so many of us use the successes of others as weapons against ourselves, as proof of our own failures, I feel some obligation to set the record straight. To say that these pages are a tiny piece of the story and sometimes I am talking about Facebook or pie or quilts, and while you are reading those words, I am at home falling apart or screaming at my sewing machine, that I have a billion questions and almost no answers, that I cry and yell and think mean thoughts and sometimes say unfair things. That I have worries and fears and goals that I'm too embarrassed or ashamed or protective to share on these pages. Or they just don't belong here.

And yet somehow the simple act of writing these words down and sharing them with you here gives the impression of having sealed it all up in a tidy bow. I don't know how to kick that. Maybe I'm not supposed to.

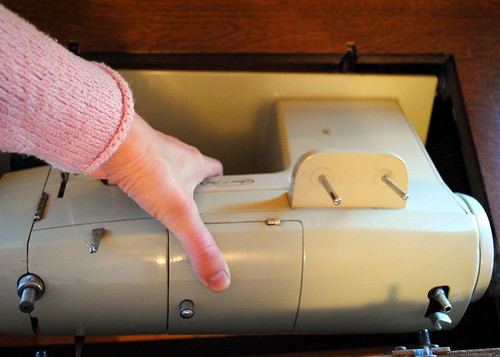
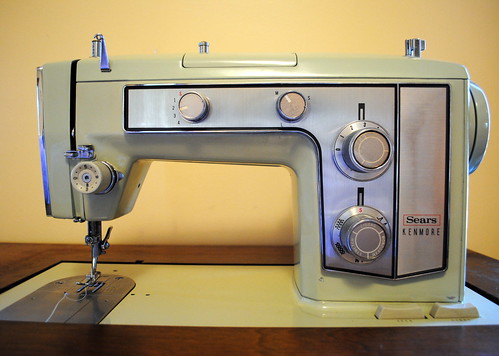
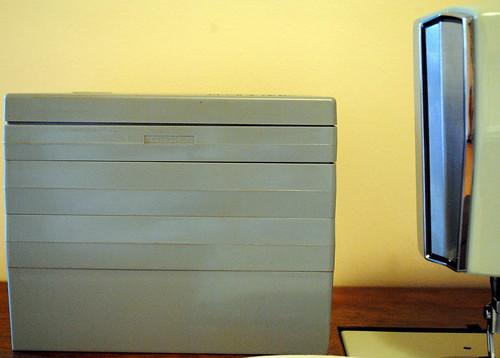
Writing is reflective. It's not tidy, but it does provide some context, some meaning, to its subject. A broken sewing machine (or a broken user) is no longer just that. On the page, I am no longer the woman sitting in tearful frustration in front of an antique machine that befuddles her. Instead, I am a woman acknowledging her limits, sharing her humanity - with you and with herself. 

* * * 

I've read a lot of sewing blogs over the years. I've seen countless projects - bags and dresses and shirts and table runners and quilts. I've never read a word about someone fighting with their sewing machine, jamming the bobbin, perpetually screwing up the tension, at least not from someone who isn't sitting down at a machine for the very first time. As far as I can tell, I'm the only craft-oriented blogger on the internet who can't figure this crap out. I'm the only one who's dumb enough to be bested by this hunk of metal.

And yet that can't be true, right? I am not so unique that I can claim this particular frustration as mine alone. I don't want to. 

I want a community around it. I want all of the people staring at their sewing machines in confusion and anger to yell across the web to each other, "ME TOO!" and wave their hands and then point and laugh at their screwed up projects because hey, we're all in this together. 

I am just as broken as you. Maybe more so, depending on the day. What you see on these pages, what looks like life tied up in a bow is me, seeking community. It is me, sharing my humanity and, in my deepest dreams, creating a space for you to share your humanity too. To wave from across the internet and say hey, me too. And to smile because you're not alone. And neither am I. 

p.s. Fickle or Renaissance?

Like what you just read? Share it with a friend! You can also follow ktmade on TwitterFacebook, or Instagram so you'll never miss a post. And you'll earn my undying affection!

Easiest Fabric Napkins


I went to a wedding last summer where the groom's mother made dozens of fabric napkins for the place settings, beautifully mismatched in as many different patterns. The bride was incredibly generous and sent me home with four dainty flowery ones, which I use for special occasions. 

Making some more to go along with those original four has been on my project list for almost a year. I don't know why it has taken me so long because whipping up a few of these fabric napkins is about the easiest and fastest sewing project you could imagine. Making hundreds for a wedding would take a while for sure, but I made 10 in less than an hour, with a little extra time for trimming the edges in front of the television. 

And now, not only are we being a bit more environmentally friendly, but I get to see these pretty fabrics on a regular basis instead of having them folded up in my studio. And I have enough that we don't have to save them for special dinners, and we shouldn't run out even if I'm behind on the laundry (and you know I am). 

If you're all set for fabric napkins at your own house, these would make a great hostess or housewarming gift. 


Easiest Fabric Napkins

Cotton fabric in a variety of patterns
Ruler
Rotary cutter or scissors
Coordinating thread
Pinking shears


1. Cut your fabric into a large square. I did this by folding from the edge into an even triangle and then cutting the two sides, which ensures that the square is...well, square. I used an existing napkin to get the size right.


2. Sew a simple straight stitch all the way around the edges of your fabric square with a 3/8 inch seam allowance. 


3. Cut the edges with pinking shears to avoid fraying. 


That's it! Now put one next to your plate and enjoy having something so pretty for wiping your hands! 


p.s. Embellished hand towels are another great way to get pretty fabrics into your everyday life.


Like what you just read? Share it with a friend! You can also follow ktmade on TwitterFacebook, or Instagram so you'll never miss a post. And you'll earn my undying affection!

The 13 Year Quilt


2002. Washington, D.C.


I was a graduate student - theater - living alone and far away from my family for the first time in my life. My studio apartment was 325 square feet, had a half-wall of tiny appliances, and was furnished (by my mom and me) with a futon, a rectangular card table, and a black and silver tv stand from Walmart. Making friends outside the dorm life of college was more difficult than I had expected. That first year, I spent many weekends by myself, watching a lot of television and channeling Mary Tyler Moore as I wandered the streets of Dupont Circle. 

I watched entire afternoons of HGTV. It was a little less trendy back then, and my favorites were the Carol Duvall Show and Simply Quilts. I crocheted while they presented holiday centerpieces and masterfully pieced together works of art. Quilting seemed out of my reach, requiring skills and paraphernalia I didn't have.

The day they shared the denim rag quilt and described it as a great beginner's option, I put down my crochet hooks and immediately searched for the episode and instructions on my computer.

To my weekend wanderings, I added thrift stores and the Goodwill, where I rummaged through piles of jeans and racks of shirts to find just the right fabrics to cut up.

I got a sewing machine for Christmas.


2004-2006. Silver Spring and Bethesda, Maryland. 

Kept company by Meredith Grey and McDreamy, I traced around the cardboard square template with a sharpie. Down the legs of a pair of men's Wranglers and up the back. With a good pair, I could get 12 squares. I needed 180 for the whole thing.

To my pile of thrifted plaid garments, I added the left-behind shirts of a former high school boyfriend and one of my college loves as well as two men's button-downs that I'd worn after coming out my senior year, a move that I had hoped signaled my newly-minted lesbian status to the ladies around me.

I bought spring-loaded scissors and kept a rubbermaid tub filled with denim and plaid under the bed I shared with my then-partner.


2007-2009. Washington, DC. 

The rubbermaid tub and my sewing machine sat in a series of closets as I moved from apartment to apartment with my then-girlfriend (now wife).

Law school left little time for crafting, and the piles of fabric looked to me old fashioned in the worst way.


2010. Washington, DC. 

My inner crafter, thought deceased, had simply been hibernating. She revived almost immediately upon graduation.

At the dining room table of our Logan Circle apartment, I oriented the sewing machine so I could stitch together squares while watching back-to-back episodes of Little House on the Prairie and waiting out the 5 months until my law firm job would begin.

"You've been carrying this all around for 8 years?" Navah asked, incredulous.

"Yep," I nodded.

"I didn't even know you sewed," She said.

"Yep."

Rows of alternating denim and plaid sprawled across the living room floor with numbered sticky notes pinned to their tops.

My sewing machine broke.


2015. Richmond, Vermont.

With a freshly painted craft room calling, I opened the old rubbermaid box. Nine rows of fabric stitched together and six waiting to be added.

I listened to the sound of the needle moving up and down through the layers of material and watched each pattern go by, remembering.

"I'm going to finish it," I told my wife. "And I think I might actually like it again - this whole denim and plaid thing."

She laughed and said she'd believe it when she saw it.

I shouted up from the studio - "Finished!" - when I pulled the last bit out from the sewing machine.

I snipped the seams for days (weeks?), through Modern Family, Six Feet Under, The Good Wife, BoyHood, Top Five, Scandal, Interstellar. I bought new spring-loaded scissors, these specific to rag quilts and the primary reason that I can still use my hands after cutting 10 little snips in every seam.

The couch, the floor, the table, my clothes, Navah's clothes were all covered in tiny little denim threads. "The cost of art," I said.

Two cycles through the washer and dryer, carefully cleaning out the lint filter every 15 minutes, and it was over.


13 years older and 500 miles further north, I am sitting under this beautiful fabric time capsule as I write these words.

I think I'll call it my gratitude quilt - for all the days and weeks and television shows and friends and loves and thrift stores and scissors and sewing machines and rubbermaid tubs that traveled alongside me to this moment with the sun not quite up, my dog on the floor beside me, my wife asleep down the hall, and the only sound the tapping of my fingers on the keys.


p.s. The first quilt I ever finished

Like what you just read? Share it with a friend! You can also follow ktmade on TwitterFacebook, or Instagram so you'll never miss a post. And you'll earn my undying affection!

Easiest Burlap Floor Pillow


During a trip to Costa Rica about five years ago, my wife and I visited a coffee farm, which was fascinating and delicious. While there, I bought a burlap coffee bag so that I could make a burlap floor pillow.

In my house growing up, we had two enormous floor pillows. I think my grandmother made them, or at least helped my mother make them, out of carpet remnants or something similarly thick and stiff. They were definitely the heaviest floor pillows anyone has ever owned. But I have the fondest memories of them - lounging on them, using them as the base for blanket forts, snuggling against them while I watched a movie. I've always been a floor person.

So I've carried this burlap coffee bag with me from apartment to apartment to house so that I could have my own floor pillow. Of course, I am a person who still hasn't finished the quilt I started 10 years ago, so I basically just forgot about the coffee bag while it languished in my fabric stash. In the meantime, we had acquired a large pillow because of a torn sofa cushion and a mix up with Ikea. We've carried it from apartment to apartment to house. I even picked out some fabric samples to cover it almost 3 years ago.

When I was cleaning out my studio a few weeks ago, I organized my fabric stash and Hey! There's that burlap coffee bag! 

So I pulled it out and tugged it onto the pillow, absolutely delighted that it fit perfectly, meaning that creating my burlap floor pillow was going to be the easiest project ever.


Steps:

1. Iron the burlap bag. Relying on a little advice from the internet, I ironed the burlap by pouring water directly onto the bag, rubbing it in, and then ironing that area. The steamer on my iron is broken, but I'm not sure that would have gotten it wet enough anyway. [I don't have a picture of this step, but you can see the wet spots on the burlap in that first picture.]

2. Shove the pillow into the burlap bag.

3. Fold the bottom (or actually, the top) of the bag around the pillow and pin in place. This took a little bit of maneuvering to get it all situated the way I wanted.

4. Using needle and thread, stitch the opening closed where you pinned it.

That's it! All together, it took me less than an hour. It's not the most refined edge, but this is a burlap floor pillow we're talking about. I'm not sure refined is the way to go.

I love that the pillow now goes with our room - it looks like it belongs there instead of just being a random off-white pillow we threw on the floor.


Jammer's not convinced, but he's a skeptical guy.


p.s. This reminded me of collecting hundreds of pillowcases for the pediatrics ward in Rwinkwavu, Rwanda. What an amazing experience that was. 

Pillowcases for Hannah


If you've been reading my blog for a while, you know that I traveled to Rwanda last year to visit my sister who was doing a fellowship there.  And you know that I organized a drive for cheerful handmade pillowcases for the pediatrics ward at the hospital where she volunteered.  The drive was a huge success, and we handed out dozens of lovely pillowcases to very appreciative kids and parents.


And then my sister put in a request for some unique pillowcases for her own bed after she returned to New York City for graduate school.  It took me a few months, but I finally got down to business, pulled out the sewing machine, and made two coordinating pillowcases using this tutorial.


Hannah picked out the wide band of trim fabric for each pillowcase while I was visiting her in New York during the fall - from Purl Soho.  And then I picked up the coordinating fabrics at JoAnn Fabric.  I was so excited to find two with the same pattern that worked so well with the different trims.


They spruce up her simple navy duvet cover beautifully, if I do say so myself!

Hannah's had that bunny since she was born!  

Fabric for the Wedding Quilt


I've known that I wanted to use squares that would be made into a quilt as our wedding guest book ever since I saw this one by Cute + Delicious.

I had seen various others during my meanderings around the internet, but I was always on the fence. But when I saw Alix's, I was sold.  Her decision to use patterned pieces and have the guests just scribble in where they could find room (or over the pattern) made for such an organic-looking finished product where the pattern was the focus, but if you looked more closely, you realized there were all those lovely signatures.

It was exactly what I wanted for mine. 

So over the weekend, I headed to Stitched, a fabulous boutique sewing store about fifteen minutes from where I live.  I'd never been and somehow didn't even know it existed for the first six months that I lived here, which is a travesty.  Of course now I can't wait to get back from the honeymoon and gorge myself on fabric, but that's a story for another day.

These patterns in the teal and red colorway from Michael Miller Fabrics caught my eye right away, but I was concerned they may look too childish.  After talking it over with the owner, I decided that was a-ok.  We agreed that a wedding quilt is all about celebration and magic, and what is more celebratory and magical than a pinwheel?  Seriously?

Also, our whole wedding weekend is at a summer camp, so we've sort of headed down the youthful delights path anyway.

After spending an hour or so cutting out the squares, I'm 100% sold and just excited to have everyone sign them and then start to make a quilt that we'll treasure forever!


Katie


When Good Projects Go Bad


Months ago I bought Brett Bara's Sewing in a Straight Line, but I never sat down to make anything from it. This week seemed like the perfect time to whip up a quick springtime skirt, and the one-hour skirt seemed just about right.


Some kind of selective memory issue caused me to completely forget everything I've ever known about elastic-waisted skirts. It was probably in part to do with the fact that the model in the book is exceedingly thin and posed perfectly.


At any rate, two hours later, I found myself with this skirt.


A teensy bit too reminiscent of something I wore as a four year old. 


I'm sure that a darker, less flowery print would've toned down the childish vibe. And another 3-4 inches on the length would help tremendously. I'll admit that I was 1 inch short on fabric, but I decreased all the seam allowances to try to make up for it. Clearly, it didn't. And while I thought this fabric seemed like a very soft cotton, it keeps very stiff and doesn't fall in the way that the skirt in the book does.


But more than the fabric and the length, I was reminded of that wise old adage:


Elastic waists take no prisoners. 


Even if I decided to wear this out of the house, there's no way to style it. If I tuck my shirt in, I look like a chunky box wearing a poofy skirt. If I leave my shirt out, I look like I'm trying to smuggle something around my waist. 


And - a problem I had also forgotten about - the elastic has already folded over on itself in one part of the skirt, something that used to drive me crazy when I wore these types of things in elementary school.


So, it will likely go back into the fabric pile and come out again one day to be made into a pillow or a skirt or some child's garment. 


Tell me about one of your projects that went horribly awry. Please? 

Katie

Children's Tote Bag Tutorial


About a week after I returned from Rwanda, I found out about two young girls who had just started learning about African geography in school and wanted to hear about my trip to Rwanda. I was super excited to oblige. I put together some slide shows of my trip, and I made each of them a little tote bag with some of my African kitenge fabric. While one hour of information was just about all they could sit still for, I think they enjoyed it. And I definitely did!


Here's a little tutorial of the children't tote bag for you:


Materials
fabric for the outside of the bag, 2 pieces cut 18 inches by 20 inches
fabric for the lining of the bag, 2 pieces cut 18 inches by 20 inches
fabric for the bag's handle, 1 piece cut 3 inches by 20 inches
tailor's chalk or other marking pen
coordinating thread
sewing machine


First things first, make sure you've pre-washed and ironed your fabric.


Pin the two pieces of outside fabric, right sides together, all the way around three sides - the two short sides and one long side.


Then begin sewing a straight stitch around those three sides with a 1/2 inch seam allowance. Make sure to backstitch at the beginning. When you get to the corner, keep your needle down, lift up the foot, and turn the fabric. Put the foot down again and keep going.


Backstitch again at the end.


To soften the corners, you'll want to stitch at an angle across the two bottom corners.


I use my ruler to make a notch 1 inch inside the corner and then draw a line across with my tailor's chalk.


Stitch straight across the line you drew on both sides. 


Now you'll follow all the same steps with the inside lining fabric - sewing around three sides with right sides together and then softening the corners.


Once you've gotten the inside and the outside sewn, it's time to head to the ironing board. 


First, iron a 1/2 inch fold around the top (unstitched) side of both the outside of the bag and the inside lining. Iron the fold in the direction of the wrong side of the fabric for both pieces. 


Then fold the handle in half lengthwise, right sides together, and iron that flat. 


Back at the sewing machine, stitch along the long edge of the now-folded handle with a 1/4 inch seam allowance.


To turn the handle right-side out, attach a safety pin to the seam allowance on one side and then feed the safety pin through the opening, working it slowly through the little tube of fabric until you can pull it out the other side, bringing the fabric's right side with it. Iron the handle again with the right sides out.


Now you're ready to put everything together. 


Turn the outside of the bag right side out but leave the inside lining wrong side out. Put the inside lining into the outside lining and line up the top folded edges of the inside and outside of the bag using the seams on the sides. 


Place one short end of the handle in between the outside of the bag and the lining on the seam line on one side. Pin in place. Do the same on the other side.


Then pin all the way around the top of the bag.


And now you're ready to do the final topstitching all the way around the top of the bag, making sure the stitches meet up back where you started. 


Clip any long threads, and you're done!


Katie

Embellished Hand Towels Tutorial


After reading several of the blog posts last week on my trip to Rwanda - like this one on traveling within the country and this one on the gorgeous African fabrics I brought home - a friend of mine emailed with the suggestion that I make something with the fabric to serve as a little gratitude reminder. After commenting on how challenging basic things like getting water are, I had remarked in one of the posts:


I have resolved to be more grateful for the ease with which I can get from place to place and acquire the things I "need." I have resolved to be grateful each time I turn on my faucet and pour myself a glass of water. But, as Hannah and I opined, that will last a few weeks. And then I'll forget, and I'll find myself complaining about having to walk to the little market a couple blocks away to get toilet paper when we run out. And then hopefully a little bell will ding in my head and bring me back to gratitude. 


She suggested that, to help keep gratitude for the ease with which we enjoy clean, potable water, I might make hand towels using the beautiful kitenge fabrics so that each time I dry my hands, I'll remember how lucky I am to have all that water! 


I instantly knew it was a brilliant idea and put it on my crafty to-do list. The fabric isn't soft or absorbent enough to act as a hand towel on its own, but I knew it would make a lovely embellishment to a standard hand towel. After picking up some plain kitchen towels and hand towels at Home Goods, I set to work on making some beautiful reminder towels. 


And because I love you guys, I put together a quick tutorial as well. These towels are a quick, simple way to add some personality to your kitchen or your bathroom. If you know how to sew a straight stitch on your sewing machine, you can make these in no time. 


First, lay the short side of your hand towel down on the wrong side of your (pre-washed and ironed) fabric. 


Using tailor's chalk or a fabric pen, draw a line on either side of the towel to mark how wide your fabric strip will need to be. 


Because you want a little extra fabric to fold onto the back of the towel, you'll measure 1 inch past your line and cut the fabric there. Do this on both sides of the fabric. 


Now that you have the appropriate length of fabric, cut the width that you would like. I wanted my fabric strip to be 2 inches wide, so I cut my fabric 2 1/2 inches wide, leaving myself a quarter inch seam allowance for the top and bottom. I went ahead and cut two strips since I knew I would be making two hand towels from the fish fabric. 


Head over to your ironing board and iron a little 1/4 inch fold all the way around your fabric - wrong side to wrong side. I always use a trick my mom taught me when I was first learning to sew. I draw a line on an index card 1/4 inch away from the edge and then use that as a guide when I'm ironing so that I have an even fold all the way across. 


Once your fabric strip is ironed, place it along the front of the towel just as you'd like it to be when sewn down. (I don't have picture of this part - woops!, but it looks basically like it does at the end). Fold over the two edges onto the back of the fabric and pin them down, making sure that you're the same distance from the bottom of the towel on both sides. 


Here comes the hardest part. You want to sew the folded-over fabric down to the back without stitching through the fabric on the front. It's really just a maneuvering issue, making sure that all the fabric is out of the way when you start the machine. 


Once both sides are sewn down in the back, then pin your front section down both at the top and the bottom. 


Now it's time to sew! Top stitch all the way across your fabric remembering to back stitch slightly at the beginning and end to stabilize the stitches.


I kept very close to the edge to minimize the look of the topstitch, but you can stitch further away if you'd like. Just remember that you want the actual edge of the fabric (that you folded over earlier with your iron) to be inside the topstitching so that you won't have any unraveling. 


Then cut any strands, and you're done!


There were a lot of pictures and steps, but one hand towel only takes about 30 minutes - and I'm a slow crafter. So it might be speedier for you. 


I'm enjoying having these pretty hand towels around, and I love that they serve the bonus function of helping me to remember how darn good I have it. (And sometimes I need the reminder! I've been known to get whiny about the silliest things!)


Is there anything you need help remembering to be grateful for? Even if you don't have African fabrics, you could make some of these towels out of any fabric you'd like with the same intention. Of course, you could also make them just to be pretty! Let me know if you whip any of these up - I'd love to see them.

Katie

Adorable Fabric Alert


If you're a long-time reader, you know that I have a deep and abiding affection for alpacas. As I've mentioned before, I can't tell you where it came from since I've been around alpacas once in my life, and that was only after I'd decided that I loved them. But love them I do.


So when I saw this new design by Laurie Wisbrun, I was instantly smitten. Of course, her design is of llamas, not alpacas. I think alpacas are a little less known and less appreciated than llamas even though, in my humble opinion, alpacas are the cuter and friendlier of the two. I'm constantly having to explain to people that I adore alpacas, not llamas. Spitting gets you nowhere, guys.


From Aragon Alpacas
I prefer gentle and timid with soft, luxurious fleece to brave and heavy enough to crush me. Oooh, and tricks. My alpacas are definitely going to do tricks. 


But since I haven't seen an adorable alpaca fabric like this, llamas will have to do. You can bet I'll be grabbing some to make myself something special. And I hope no one will mind if I call them alpacas. 

Katie

Pillowcases: The Final Tally

Today is the day!

In just a few hours, I'll be heading to...Newark! And then I'll meet up with my mom, and we'll be off to...Brussels! And then, finally to Kigali, Rwanda!! It's one long trip - about 23 hours total. Hello cramped legs and cranky Katie.

Of course, all that will wash away as soon as I get there. I'll be so excited to see Hannah, and it'll be 8 pm in Rwanda when we arrive, so I'll get to go to bed pretty soon after.

Packing up all the pillowcases has made me positively giddy with excitement about sharing them with the kids in the pediatrics ward.

I took a photo of each pillowcase, and I put together a little digital patchwork "quilt" on Picasa. Look how beautiful they all are! 

Collage Final

I'll be arriving with 114 pillowcases. When Hannah and I first talked about the project, I was worried that I wouldn't be able to get the forty that she asked for. And now just a little over a month later, I'm bringing almost three times that many. (And for those who are wondering, my two pieces of luggage are currently weighing in at a combined total of 85 pounds. About 10 pounds of that is my clothing for the trip!)

I've said it several times over the last few days, but I'm going to say it again. I am so overwhelmed by how kind you have all been by giving your time, energy, and money to make all these pillowcases and send them to me. I thank you deeply.


Though I will be mostly without a computer in Rwanda, I have prepared some posts for while I'm away. Posting will be less frequent than usual, and I won't be able to respond to comments as readily as I normally can or post updates on Facebook or Twitter. But I hope you'll still stop in! If you're not a follower on google friend connect, through email, or through an rss feed, now might be the time to sign up so that you don't miss anything!

Katie

My Pillowcase for Rwanda

my pillowcase 2
I finally got my pillowcase completed - as in one day before I leave for Rwanda. It was touch and go there for a while. I have had so much to do both to get ready for the trip and to deal with all the stuff I put off during the bar study time that I haven't known which end was up!


But after one trip to Joann Fabric to buy a coordinating fabric and trim to go with the awesome elephant print I got from Hawthorne Threads and a second trip to buy more trim since I had been silly and not measured the first time, I finally made that sucker.
my pillowcase 3

I had originally planned to make two, but we obviously weren't lacking for fabulous pillowcases, and I was short on time, so I just made the one. 


my pillowcase 4 After reading through the manual and futzing around with some of the tension settings, I got quite comfortable with my new-to-me sewing machine. She works beautifully - nice, even stitches, good pressure on the feed dogs. I like her so much that I felt it was appropriate to name her. Henceforth, she will be called Liesl in honor of The Sound of Music, where Maria made play clothes from drapes. Exactly the type of creative thinking I like. Liesl and I are taking it as a challenge to make play clothes from a bath mat. I'll keep you posted.
my pillowcase

At any rate, here's the finished product. I still adore the elephant print, and I was tickled to find such a great coordinating fabric at Joann in the clearance section! And of course, pom-poms cannot be beat. I've loved them since I was a kid, and I still do. They're just so festive.
my pillowcase 5

I hope this pillowcase will bring a smile to a child's face, just as I know all of you hope for the pillowcases you made. 


And tomorrow I'll be setting off on that journey, so check back in for some final details on the pillowcase project!

Katie 

Pillowcases and Pillowcases and More Pillowcases

Forty-nine pillowcases
Yesterday I picked up the latest batch of pillowcases to bring to Rwanda this week - FORTY-NINE!


So, if you're keeping track, that brings our current total to 105. One hundred five pillowcases!


We'll have enough for all the beds and extras for when they do laundry. 
Forty-nine Pillowcases 2

In the mix were thirty-two pillowcases from my friend Beth's mom's quilting guild, from my blogger friend Kara, and - as in all the batches - from people I don't even know who just wanted to do something nice. 


And I learned from my sister that we'll be watching the cartoon Cars with the kids at the ward. I can't wait!


Let's just hope that I can fit all these pillowcases (and all the cake mixes and macaroni and cheese and snickers bars requested by the fellows) in my suitcase. 

Katie

The Motherload

Well thank goodness that's over!  I missed you guys!


It'll be a short one as I'm still trying to get my life in order. After moving and then spending three weeks saying "that can wait til we're finished," the now-that-we're-finished list is kind of long!


But one of the things on it was going to check on the ol' po box to see if any new pillowcases had arrived. And boy, had they.


DSC_0002

As you see, they had to give me a fancy container so I could get them all home!


And from these packages, I pulled FORTY-SEVEN pillowcases. Did you get that? Forty-seven!
DSC_0006 Which brings us to a whopping 56. And I know more are on the way.


They have arrived from family and friends, from fellow bloggers like Jess of Tiny Leaf Studios, and Caitlin, who corralled several of the other gals at Spoonflower to put together some absolutely adorable ones. And I've received many from folks who know nothing about me except that I'm taking these to Rwanda, and they wanted to help. 


That's all for today, but I'll keep you posted on the pillowcases and of course on the other domestic things I'm excited to get back to!


As always, thank you for reading.

Katie 

First batch of pillowcases!

I headed over to the post office this morning to see if any pillowcases had arrived. I was preparing myself on the drive over for an empty po box so that I wasn't disappointed, but lo and behold, there were SIX packages waiting for me.  PackagesPillowcases are coming in from all over the United States.  Today I brought home the work of crafters from Missouri, Tennessee, New Jersey, Ohio, California, and Kentucky.  And I know more will be rolling in over the next few weeks.


First Batch If you haven't yet contacted me about making pillowcases (via facebook, email, text, or in the comments section), we will have enough pillowcases this time. However, I have definitely taken note of how excited people have been to jump into this project, and I hope to bring you other similar projects in the future. For now, head over to  Craft Hope to see if there's a project there that could utilize your crafty skills. For those who have already contacted me, keep 'em coming!


My own pillowcase-making will likely have to wait until after the bar (Feb. 28), but I'll definitely give you guys a little show when I get mine completed.


Thank you again to all of you who have sent in pillowcases and to all who are working on them. Your work is so very appreciated!
First Batch 2
Katie  

Spotlight on the sewing table

sewing table tada

Let's talk a little about the lovely sewing machine table that arrived with the rest of our new furniture.

Many folks my age - my fiancee Navah included - have never seen a sewing table, so there's a little confusion about where exactly the sewing machine goes when it's not sitting up on top.  If my grandmother had not had a sewing table (or cabinet, as they're also called), I probably never would've seen one either.  But since, as a child, I watched her set it up and sew the tiniest little dresses for my Barbie dolls, I have been forever fascinated with them.  Even though I know exactly how they work, they still seem magical to me and like a sign of a craftier time - where sewing was such a normal part of your life that you needed a whole piece of furniture devoted to it.  Yes indeed.

So, for those who haven't seen one before, here's a play-by-play of mine:

When it's just hanging out like a desk, it looks like this...

sewing table

And on the top of the desk, there's a little wooden button (it's normally flush with the surface).  In the next photo, I'm pressing that button down, which will release the piece of wood covering the machine.

opening sewing table

When I lift the piece of wood, you see the machine there on its side, which is how it's always situated when not in use.  So the drawer across the front of the desk is just for show.

opening sewing table 1

You can see here that the machine is partially obscured by another piece of wood.

opening sewing table 2

That's on a  hinge so I can lift it up.  Later, when I get the machine all the way out, I'll put that little piece of wood back down, and the machine will rest on those two little peg-like things that you see at the bottom of the photo below.

opening sewing table 3

Pulling the machine out...

opening sewing table 4 opening sewing table 5

I put that little piece of wood back down, and now I'm lowering the machine onto the little pegs, which you can't see in this photo.

opening sewing table 6

And tada.

There it is, a pretty little machine ready for sewing.

sewing machine


At the used furniture store where I bought the machine, they also had a gorgeous vintage Singer table that looked a bit like this but perhaps older.  I passed on that one because the condition of the table itself wasn't as good and because I wasn't sure I could figure out how to use the machine, which didn't come with an instruction manual.

Which brings me to the next bit of fabulous.  The machine is in impeccable condition - all the way down to the accessories.  That's right, in the drawers of the desk, I found these:

A full instruction manual for the machine

instruction manual

A box filled with bobbins (the only indication I have that the machine was actually used) and a button-hole sizer

bobbins 1

As well as a meticulously-kept box of accessories.

sewing machine accessories

Let's dig into that a bit.

sears kenmore

It's a multi-layered box.  As you take off each section, you reveal a layer of neatly organized accessories for the machine.

accessories box accessories 1 accessories 2 accessories 3


Yep, it monograms!

So, though I think the sewing cabinet is delightful enough to buy just for the fun of it, there was actually a purpose for me.  My sewing machine has been giving me fits.  Fits, I tell you.  The zig zag stitch (and, in fact, any stitch other than a straight stitch) works only intermittently, generally for the guy at the sewing machine repair shop when I'm there trying to show him how it's not working.  And then not for me when I get home and try to sew something.  It's brilliant that way.  It was also giving me a lot of trouble in the tension department.

It's a Singer machine that I bought about 10 years ago at Walmart for $125.  I started doing research to prepare for buying a new machine.  I learned that, though Singer has a traditionally good name in the sewing machine world, more recent Singer machines, and particularly those that are made to sell on the cheap to folks like me, have a pretty bad reputation.  Having spent on repairs almost as much as the machine originally cost, I decided it didn't make sense to sink any more money into it.  I was going to buy a new machine that would last.  But those machines aren't cheap.  Though I wasn't planning to go with a top model, like a Bernina, that can cost thousands of dollars, I figured I'd be spending in the $500 range.  I was saving up.

And then I found this beautiful Kenmore for $90.  These older machines, like most types of older machines, were built to last.  Unlike the plastic machines now, they were made from metal.  The paperwork with the one I just bought says that the warranty on the sewing machine head was for 30 years.  I know several people who happily sew on their mother's machines, purchased in the 1950s.  So, while this one doesn't have some of the fancy electronic features that I may have opted for with a new machine, I am really excited about working on something that's not going to break on me every two seconds.  (And, if you're concerned, I tried it out in the store before I bought it.)

As for the specifics on her - she's a Sears Kenmore Model 158.18023.  A little online research revealed that this particular model was produced in 1970 and 1971.

And now....some sewing machine porn. Avert your eyes if you're not of age.

sewing machine 5 sewing machine 3 sewing machine 2

Sigh.

If I weren't bar studying right now (as in, after I finish writing this post), I'd be all over this baby.  But for now, she's just going to have to wait a bit.

Katie 

Pillowcases for Rwanda: An Update Plus a Dye Idea

I am so overwhelmed by and supremely grateful for the wonderful response my sister Hannah and I have gotten to our project to outfit the pediatrics ward in Rwinkwavu, Rwanda with lots of cheerful pillowcases.  Every time I get another email, I do a little cheer for the children in the ward.  Thank you for joining in and giving your time and energy and particularly for sharing the project with your friends and family.


I want to give a special thanks to Bonnie over at Wonderfully Awkward, who has been quite the cheerleader for us, sending me encouraging emails and tweets while she shared my project not only with her facebook and twitter followers but also with Craft Gossip, leading to the project getting its own post on that site.  So a special thank you also to Anne from Craft Gossip.  I've gotten a number of emails just since the post went up last night!


I can't wait until all those pillowcases start arriving!


And yesterday, I got a little package of fabric in the mail from Hawthorne Threads that is going to make one fabulous pillowcase!


Fabric


I saw the fabric (Marrakech in Artisian by Valori Wells) used in a project online, and I knew I had to have it.  Isn't it gorgeous?  I got a shipment notice basically seconds after I ordered it, and my package came the very next day.  I was quite impressed with the service at Hawthorne Threads.  I'll definitely be using them in the future, and they have a great selection if anyone is looking for fabric.  I still want to pick up some ribbon and accent fabrics for mine.


And for those of you who aren't big into sewing but are interested in dying some pillowcases, I came across this really cool tutorial the other day.  If you haven't made yours yet, this might be a fun idea.


The Art Girl Jackie has a project for dying t-shirts (or pillowcases!) with sharpies and rubbing alcohol, two things you might already have at home.  She completed the project with her daughter, and I'd say the results are pretty cheerful!


Source


Thank you again to all of those who are making pillowcases.  I can't wait to share them with the children at the pediatrics ward!

Katie
  

Pillowcases for Good

Hannah
Hannah with another PIH fellow in front of the hospital
As you may already know, my little sister is in Rwinkwavu, Rwanda right now on a fellowship with Partners in Health.  She deals primarily with management and dissemination of necessary pharmaceuticals and medical commodities to rural facilities, but she's also been doing some volunteering in the Rwinkwavu District Hospital Pediatric Ward.  The ward itself is kind of somber in terms of decorations, and Hannah thought it might be fun to spruce it up a bit for the kids.  I'm heading to Rwanda in March, so she asked me if I could sew and bring forty bright and cheerful pillowcases.  I told her that, because I was moving and now studying for the bar, I wasn't really in a position to sew forty pillowcases.  BUT, I told her, I can definitely sew a few, and I bet there are some crafty bloggers and friends out there who would love to join in and make some pillowcases for the children in the Rwinkwavu pediatrics ward.


Though I can't post pictures of the children in the ward, I thought I'd include some photos from Hannah's time in Rwinkwavu and some of the happy, healthy kids she's met there.  Hannah is nothing if not a lover of children.


Hannah and kids


Hannah with baby
Hannah with little boy
Hannah teaching
Hannah also volunteer tutors for a standardized test that's in English


So, on to the actual pillowcases.  Hannah's looking for bright and cheerful standard-size pillowcases, gender neutral as much as possible, and without any specific cartoon characters, cowboys and indians, or guns. I've included links to a bunch of tutorials showing how to sew your own pillowcases and to get those ideas flowing.


Tutorial from The Cottage Home

Tutorial from Wonderfully Awkward

Tutorial from You Go Girl 
Tutorial from Film in the Fridge

Tutorial from J Caroline Creative

Tutorial from Made

Tutorial from Sara vs Sarah


It's a really simple project, perfect for beginners!  


Also, my mom pointed out that it could also be fun to buy standard  pillowcases and decorate them with fabric paints or even applique fabrics onto them.  She may invite friends over to decorate the pillowcases together, which I think is a fabulous idea!


If you'd like to send pillowcases (even one would be appreciated!), then shoot me an email at ktmadeblog (at) gmail (dot) com so that I can get a sense of how many I'll be getting.  When your pillowcases are complete, just send them along to:


KTMADE
P.O. Box 5313
Burlington, VT 05402-5313


I will be leaving for Rwanda on March 8th, so please get your pillowcases to me by March 6th, when I'll make one last run to the post office.


Please pass this along to your friends and fellow bloggers, and feel free to post about it on your blog if you have one.  I'd love to show up in Rwinkwavu with enough pillowcases for every child in the pediatrics ward.


So excited to have this opportunity to share our crafting love!

Katie 

Sewing In a Straight Line

Don't you just love getting exciting things in the mail?  Even if you sent them to yourself?

An email that I send myself will usually contain a reminder to do something mildly unpleasant, like pay my Verizon bill.  But snail mail that I send myself - that's usually something to get really pumped up about, like this new book from Brett Bara, Sewing in a Straight Line.  I ordered it last week and waited anxiously for my copy to arrive, and hurray for a package at my door over the weekend!

The blog world had been all a-twitter over it, and I was so excited to rip that cardboard open and peruse my little mail gift.  Boy, was I pleased.


Book cover
You know how sometimes you pick up a sewing or other crafty book at the bookstore, and the cover is gorgeous and you start calculating how you're going to afford it and whether you need to put some other book back?  And then you start flipping through it and...meh...only three or four of the projects look any good.  And the instructions seem confusing.  And it's just not worth $30.

Well, people, get to the bookstore.  Because that is not at ALL what's happening here.  At less than $20 a pop, this book is filled with fabulous project after fabulous project.  Brett's instructions are clear, with lots of pictures and diagrams.  And she made all these things in her Manhattan apartment sans craft room!  So no matter how much space you have, you can whip up these awesome projects.  I know one blogger who just got a new sewing machine, and she should be running to the bookstore right now!

Just look at all the fabulousness.

One-hour skirt 15-min sham Jewelry Keeper Baby Quilt Ottoman cover

I'm thinking about hosting a sew-a-long for one (or more) of the projects from the book when I get back from vacation (yippee!), so I'd love to hear if you'd be interested in something like that.

And no, Brett Bara did not pay me to say any of the nice things I said about this book.  Are you kidding?  She has no idea who I am!

Katie 

KTMade Christmas: Part III


It continues!


My dad is a nature man and an avid birder.  Not only does he love bird watching, he's incredibly good at it.  He can spot a bird - by sight or sound - in the midst of a dense forest as if all the birds were just sitting around on bare limbs at eye level just waiting to be found.  He also catalogs the birds that he sees in notebooks and with gorgeous pictures.  Each year I look forward to the calendar that he and his wife Miki put together, filled with his best bird photos from the year.


When I saw this project in Martha Stewart's Encyclopedia of Sewing and Fabric Crafts, I knew that I had to make it for my dad and Miki.  From the beginning, I knew that I wouldn't be able to make the queen-sized quilt in the book.  Because it required making 30 needlepoint birds, I thought that it would take me more than a year.  So I planned to make a full-sized quilt.


And then I planned to make a throw with 20 birds.  Then 18 birds.  Then 12.  Then 9. Finally, 6.  I hope my dad and Miki don't feel jipped, but I just completely underestimated the amount of time that it would take to needlepoint each of those birds (and the intensity of the callous that would form on my finger - I now know why people use thimbles!).


I dream of one day redoing the whole business and making the full queen-sized quilt. Maybe for Christmas in 10-20 years.


Even though they didn't get the big quilt that I originally hoped to give them, I think the finished product is beautiful and comfy.  It's backed with a soft flannel, and Miki was cozying up underneath it within an hour!


I must also note that today is a particularly important day for this post because my dad had back surgery this morning.  He's doing well, but there's still the recovery process to work through.  I'm sure he'd appreciate any good thoughts being sent his way.


Katie