
Children's Tote Bag Tutorial
/
About a week after I returned from Rwanda, I found out about two young girls who had just started learning about African geography in school and wanted to hear about my trip to Rwanda. I was super excited to oblige. I put together some slide shows of my trip, and I made each of them a little tote bag with some of my African kitenge fabric. While one hour of information was just about all they could sit still for, I think they enjoyed it. And I definitely did!
Here's a little tutorial of the children't tote bag for you:
Materials
fabric for the outside of the bag, 2 pieces cut 18 inches by 20 inches
fabric for the lining of the bag, 2 pieces cut 18 inches by 20 inches
fabric for the bag's handle, 1 piece cut 3 inches by 20 inches
tailor's chalk or other marking pen
coordinating thread
sewing machine
First things first, make sure you've pre-washed and ironed your fabric.

Pin the two pieces of outside fabric, right sides together, all the way around three sides - the two short sides and one long side.

Then begin sewing a straight stitch around those three sides with a 1/2 inch seam allowance. Make sure to backstitch at the beginning. When you get to the corner, keep your needle down, lift up the foot, and turn the fabric. Put the foot down again and keep going.


Backstitch again at the end.
To soften the corners, you'll want to stitch at an angle across the two bottom corners.
I use my ruler to make a notch 1 inch inside the corner and then draw a line across with my tailor's chalk.
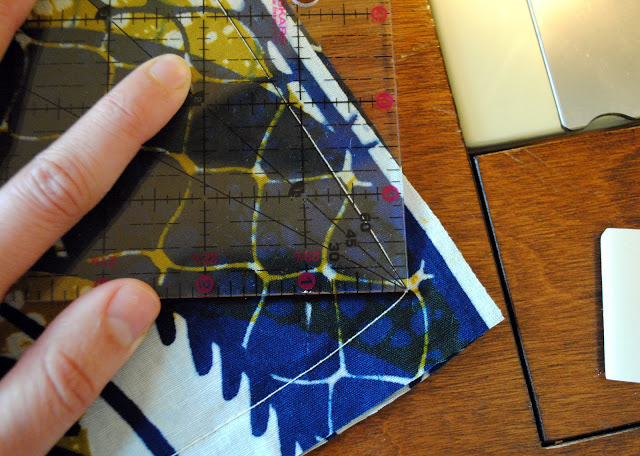

Stitch straight across the line you drew on both sides.

Now you'll follow all the same steps with the inside lining fabric - sewing around three sides with right sides together and then softening the corners.
Once you've gotten the inside and the outside sewn, it's time to head to the ironing board.
First, iron a 1/2 inch fold around the top (unstitched) side of both the outside of the bag and the inside lining. Iron the fold in the direction of the wrong side of the fabric for both pieces.


Then fold the handle in half lengthwise, right sides together, and iron that flat.

Back at the sewing machine, stitch along the long edge of the now-folded handle with a 1/4 inch seam allowance.

To turn the handle right-side out, attach a safety pin to the seam allowance on one side and then feed the safety pin through the opening, working it slowly through the little tube of fabric until you can pull it out the other side, bringing the fabric's right side with it. Iron the handle again with the right sides out.


Now you're ready to put everything together.
Turn the outside of the bag right side out but leave the inside lining wrong side out. Put the inside lining into the outside lining and line up the top folded edges of the inside and outside of the bag using the seams on the sides.

Place one short end of the handle in between the outside of the bag and the lining on the seam line on one side. Pin in place. Do the same on the other side.


Then pin all the way around the top of the bag.

And now you're ready to do the final topstitching all the way around the top of the bag, making sure the stitches meet up back where you started.
Clip any long threads, and you're done!


Katie


