Painted Clementine Box


It took me forever to give clementines a chance. I've always hated tangerines (still do), and clementines looked way too much like tangerines for my comfort. But one day at work many jobs ago, a coworker offered me a clementine when I said I was hungry and had forgotten to bring an afternoon snack. I didn't want to be rude, so I took it. Of course, it was amazing. 

Now when clementines are in season, I eat at least two of them every day. Maybe four. It depends on how snacky I am and how sweet the particular batch I got is. Some days I feel like they're the only positive element of winter - that and getting to wear chunky sweaters.

Every now and then I buy them in one of those orange netted bags, but usually they're in a wooden box. By the end of the winter, I've thrown away perhaps a dozen of them. They're not recyclable (at least not here), and I feel terrible about it. So I've started to put them to use as storage containers. 

I had a perfect spot for one at the bottom of the new multi-shelf floor lamp in my studio, but it needed to look pretty. So I did a quick paint job, and now it's holding all of my stamping supplies (of which I have a surprising amount) and looking good doing it. 

You may have noticed a theme with my craft projects. For the most part, easy is the name of the game for me. It's not that I don't love more involved projects. It's just that I have a hard time finishing them - they're all in partially completed form in rubbermaid containers in the closet. Whoops.

No need to put this one away for later. You can finish it in an hour, tops. And most of that time is waiting for the paint to dry. 

Materials
Clementine box
2 bottles of craft paint in coordinating colors
paint brush
painters tape 


1. Tape diagonally from corner to corner across each side of the clementine box to mark off the bottom section of the box. 


2. Paint the taped off bottom section with your first paint color. I chose a metallic gold. 


3. Once that has dried, remove the tape and then tape again across the straight line of that gold paint from corner to corner to mark off the top section of the box. 
4. Painted the taped off top section with your second paint color. I chose a soft purple. 
5. Once that has dried, remove the tape and voila! 


Note: You could paint the box all over, then tape off the bottom section and paint that in the coordinating color to save yourself the effort of taping twice. But since the taping doesn't take much time and cuts down on the amount of paint I use, I went that route. 


It fits perfectly on that last shelf of my new lamp and corrals all my stamps and ink pads, which had previously been floating around in a giant bin that had a random assortment of crafty things. Organization win!

p.s. That crocheted bag. The sewing machine. The needlepoint save the date. 

Like what you just read? Share it with a friend! You can also follow ktmade on Twitter, Facebook, or Instagram so you'll never miss a post. And you'll earn my undying affection!

Wooden Over-the-Door Sign Tutorial


I'm love love loving my THIS IS THE DAY wooden sign. I feel like it's cheering me on as I get ready for work in the morning. 

It was super easy to make, and I'm guessing there's a door in your house that could use a little up top decorating. So here's a quick and dirty tutorial to make your own over-the-door painted wooden sign. (I was inspired by this gorgeous table project from Domestic Imperfection.)


Materials
1 x 4 wood cut to width of doorway (mine was cedar cut to 2 ft)
White craft paint 
Paint brush 
Wood stain in color of your choice
Foam brush 
Paper towel
Printer 
Tape
Paper cutter or scissors 
Power sander or sandpaper 
Carbon tracing paper
Large sawtooth hanger

1. Lightly sand your wood board, either with sandpaper or a power sander. This doesn't need to be perfect. Just remove the rough edges.

2. On your computer, type out the words you want on your sign and choose a font. Increase the size so that the letters are slightly less than 4 inches tall and will fit lengthwise across your board. Because I was trying to save paper and not do a bunch of trial and error printing, I set my page view to 100% and put a ruler right up to the computer screen. 

3. Print out your words and cut off excess paper. Getting your cuts nice and straight at this stage will make things easier in the next step. I used a paper cutter. 

4. Tape the words together, leaving appropriate space in between words and then tape the whole phrase down to your board just on the two short sides. Because my paper edges were straight and even, I was able to line them against the edge of the board to make sure the phrase would be straight. Center the phrase by measuring the distance from the short edges. 

5. Slide your transfer paper underneath the printed paper taped to your board so that there is a layer of transfer paper between every letter and the wood board. (And please take note of my awesome vintage carbon tracing paper, a gift from my stepmom.)


6. With a pen or pencil, carefully trace around the edges of all the letters. When you're finished, remove the papers and transfer paper, and you should have transferred an outline of the phrase onto your board.


7. With your white paint and paint brush, fill in the outlines of all your letters. You may need multiple coats. Allow the paint to dry as long as necessary, according to the instructions on the bottle. 

8. Once the paint is dry, cover your work surface and brush your stain onto the board with the foam brush. Allowing coats to dry slightly in between applications, brush on stain as many times as necessary to achieve your desired color. 


9. Once the stain has dried, find the middle of the board and attach the sawtooth hanger. 


10. Hang in a perfect spot over your door. 


p.s. I love this almost as much as my needlepoint save the date, and this sign was way less time-consuming.

Easiest Burlap Floor Pillow


During a trip to Costa Rica about five years ago, my wife and I visited a coffee farm, which was fascinating and delicious. While there, I bought a burlap coffee bag so that I could make a burlap floor pillow.

In my house growing up, we had two enormous floor pillows. I think my grandmother made them, or at least helped my mother make them, out of carpet remnants or something similarly thick and stiff. They were definitely the heaviest floor pillows anyone has ever owned. But I have the fondest memories of them - lounging on them, using them as the base for blanket forts, snuggling against them while I watched a movie. I've always been a floor person.

So I've carried this burlap coffee bag with me from apartment to apartment to house so that I could have my own floor pillow. Of course, I am a person who still hasn't finished the quilt I started 10 years ago, so I basically just forgot about the coffee bag while it languished in my fabric stash. In the meantime, we had acquired a large pillow because of a torn sofa cushion and a mix up with Ikea. We've carried it from apartment to apartment to house. I even picked out some fabric samples to cover it almost 3 years ago.

When I was cleaning out my studio a few weeks ago, I organized my fabric stash and Hey! There's that burlap coffee bag! 
So I pulled it out and tugged it onto the pillow, absolutely delighted that it fit perfectly, meaning that creating my burlap floor pillow was going to be the easiest project ever.


Steps:

1. Iron the burlap bag. Relying on a little advice from the internet, I ironed the burlap by pouring water directly onto the bag, rubbing it in, and then ironing that area. The steamer on my iron is broken, but I'm not sure that would have gotten it wet enough anyway. [I don't have a picture of this step, but you can see the wet spots on the burlap in that first picture.]

2. Shove the pillow into the burlap bag.

3. Fold the bottom (or actually, the top) of the bag around the pillow and pin in place. This took a little bit of maneuvering to get it all situated the way I wanted.

4. Using needle and thread, stitch the opening closed where you pinned it.

That's it! All together, it took me less than an hour. It's not the most refined edge, but this is a burlap floor pillow we're talking about. I'm not sure refined is the way to go.

I love that the pillow now goes with our room - it looks like it belongs there instead of just being a random off-white pillow we threw on the floor.


Jammer's not convinced, but he's a skeptical guy.


p.s. This reminded me of collecting hundreds of pillowcases for the pediatrics ward in Rwinkwavu, Rwanda. What an amazing experience that was. 

Quick and Easy Stamped Thank You Cards


Of course there are a lot of lovely thank you cards out there, but I was so deep in the crafty spirit before the wedding that I was excited to make my own.  

I knew I didn't have much time, so they couldn't be little thank you card masterpieces.  I needed a way to make something I thought was pretty and unique but could be made in quick succession. 

Thus, the choice for stamping the cards.


I bought a stamp and the acrylic block to mount it on at Michaels, along with cream colored cards and envelopes, and stone gray StazOn ink.  I went with gray instead of black because I wanted something a little softer and more elegant.  

The stamping itself was simply a matter of...well...stamping. 

I made most of them with one simple "thank you" in the bottom right of the card, but I really liked a few that I made with "thank you" all over the front.  


With scrap paper underneath, I let the "thank you" overlap off the card and spaced them kind of randomly.  

So far no one's actually received my stamped thank you cards yet since I've been terrible about actually getting the addresses on the envelopes, but I hope folks will like them when I finally put stamps on and get them out the door!


Katie

How to Make a World Map Seating Chart


When I saw this image on Pinterest, I knew that I had found our seating chart.  But the picture didn't lead anywhere, so I had to figure out how to make it. 

It turned out to be quite simple, if a bit tedious.  It also turned out to be my favorite project of the wedding.

So if you're thinking of making one yourself, I say go for it!  But give yourself several hours.

World Map Seating Chart Tutorial

Materials:

World map 
One piece of foam core cut to the size of the world map
One can Aleene's Tacky Spray
One box of quilting pins
Bakers twine
Card stock
Pen

My local Michaels cut the foam core to size for me.  

I used Aleene's Tacky Spray to affix the map to the foam core, following the instructions on the back of the can.  Then I laid it flat with something heavy on top and let it dry for 24 hours. 


I liked the look of simple kraft paper for the names of the guests and the countries, so I cut little rectangles from some tan card stock that I had on hand.  I used a basic black gel pen to write all of the names in cursive while we watched an episode (maybe 2?) of Mad Men on Netflix.  


I had made our original seating chart - just for figuring things out and being able to move names around - on a piece of poster board with sticky notes.  So I used that as reference originally so that I knew how many tables we were going to have and how many people would be sitting at each.  


That way I could arrange things on the world map and figure out where they would all fit and choose countries accordingly.  I would have liked to choose countries based on our travels or special places, but I ended up making the decision based, for the most part, on where the names of the guests would fit.  

Once I had that figured out, I laid all the guest names and country names in the correct positions on the world map and pinned every piece of card stock down the map.  Make sure you have something protective underneath if you're working on a nice surface.


Once everything was pinned down, I pulled out one of the country pins and tied the end of my spool of bakers twine to that pin and then poked it back into the country name on the world map.  


Then I simply wound the spool of twine back and forth through all of the pins for the guest names. 


And finally I cut the twine and tied a final knot on the original country pin.


Then I snipped the ends of the twine, and I moved on to the next country.  

And there you have it - just like that, and it was finished.


One word of caution.  Our wedding was during a pretty rainy weekend.  The map got a little ripply, I suspect from the humidity.  I still thought it was fabulous, but it's something to be aware of when you're choosing what adhesive to use.


My friend Katie - one of the many helping angels who lent their hands in the weeks and months before the wedding - made matching country signs for each of the tables. 


I was so pleased by how all the seating arrangement crafts worked out.  Of course the love and joy in the room were the important things, but I sure liked looking at that map! 

Let me know if you make one -  I'd love to see how it turns out!


Katie 

Needlepoint Save the Date: Exploit Your Dog


About a year ago, I saw this bandana, made by my friend Caitlin, featured on Brides.com. I knew I wanted to make something like it, but I'm not so great with cross-stitching. And I love the look of appliqued fabric with stitching around it. 


Also, I didn't want to wait to see it around cute little Jammer's neck until our wedding day. 


The solution? Make a needlepoint version for the save the date. 


So I started. 


Using regular ol' Microsoft Word, I picked a font that I liked and printed out our initials and the date the size that I wanted for the bandana. 


I pulled out a bunch of scrap fabric and chose some prints that I thought went together for the letters. 


Using tracing paper and a pen, I traced the outline of the letters onto my chosen fabrics. 


After cutting them out, I cut out some light-weight fusible interfacing in the same letter shapes and ironed it onto the fabric according to the instructions. 


I placed the letters onto my fabric, using a straight edge to arrange them, and then ironed them onto the plain fabric I was using for the bandana. 


From there, it was time to put the fabric in an embroider hoop, pick a coordinating-color embroidery thread, and begin doing a blanket stitch all the way around each letter. 


I included some pictures of the blanket stitch process, but if you need a great tutorial, I'd check here


Once I had completed blanket stitching all the way around all the letters, I was ready to move on to the date. 


I measured the letters on my fabric and the numbers on my original print-out to find the exact center of each. 


Once I'd lined it up, I traced the numbers onto my fabric.


And then used a basic back stitch for them and sewed a couple buttons in between the numbers. 


The final step was to cut out the fabric into the bandana shape. I used another of Jammer's bandanas as a template. 


And there it was. 


Originally I planned to take a picture just of Jammer with the little needlepoint bandana around his neck, but those pictures just weren't doing it for me. 


He looked so somber that I felt like we were inviting people to our funeral instead of a wedding. 


We decided that we had to get us in the picture somehow. 


This was our first try, but in order to get our hands in the picture the way we wanted, the letters on the bandana were too small. 


But luckily we landed on our final version, with Jammer looking like a stern butler but us looking joyful in the background: 


Katie

Children's Tote Bag Tutorial


About a week after I returned from Rwanda, I found out about two young girls who had just started learning about African geography in school and wanted to hear about my trip to Rwanda. I was super excited to oblige. I put together some slide shows of my trip, and I made each of them a little tote bag with some of my African kitenge fabric. While one hour of information was just about all they could sit still for, I think they enjoyed it. And I definitely did!


Here's a little tutorial of the children't tote bag for you:


Materials
fabric for the outside of the bag, 2 pieces cut 18 inches by 20 inches
fabric for the lining of the bag, 2 pieces cut 18 inches by 20 inches
fabric for the bag's handle, 1 piece cut 3 inches by 20 inches
tailor's chalk or other marking pen
coordinating thread
sewing machine


First things first, make sure you've pre-washed and ironed your fabric.


Pin the two pieces of outside fabric, right sides together, all the way around three sides - the two short sides and one long side.


Then begin sewing a straight stitch around those three sides with a 1/2 inch seam allowance. Make sure to backstitch at the beginning. When you get to the corner, keep your needle down, lift up the foot, and turn the fabric. Put the foot down again and keep going.


Backstitch again at the end.


To soften the corners, you'll want to stitch at an angle across the two bottom corners.


I use my ruler to make a notch 1 inch inside the corner and then draw a line across with my tailor's chalk.


Stitch straight across the line you drew on both sides. 


Now you'll follow all the same steps with the inside lining fabric - sewing around three sides with right sides together and then softening the corners.


Once you've gotten the inside and the outside sewn, it's time to head to the ironing board. 


First, iron a 1/2 inch fold around the top (unstitched) side of both the outside of the bag and the inside lining. Iron the fold in the direction of the wrong side of the fabric for both pieces. 


Then fold the handle in half lengthwise, right sides together, and iron that flat. 


Back at the sewing machine, stitch along the long edge of the now-folded handle with a 1/4 inch seam allowance.


To turn the handle right-side out, attach a safety pin to the seam allowance on one side and then feed the safety pin through the opening, working it slowly through the little tube of fabric until you can pull it out the other side, bringing the fabric's right side with it. Iron the handle again with the right sides out.


Now you're ready to put everything together. 


Turn the outside of the bag right side out but leave the inside lining wrong side out. Put the inside lining into the outside lining and line up the top folded edges of the inside and outside of the bag using the seams on the sides. 


Place one short end of the handle in between the outside of the bag and the lining on the seam line on one side. Pin in place. Do the same on the other side.


Then pin all the way around the top of the bag.


And now you're ready to do the final topstitching all the way around the top of the bag, making sure the stitches meet up back where you started. 


Clip any long threads, and you're done!


Katie

Cardigan Makeover

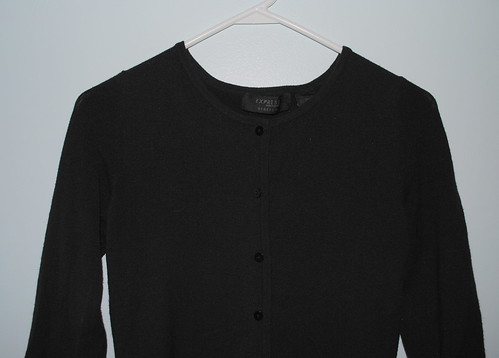
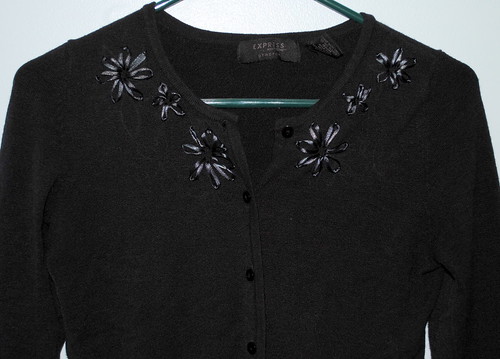
Ever have an article of clothing in your closet that's perfectly functional but a little bland?  I have a black cardigan that I've owned since I was four.  Okay, maybe not quite that long, but it's been with me for at least ten years.  I'm sure that for some of you, once a sweater hits its golden years, it's time to send it out the door and do some shopping.  But I'm trying to cut back on my spending these days.  And it's still my utilitarian dream sweater: black, so it goes with everything; 3/4-length sleeves that don't make me too hot; slightly stretchy; not at all itchy; and it still has all its buttons.  Also, would Laura Ingalls throw a good sweater out just because it was boring?  Just sayin'.


Sweater Before
You can't tell from this photo, but it's really faded.


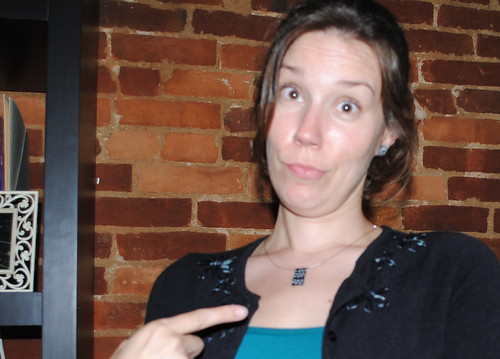
So here's how I took my plain ol' faded cardigan and remade it into this snazzy number:


This sweater is the bomb diggity
You can't argue.  It's snazzy.


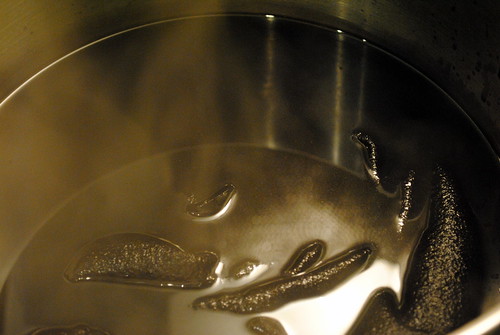
First, I went all double, double, toil and trouble on it and dyed the cardigan with basic Rit dye. 

Dying


It went from sort of black to jet black.  Perfect. There may or may not have been a brief terrifying moment when I thought I had dyed little black dots in the bathtub from the sweater dripping dry.  Thank goodness for bleach.

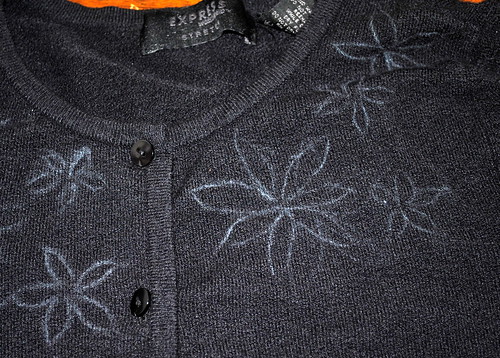
Anyway, after the sweater was dry, I sketched out a quick design of flowers.  I actually didn't end up keeping to this design much, but it gave me confidence for the actual embroidery part.

Tailor's Chalk


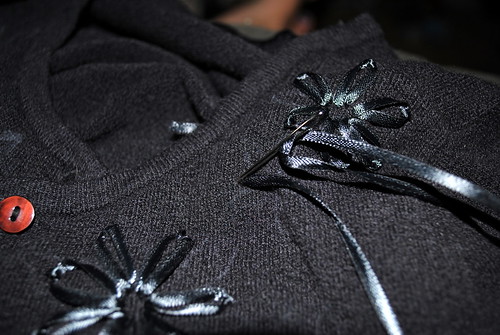
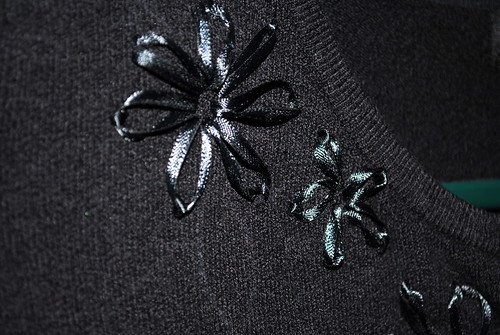
I knew I wanted embroidered flowers, but I thought traditional embroidery floss might not show up well and also might give the sweater more of a country-sweet look than I was going for.  So I opted for a simple thin satin ribbon, purchased from Michaels for $1.99, along with a yarn needle.

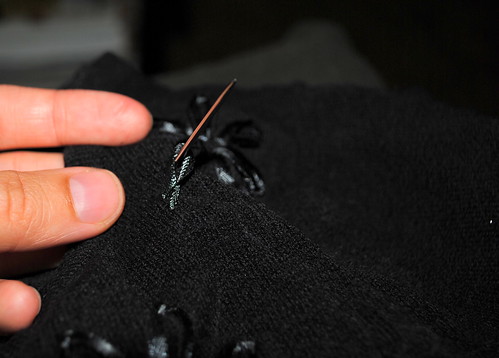
I used a lazy daisy stitch for the flowers.  You can find basic tutorials for the lazy daisy stitch here and here.  But essentially, you bring your needle up through the fabric at point A.

You pull the thread (or ribbon) almost all the way through, leaving a tail or knot on the wrong side of the garment, and then thread the needle back through point A.  Don't go all the way, though.

Lazy Daisy 1


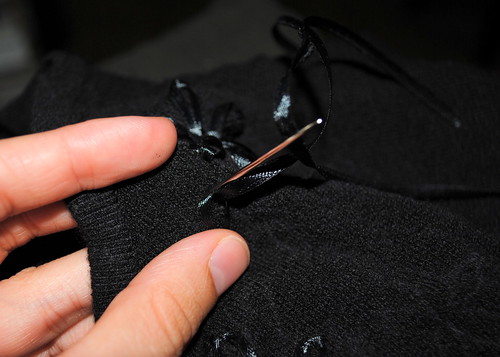
Leaving a loop of thread on the right side of the fabric, bring your needle up on the inside of the loop (B)
Lazy Daisy 2


And then down right on the outside of the loop (C).  It's a little difficult to see with black on black, so I recommend visiting one of those tutorials I mentioned above.

Lazy Daisy 3


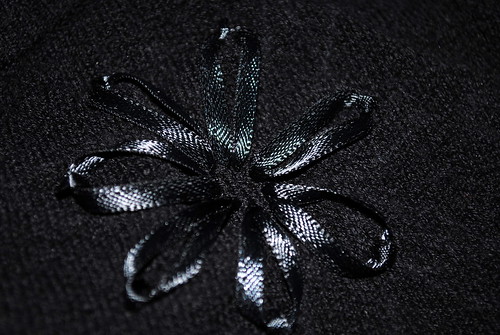
When you're finished, you have a lovely little flower like this.

Flower 2
Flowers
Sweater After


And then several flowers (and one episode of Little House on the Prairie) later, you've turned a drab sweater into a unique and stylish cardigan.

I wonder what I'll make next


Hmm....what am I going to embroider next?

Any items in your closet that need a pick-me-up?

Katie


Linked up today at


http://www.thethriftyhome.com

Delayed Gratification...and a credit card sleeve tutorial


When I was a kid, I lived for a gift shops.  My first investigation upon entering any new vacation spot, amusement park, or hotel was to find out whether they had a gift shop.  And then I would beg my mother to take me there.  We usually had rules: (1) I could get one thing, (2) It had to be under a set price limit, usually somewhere between $3 and $5.  It was always too low for my tastes, but I didn't let that stop me.  I never, NEVER, NE-EH-EH-EH-VER walked out of a gift shop without something in my hand.  In Maine, a two-dollar pen with an ocean scene inside with fish that "swam" when I tilted it up or down.  A pencil from Fernbank Museum in Atlanta with little multi-colored pebbles inside a plastic casing.  Erasers in the shape of Walt Disney characters.  In Florida, a tiny painting of a giraffe (because there are so many of them there).

In short, I have always been a consumer.  From the beginning.  But I've never had much expendable income.  Once I was older and had my own dough to spend, there was a joke in my family - I never bought anything that cost more than $7.  I may buy more crap than anyone else, but, "not a thing cost more than $7," I would exclaim proudly as I showed off my wares.  I was completely incapable of walking away from a "deal."  I had more cheap t-shirts, novelty socks, and hair bobbles than any one girl could need, none of them costing more than seven buckaroos.

Compare that with my sister - younger and wiser - who hoarded her money as if she had lived through the Depression.  When she did bring herself to buy something, it was only after months (or more) of research, price comparison, and a determination that she was making a good "investment."  It took her two years to settle on a pair of black boots, but I suspect she'll wear them for the next ten years.

I envied her discipline, but I've only recently been able to apply her wisdom to my own spending patterns.  And it definitely doesn't come naturally.  Not even close.  It takes a lot of work.  I'm learning to trade instant-gratification purchases that often lead to buyer's remorse for the deeper pleasure that comes from spending money on something that promotes the type of life I want.  Putting my money where my heart is.  It is 100% a work in progress, but I'm getting better at remembering that for me, every purchase is a choice.  Do I want to spend my money this way or that way?  I'm more likely to resist a frivolous impulse buy if I have a clear picture in my head of what the other option is.  To help me out, I created these credit card sleeves, and so far, the visual reminder is really making a difference in my ability to put my credit card back in my purse and walk out of the store, or more often, close the internet shopping website.  It's not that I never plop down the debit card - I'm still me, after all - but I'm more aware of the choice I'm making when I do.  And I try not to forget how lucky I am that I have the choice to make, that I'm not deciding between paying for food and paying for rent.


Even so, sometimes it's hard to connect how buying a $10 pair of earrings could affect the down payment on a farmhouse (and the associated acres of gorgeous farm land) of my dreams.  But those little purchases add up.  And more importantly, that mindset of unconscious spending leads to my empty bank account, no money in savings, and a house and closet filled with things that perhaps pleased me for a moment but don't provide any lasting happiness.  $215 could buy me 20 pair of earrings, 5 new blouses, 50 lattes.  Or it could buy me one space in a writing workshop.  The choice is mine.


I created a very simple pattern you can use to make your own credit card sleeves if you might need a little reminder yourself.  Just cut out pictures of the things you're saving up for - maybe it's a nursery for your new baby, maybe it's a vacation home, a wedding, another degree, or maybe it's just the perfect pair of boots.  Cut them out in the shape of the sleeve (or glue them onto a piece of paper if they're not big enough or the right shape to be cut out).  Glue and then tape for reinforcement, and you're good to go!

Katie 

Doggie Bag Dispenser (With Tutorial)


Picking up poop is not my favorite part of being a dog owner.  But stepping in poop is worse, so there's no question that we city-dwellers must properly dispose of our puppies' little treasures.  When we first got Jammer, our plan was to use old plastic bags.  We had plenty of them, but I soon discovered a fatal flaw in the plan.  I was terrible - like ridiculously, embarrassingly, sadly terrible - at remembering to bring them with us on our walks.  Twenty minutes into the walk, I would inevitably remember that I didn't have a bag.  On the good days, there was a friendly fellow dog-walker out with an extra bag to loan me.  I hoped it wasn't the same person who had loaned me a bag the day before.  On the bad days, I scooped up poop with a random piece of newspaper lying on the ground or the ziploc bag that was storing doggie treats in my pocket.  It wasn't pretty.

Eventually we gave in and bought one of the little bag dispensers that everyone seemed to have.  They're extremely convenient - they just clip right on to the leash, so you always have a bag handy.  But you have to buy the refill bags, and we have tons of bags just sitting in our pantry waiting to pick up poop.  Even though our local grocery store no longer uses plastic bags for the groceries, we still have vegetable bags and the bags from loaves of bread and little bags from the farmers market.  It just seemed like such a waste.

So I decided to take matters into my own hands and make a little doggie bag dispenser that we could attach to our leash and stuff with old plastic bags.  I modeled it after those fabric plastic bag holders that have elastic on either end - we had one hanging up in the laundry room when I was a kid.  The one I made is now holding five bags, and I'm totally delighted with it!  

Here's the tutorial:


Doggie Bag Dispenser


Materials:
1. One piece of fabric cut 5 inches x 7 inches.  I used pieces of an old plaid shirt that I had leftover from another project.  
2.  1/4-inch elastic cut into three pieces - 4 inches, 2 1/2 inches, and 3 inches.
3.  Thread
4.  Safety pin
5.  Sewing machine (although I guess you could also do this by hand)


Step one:  With the wrong side of the fabric facing you, fold one side of the long end (the 7 inch side) of the fabric toward you about 5/8 inches and pin.  If you want to be really neat about it, you could iron it down, but I was feeling more speedy than neat.  If you're not super comfortable with the sewing machine or feel concerned about sewing a straight line very close to the edge of the fabric, then give yourself a bit more room to work with by folding the fabric over 1/2 inches.


Step two:  Sew along the raw edge of the fabric that you just folded down, backstitching at each end.  I stitched it twice because I wanted to make sure the seams would be extra sturdy for all the wear and tear that they'll get.  Make sure that you sew far enough away from the fold to allow the elastic to fit through the channel.


Step three:  Repeat steps one and two on the other long end of the fabric.

Step four:  Attach a safety pin to one end of the 4" piece of elastic and thread it through one of the channels that you have created until the other end of the elastic (that doesn't have a safety pin) is flush with the edge of the fabric.  


Step five:  Stitch the elastic to the fabric, being sure to backstitch.  


Continue threading the elastic through the channel.  Once you pull the elastic all the way through, stitch that side to the fabric as well.  You should have a little gathered channel on one end of the fabric.


Step six:  Repeat steps four and five with the 2 1/2" piece of elastic.  You might have to struggle with your sewing machine a bit to get it to sew over the gathers once you've pulled the elastic all the way through.  I sewed over it a couple of times just to make sure it was secure.  Now you should have two gathered channels, one being more gathered than the other.

Step seven:  Fold the 3" piece of elastic in half and pin it to the right side of the fabric in the middle of the two gathered sides.  This will eventually be the loop that you can hang the bag dispenser from.  


Step eight: With right sides together, sew a 5/8" seam to close up the bag dispenser.  Be sure to backstitch, and I stitched twice to make it extra sturdy. Turn right side out.  And there you have it! 


I had a little carabiner lying around, and I hooked it to the loop and attached it to my leash.  


Even Jammer thinks it's pretty awesome (that's his I-think-this-is-awesome face).  


Katie