Project Pie: Whole Wheat Maple Apple Pie


Project Pie: I'll be baking 24 pies before Pi Day 2016 to get over my fear of baking pies. And to eat delicious things. You can join me by posting about your pies in the comments or tagging your twitter, instagram, or facebook posts with #projectpie. Make something gooey and delicious!

After I announced my pie-baking intentions last week, I got a super nice email from Elizabeth sharing a pie crust recipe that she promised was "crazy easy." It was so kind of her to send the email ("I figure if you find a recipe that works, share the hell out of it, because sometimes finding good yummy recipes is not always easy."), and it pushed me from thinking about baking another pie to actually baking another pie this weekend. 

And she was right. Crazy easy pie crust - even with whole wheat. 

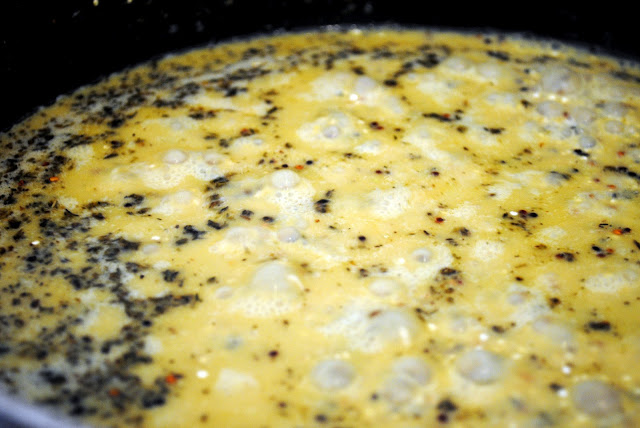
I went with an apple pie for #2. And here's the thing about apples: I am super picky about apples for eating straight. An apple must be crisp, juicy, and sweet. Not tough or grainy or mealy or tasteless or soft or bitter. I simply won't eat it. And this time of year can be a little rough on that front. My favorites are Honey Crisp and Pink Lady, but those are difficult to come by. What I see a lot of are big bags of apples that I don't really love to eat - Macintosh, Macoun, Empire. Generally not good for eating (in my opinion), especially when they've been stored since the Fall, but they are excellent for cooking. 

Those bagged apples were just begging me to make an apple pie. 

And thank goodness because apple pie is freaking delicious. I forgot a little bit until my taste buds reminded me. 

Of course everything we make in this house is a little bit wacky, so our apple pie has a 100% whole wheat pie crust (delicious) and is sweetened with maple syrup and coconut palm sugar (also delicious) and no refined sugars. But I would happily feed it to guests with no food restrictions. It's that's good. 

Navah proclaimed it the best thing I've ever baked. 


Maple Apple Pie (whole wheat, without refined sugar)

100% Whole Wheat Crust


2.5 cups flour (I used white whole wheat)
2 sticks (or 1 cup) butter or margarine (I used earth balance)
2 ounces cold water
2 ounces vodka

1. Preheat the oven to 375 degrees. 
2. Cut your butter into chunks (best if they're not all uniform in size) and put in the freezer for at least 10 minutes.
3. Add the flour and butter to your food processor and pulse 8-10 times, or until the mixture looks a little crumbly. Stop before it starts to look like cornmeal. You want some different sized buttery chunks. 
4. Pour in the water and vodka and pulse again 8-10 times until the dough starts to come together. Stop before it forms a big ball. 
5. Take the dough out of the food processor. It should all stick together at this point. Separate the dough into two equal chunks. Using a rolling pin, roll out 1 chunk of dough on a lightly floured surface until it is about an inch wider than your pie plate all the way around. 
6. Pick the crust up by rolling it onto your rolling pin and place it into your pie plate. Cut off any excess around the edges and put the crust into the refrigerator to chill while you make the apple filling. 
7. Wrap the other chunk of dough in saran wrap and put into the refrigerator. 

Maple Apple Filling

5-6 apples (I used Macintosh)
1 tablespoon butter or margarine (again, I used earth balance)
2 tablespoons whole wheat flour (I used white whole wheat)
2 tablespoons maple syrup
1 1/2 teaspoons pumpkin pie spice
1/4 teaspoon sea salt
1 tablespoon lemon juice

1. Peel and cut up the apples - I used a simple corer/slicer and then cut each slice two more times lengthwise. 
2. Put the apples into a microwave-safe bowl and microwave for 5-6 minutes. 
3. Drain the liquid from the apples and then add in the rest of the ingredients and mix until incorporated. 

Putting the pie together

1. Pour the apple mixture into your chilled pie crust. 
2. Roll out your second chunk of dough until it's about 1/8 inch thick and use cookie cutters to cut out shapes. 
3. Place the shapes onto the pie crust in a pattern that suits your fancy. 
4. Bake the pie at 375 degrees for 1 hour. If the edges start to brown or burn, use tin foil to cover them and continue cooking. 
5. Serve warm. 


As you can see from the pictures, I'm not perfect at pie crust making - the edges of my crust don't go over the edge of the pie plate. I underestimated how much crust (and how many apples) I would need to fill up the deep dish pie pan. But the idea here was to bake more pies and to stop feeling intimidated, not to be perfect. Remember the rules?

1. Make some pies.
2. Don't cry if they're not perfect.

Anyone else out there baking a pie this week? What kind? I need ideas for pie #3!

p.s. This vegan apple crisp is another great way to use those bagged apples.


Chocolate Raspberry Chia Parfait


What is it about layered desserts that sets my mouth watering? I've always loved the process of dipping down into a parfait to get a little bit of each delicious element on a single spoonful. There's a bit of a challenge built into every layered dish - can you eat this is just the right ratio that every bite has a little bit of every thing until the very end?

Just me?

This chocolate raspberry chia parfait was the most delectable challenge.


If you're not familiar with chia seeds, they look like...well, like teeny tiny little seeds. But when they mix with liquid, they puff up and become a little gelatinous - a bit like a smaller version of tapioca. And I love tapioca. They're also crazy good for you with all their fiber and calcium.

So when you eat this parfait, you can pat yourself on the back for making excellent, healthy food choices.

Chocolate Raspberry Chia Parfait

Chocolate Chia Pudding Layer:
2 cups almond milk
3 tablespoons chia seeds
3 tablespoons unsweetened cocoa powder
2 tablespoons maple syrup
1 teaspoon vanilla extract

1. Quickly blend all ingredients together in your blender and then pour into a bowl with a lid. (If you don't have a blender, you can stir them all together - the cocoa powder will be a little difficult to incorporate.)
2. Place in the refrigerator overnight or for at least 2 hours.
3. For the raspberry chia jam layer and the whipped coconut cream, follow this recipe (just the jam) and this recipe from Oh She Glows.
4. Once the chocolate pudding layer is set, place a few tablespoons of the pudding into a pretty glass, then a couple tablespoons of the raspberry chia jam, then a few more tablespoons of the pudding, and then top with a dollop of whipped coconut cream and a raspberry.
5. Serve and enjoy!

p.s. Want more chocolate? I've been thinking about these almond butter and jam chocolates a lot lately...


Like what you read? Never miss a post: follow me on twitter, instagram, or facebook

New Favorite Meal: Chipotle Twice-Baked Sweet Potatoes


There are some meals that are always in our regular rotation.  Pasta and spaghetti sauce.  Vegetarian chili.  Bean burritos. A simple tomato and hearts of palm salad.  Stir fry with rice.  And then there are meals that we're obsessed with for a while but that somehow fall off our radar.  Beer and sausage pasta.  Tofu scramble.  We'll eat it once a week for a month and then not eat it again until, a year later, one of us says, "Hey.  Remember when we used to make [insert delicious dish here] all the time?"

Well, I'm hoping this new favorite doesn't disappear anytime soon because it is so delicious and different from our normal flavor palate that just knowing I'm going to have it for dinner can sustain me through a rough day.  I'm serious.

You can find the recipe over here at The Stay At Home Chef.  I've traded out the spinach for kale when that's what I had on hand, and it was just as delicious.  I leave out the chopped chipotle pepper and just use chipotle chili powder, and it's plenty spicy enough for me.  But if you can't find chipotle chili powder, I would definitely recommend using a chipotle pepper because that taste is delicious and way better than just regular chili powder.  And we use cheddar cheese rather than mozzarella because Cabot cheddar is all aged long enough to be lactose free (hurrah!).

(Word of caution:  Chipotle chili powder is spicier than chili powder.  If you add a bottle of it to your spice rack, don't accidentally interchange them in other dishes.  I say this from experience!)

What's your favorite meals these days?


Pistachio and Coconut Stuffed Dates


One of my favorite new food blogs is Cassie's Back to Her Roots.  Her focus is on healthy cooking and  living, but she doesn't go overboard with it.  As she says, "Now I understand that kale, birthday cake, rest days, flax seeds, strenuous hikes and good beer can all be healthy."  Cassie doesn't forgo all the pleasure of good food in favor of a smaller pant size.  Instead, she takes a holistic approach - good food (some hardcore healthy meals, some a little more decadent, but all made with good wholesome ingredients), lots of enjoyable physical activity, and a commitment to self care.

I swear, every time I read one of her posts, I feel better about life.

Besides that, she's just smart in the kitchen.  Her salads in a jar are genius, and her Sunday food prep regime has me spending a little extra time preparing on the weekends and being so glad for it during the busy week.

A couple weekends ago, I tried my hand at one of her recipes, and it was a huge success.

In preparation for a potluck, I made her stuffed dates and dipped one end in chocolate, a little added excitement that she mentioned in the brilliant post about how she preps food for the week.

They were a huge hit.  I had none to take home, and several people specifically sought me out to tell me how delicious they were.  Potluck score.

I followed Cassie's pistachio and coconut stuffed dates recipe completely.  And after they were all stuffed, I melted chocolate chips in a bowl in the microwave, dipped one end of the dates in and then let them cool on some parchment paper in the fridge.  (We use Sunspire grain-sweetened chocolate chips, which we buy in the bulk section of our local health food store.)


The bad news was that I discovered I'm allergic to pistachios.  Major fail.  I developed a cashew allergy as an adult that's gotten progressively worse in the last few years.  And now pistachios are also on the no-eat list.  What a shame.  I'd forgotten how delicious they are.

I'll have to come up with another version - maybe with pecans...


Thai Red Curry


I go through fits and spurts with cookbooks.  I tend to find most of my recipes from blogs, but every now and then I get a longing to lay a book out on the counter and splatter it with all sorts of ingredients.  There are two that I turn to most - my beloved King Arthur Whole Grain Baking and Moosewood Restaurant Cooking for Health.  They rarely disappoint.


I made this recipe for the first time last week, and I was completely wowed by it.  I wish you could smell through the computer because even before you taste this, the smell is divine.

The Most Valuable Player award goes 100% to the lime leaves.  Do not leave those out.  (I bought them in the produce area with the herbs.)  Just by floating in the coconut milk as it cooks, they give the dish that distinctive Thai flavor.  And I might have developed a habit of randomly pulling the bag of them out of the refrigerator, snicking my nose in, and inhaling deeply.  Might have.


Thai Red Curry
From Moosewood Restaurant Cooking for Health

8 ounces firm tofu, cut into cubes
2 tablespoons soy sauce
1 1/2 tablespoon grated, peeled ginger root
4 teaspoons coconut oil
3 garlic cloves, minced
1/4 cup minced shallots or onions
1 tablespoon red curry paste
1 14-ounce can coconut milk
1 cup water
2 Thai lime leaves
1 cup sliced carrots
3 cups bite-sized cauliflower florets
1 cup cut green beans (I used frozen)
1 red bell pepper, diced
1/2 cup chopped fresh basil
1 tablespoon lime juice
Grain of choice for serving (I used quinoa)

1.  Toss the tofu cubes, soy sauce, and 1/2 tablespoon of the grated ginger (I actually use minced ginger that I get in a har - it's one of my time-savers and means I'm not constantly throwing away dried up nubs of ginger that I forgot about).  Set aside for at least 15 minutes while you chop the vegetables.

2.  Prepare your grain of choice according to the package directions.

3.  Warm 2 teaspoons coconut oil in a soup pot on medium heat.  Drain the tofu and reserve the liquid.  Cook for 5-10 minutes, stirring occasionally, until the tofu is golden.


4.  After the tofu is golden, remove it from the soup pot and put it back in the bowl with the marinade.  To the soup pot, on medium-high heat, add the remaining 2 teaspoons of oil, the remaining tablespoon of ginger, the garlic, shallots or onions, and red curry paste.  Cook for about a minute, stirring constantly to prevent scorching.  Stir in the coconut milk, water, and lime leaves and bring to boil on high heat.

5.  Stir in the carrots and cauliflower, bring back to a boil, then reduce the heat and simmer for 5 minutes.  Add the green beans and simmer for 2 minutes.  Then add the bell peppers, basil, tofu cubes, and reserved marinade.  Return to a simmer for 2-3 minutes until all the vegetables are crisp-tender.  Finally, stir in the lime juice and serve with the quinoa (or other grain).


Five Ingredient Chocolate Nut Butter Cups (Sugar-free!)


The chocolate options for a person who's lactose intolerant and  doesn't eat sugar have exploded in the last few years.  At one of our local health food stores, we can buy peppermint patties and dark chocolate bars sweetened with honey, agave nectar, or coconut palm sugar.  We even recently found hot chocolate mix sweetened with coconut sugar.  And our favorite grain-sweetened chocolate chips are back in stock in the bulk section.

It's a far cry from the days when I used to sweeten my own chocolate and break it up into chunks so I could make chocolate chip cookies for my sweetie.  

But a girl who loves a cooking challenge can't stop when there are so many exciting ideas out there. When Angela from Oh She Glows posted this recipe for making your own vegan chocolate candies, I knew I had to try it.  Chocolate and maple syrup sounds just about as good as it gets.  

Well, until I decided to add in almond butter.

And jam.
 

Then...well, then I was in heaven. 


Five Ingredient Chocolate Nut Butter Cups
Adapted from Easy Homemade Vegan Chocolate

1 cup cacao butter chunks
1/2 cup cocoa powder
1/2 cup maple syrup, at room temperature
1/4 cup almond butter (or nut butter of your choice)
2 tablespoons jam (we used fig preserves sweetened with white grape juice)
(optional: a pinch of sea salt)

1.  Melt the cacao butter over low heat, stirring continuously.
2.  Once it is melted, stir in the cocoa powder and maple syrup.  Add in the sea salt if you're using it.
3.  Pour the melted chocolate into a blender and blend for a few seconds.  Be careful to allow the steam to release before blending so that your blender doesn't explode!
4.  Using 12 silicone mini muffin cups, pour a little layer of chocolate into the bottom of each cup. 
5.  Let the muffin cups sit for a few minutes in the refrigerator while you quickly mix together the nut butter and jam.
6.  Take the muffin cups back out, put a dollop of nut butter/jam mixture into each cup, and then pour the rest of the chocolate into each cup to cover the nut butter/jam mixture. 
7.  Freeze for about 30 minutes and then enjoy.


Store in the refrigerator, and try not to eat them all in one sitting.  :)


Beer and Sausage Pasta


A few months ago, Ashley of (never)homemaker posted a recipe for crockpot vegetable soup, and she used beer in place of the vegetable stock.  I tried her recipe when my family was here for the holidays, and my mind was blown.  The turkey stock in my freezer may never get used.  It's beer from here on out.


The richness of flavor that the beer brings an otherwise average meal is just unbeatable.  So I've been trying it in everything imaginable.  And this one is by far my favorite.  We've had it twice in the last month, which doesn't seem like that much but is a lot for me.  I'm generally pretty flighty with my food choices.  But I was actually craving this dish after we had it.  The mix of all the different flavors - the smoothness of the sweet potatoes, the spicy sausage, the tangy sun-dried tomatoes, the beer.  Absolutely delicious.


Though there's a little prep time, this pasta is a cinch to make, and it could easily be a dish you serve over rice or quinoa or with mashed potatoes if that's your thing instead of pasta.  I think we'll be having it with quinoa at some point in the future.  Probably not too far in the future, actually...


Beer and Sausage Pasta

1 medium yellow onion, diced
1 sweet potato, diced
1 pound sausage (I used Bilinski's chicken andouille-flavored sausage), chopped
4 large leaves curly kale, thinly chopped
4 cloves minced garlic
6 sun-dried tomatoes, diced
1/2 pound pasta of your choice (I used fusilli)
1 can beer of your choice (I used Budweiser)
1 teaspoon dried oregano
1 teaspoon dried thyme
Olive oil
Salt and pepper to taste

1.  In a pan over medium heat, saute the onions in olive oil.  Add oregano, thyme, and salt and pepper to taste.  Stir occasionally and cook until the onions begin to soften, about five minutes.
2.  While the onions are cooking, steam the diced sweet potato until soft (about ten minutes) and put the pasta water on to boil.
3.  Once the onions are soft, move them to the edges of the pan and put the sausage in the middle of the pan.  Turn up the heat just a bit and resist the urge to stir too much!  Let the sausage brown a bit before turning it and letting it cook a bit more.
4.  When the sausage has browned a little on the outside, add in the garlic and the sun-dried tomatoes and pour in the beer.  Turn down the heat to medium low and let it all simmer and get good and beer-y. This is probably around the time your pasta water will be boiling and ready for the pasta.
5.  Once about half of the beer has reduced down, add in the kale and put the top on to allow the kale to wilt for about five minutes.
6.  When the pasta is finished cooking, drain it and mix the pasta with the sausage.  Serve immediately with a good, hearty whole wheat bread.


*The first time I made this dish, I mixed in a couple of tablespoons of nutritional yeast at the end of the sausage mixture cooking time.  It adds a bit of creaminess that I liked.  I'll probably make it both ways in the future.  


100% Whole Wheat Bread


I've taken to baking bread on the weekends - a simple loaf  made of 100% whole wheat flour.  The recipe* comes from the gods of whole grain baking, the King Arthur Flour company.  
 
I love the feel of the dough under my hands, the way I end up measuring time by the number of minutes left for rising, the smell from the oven.  And then finally, after a day of waiting expectantly, the  luxurious act of spreading butter (or earth balance) on a warm piece of bread.  We always cut it before we're supposed to.  We never let it cool enough.  How could we? 
 
We eat those first warm bites with our eyes closed, sighing in gratitude for the way a little bit of yeast can turn flour and water into this nutty goodness.  For days, we eat the bread in unfortunate quantities - slathered in butter, covered with a bit of cheese, or just plain, sneaking off a slice before dinner.   And then it's gone and we look forward to the next weekend and another day that ends with a warm loaf from the oven.


*  I make a few changes to the recipe for our needs.  I use dry soy milk instead of regular dry milk, and I use 1/4 cup orange juice in place of part of the water, which tempers the bitterness of the whole wheat a bit.  I sweeten ours with maple syrup.

Freezer Vegetarian Chili


Several years ago Navah and I read Barbara Kingsolver's Animal Vegetable Miracle, where the author narrates her family's year of local-eating.  They limited themselves to only food grown within one hundred miles of their Virginia homestead, so it makes sense that their kitchen was very season-specific.  Summer found it overflowing with a bounty of fruits and vegetables, literally drowning in piles of zucchini.  In Fall, they enjoyed crisp apples and some of the later vegetables and checked their pantry and freezer to make sure they had enough stored away for the winter.  

I adored the book and finished it with an overwhelming desire to hang garlic up to dry over my kitchen sink and hunt for morels on a hillside and buy bushels of tomatoes to freeze or can, to draw on all those years relishing the chore-filled, season-driven lives of the Little House on the Prairie clan.  

But at the time I was reading it, I was lying on a beach in Costa Rica, buying rice and beans for every meal from tiny little restaurants.  And by the time we were back home in our DC highrise apartment, I had forgotten.  

Perhaps one day I'll lead a life so close to the earth that my kitchen will follow the seasons, and I'll finally become one with my inner Laura Ingalls Wilder.  But now the days fly by me so fast most of the time.  A season's gone before I realize that my canning pot hasn't moved from the top of the refrigerator.  

So when I stepped outside to walk Jammer about a week ago and had to run back in for a warmer jacket, the thought that came right after "ooh, it's FALL!" was "ooh, I need to FREEZE something!"

With a potluck on the calendar for that evening, a giant pot of chili seemed like a winner.  I could make a big enough batch that I'd have enough to bring to the potluck and enough to freeze for some cold winter night down the road.


And a big batch it was.  We brought about seven servings to the potluck and were able to put at least that many in the freezer.

Freezer Vegetarian Chili

2 tablespoons olive oil
1 onion
1/2 tablespoon salt
1 teaspoon ground pepper
2 teaspoons cumin
1 1/2 teaspoons chili powder
1/4 teaspoon chipotle chili power
1/4 teaspoon paprika
4 cloves garlic 
2 fifteen-oz cans of kidney beans
2 fifteen-oz cans of black beans
2 fifteen-oz cans of navy beans
1 fifteen-oz can of Amy's medium chili with vegetables (my "secret" ingredient)
1 eight-oz can of tomato sauce
four tomatoes
1 each green, red, and yellow pepper
1/2 bag frozen corn
1 cup bulgur wheat

1.  Dice the onion and saute in a large pot over medium heat in the olive oil.  Add in the salt, pepper, chili powder, garlic, and half the cumin.  Cook, stirring occasionally, for about five minutes, or until the onions begin to soften and turn clear.  

2.  Add in the chopped peppers and tomatoes.  Cook together for about five minutes.

3.  Add in the beans, tomato sauce, corn, bulgur wheat and remaining spices (including the other half of the cumin).  Bring to a boil and then reduce to a simmer.  Let cook with the top on for 1-2 hours, checking occasionally to be sure the bottom isn't burning.  

It's so simple but really delicious.  Once the soup cools, ladle it into your freezer-safe containers and look forward to pulling some out on a cold night this winter!


Katie 

Simple tomato and hearts of palm salad


We went to a goodbye party for a friend last night.  Like many Burlington shindigs, it was a potluck.  I showed up with this salad, which made it one of three tomato-based salads on the table.  

Yes, it's tomato season here in Vermont.


And while we never got around to growing our own veggies this year, we're definitely benefitting from other people's abundance.  We have twice now been graced with overflowing baskets of beautifully colored tomatoes, and I am loving it. 

I'm happy to just cut them up and eat them with a little salt.  Or on a tomato sandwich (the only time you will see me slather mayonnaise onto a slice of bread).  But I really love them as the base for this salad.  


Simple tomato and hearts of palm salad

3-5 ripe tomatoes 
1/4 red onion
1 can hearts of palm, drained
2 tablespoons Newman's Own olive oil and vinegar salad dressing* (or oil and vinegar)
1 teaspoon dijon mustard
1 1/2 teaspoons honey
1/4 teaspoon salt
1/4 teaspoon freshly ground pepper

1.  Roughly chop tomatoes, onion, and hearts of palm and toss into a salad bowl.
2.  Whisk together the salad dressing, dijon mustard, honey, salt,  and pepper. 
3.  Pour the dressing over the salad and mix gently until all the vegetables are covered.
4.  Eat!


*I love oil and vinegar-based salad dressings, but I often struggle with getting just the right proportion of oil to vinegar.  While housesitting last month, I discovered this salad dressing in our friend's refrigerator.  I've been hooked ever since.  It has no sugar or other unnecessary ingredients, and it's a great base for my salad dressing concoctions. 


Katie


Interested in guest posting on ktmade? I'm especially looking for folks who would like to submit posts on creative topics, including food, craft, home decor, writing, and craft/life balance for the weeks of September 10-21. Email me at ktmadeblog [at] gmail [dot] com.

Taco Salad: Make Your Own Taco Bowl


When I go out for Mexican food (generally Tex-Mex, actually), my favorite things to order are nachos, burritos, and taco salads.  Nachos and burritos are pretty frequent at home too - they're easy to put together, and we try to keep the ingredients around. 

But a taco salad?

The best part of that is obviously the crispy taco bowl, and the ones you can buy in the store always taste a little stale.  So, for my money, they're not worth it.  And Navah wouldn't be able to eat them anyway since they have white flour and usually high fructose corn syrup or sugar, so that just seems cruel.  

What to do?  I noodled around on the interwebs a bit and found a tutorial here on how to make your own fried taco bowls.  I came across some baked ones as well, but I wasn't sure whether those would really get crispy.  And we love fried things.  


I'm sorry to report that I only have one somewhat sad photo of the process of creating the taco bowls because I started a bit of a grease fire in the process.  Everything is quite alright, and I don't have any great tips for how to not make that happen except that it's probably not a task you'd want to assign to your child.  

Vegetarian Taco Salad with Fried Taco Salad Bowls

Taco salad bowls 
Adapted from Creating Through Life

10 inch flour tortillas (we used whole wheat tortillas)
1 empty can (I used the one from the beans for the salad)
small pot (smaller in diameter than tortillas)
vegetable oil

The one sad process photo.  I had to use the tongs to flip that floppy bit out so it would form a bowl.

1.  I didn't remove mine, but you should probably remove the label off your can and wash and dry it.
2.  In your pot, heat the oil - about 2 inches deep - until it's 375 degrees.  You can, of course, test this with a thermometer, but you can also put the bottom off a wooden spoon in.  If it bubbles, it's ready.
3.  Optional step:  Dip the tortilla for just a second into a pan of water to soften it.  This may be why I started a grease fire, so beware.
4.  Place a tortilla on top of the oil.  Holding the can with the tongs, place it in the center of the tortilla and push the tortilla gently down into the oil.
5.  Hold the can there for about 5 seconds, or until the tortilla shape is set.  Then remove the can and move the tortilla around in the oil with the tongs until it's all as crispy as you'd like.  (Because we only have very tiny or very big pots, my tortilla wouldn't totally fit in the pot, so I did a lot of moving it around afterwards to get all the bits crispy.)
6.  Remove the tortilla with the tongs and place upside down on paper towel to cool.


The Vegetarian Taco Salad Filling

1 can beans (we used kidney, but black beans, or white beans would also work)
1 onion
2 sweet potatoes
2 cups romaine lettuce
1 tomato
1 1/2 tsp chili powder
1 tsp cumin
3/4 tsp paprika
salt and pepper to taste
optional toppings (cheese, avocado, salsa, sour cream, olives, etc)

1.  Put a small pot of water on to boil.
2.  Chop the sweet potatoes into small cubes (about 1/4 thick).  Place in the pot of water and boil until just soft.
3.  While the sweet potatoes are boiling, chop up the onion and place in a frying pan with a tablespoon of olive oil.  Cook on medium heat until the onions turn clear.  Add salt and pepper to taste. 
4.  Drain the sweet potatoes and add to the onions, along with the can of beans and the chili powder, cumin, and paprika.  
5.  Cook over medium-low to medium heat for about 5 minutes, stirring occasionally. 
7.  While the bean and potato mixture is cooking, prepare your salad bowls with lettuce, chop up a tomato, and get out any toppings you would like.
8.  Remove the bean and potato mixture from the stove and place a generous spoonful on top of the lettuce in your salad bowl. 
9.  Top with tomatoes and whatever toppings you've chosen.


Enjoy!

Katie 


Beet Risotto

I love beets.  


And I love any opportunity to incorporate beets into my diet in interesting ways.  I'm even hoping to use some beets in a dye sometime - they're certainly an exquisite color.


This beet risotto gives me a little of both worlds.  


How often do you get to eat a savory fuchsia dish?!  Sometimes I try to avoid the beet color infusing my entire meal, but with this risotto, it's just plain fun!


And delicious to boot.


The sweetness of the beets combined with the creamy coconut milk and the nutty flavor of the brown rice makes for a complex dish that could work as a side or on its own.  


I had it as my entree for lunch today, but I've also served it alongside a salad and some grilled chicken.


Beet Brown Rice Risotto
Adapted from Group Recipes


1/4 cup Earth Balance (or butter)
6 small beets or 3 medium beets, peeled and chopped
1 medium chopped onion
1 cup short grain brown rice
1 cup vegetable broth
1/2 cup water
1 can coconut milk
1 tbsp balsamic vinegar
salt and pepper, to taste


1.  Melt earth balance in large pot over medium heat.
2.  Add onions and beets, salt and pepper to taste, and cook approximately 10 minutes until onion is soft.
3.  Mix in rice and all liquid ingredients and reduce the heat to medium low.  
4.  Simmer gently uncovered until beets and onions are soft and risotto is creamy, stirring occasionally. Probably about 20-30 minutes. 


Enjoy the colorful deliciousness!

Katie

Broccoli Arugula and Squash Soup


It's a little strange to be sharing a soup recipe in July, I suppose.  There are some of you will set this aside for the winter, but soup's an all-year-round dinner for me.  It's not what I reach for in the middle of the day when I'm sitting outside in the sun.  But at night, when I'm cozied in for the evening, soup is comforting - especially on those nights up here where things really cool down.  


I made this soup when I was doing a cleanse a couple years ago, and then I forgot about it.  I remembered it when I did the cleanse this time, and now, with a few modifications, it has become a staple of our diet.  


The coolest thing about it is that - for the most part - it's incredibly seasonal.  All the veggies in this pot came from the farm CSA that we got while we were housesitting.  


Broccoli Arugula and Squash Soup
Adapted from GOOP


One onion, chopped
One head broccoli, chopped
One zucchini, chopped
One summer squash, chopped
4 cups vegetable broth
One can coconut milk
Two cups arugula
Salt and pepper to taste


1.  In large pot over medium heat, saute onions in olive oil with salt and pepper for 3 - 5 minutes.
2.  Add in the broccoli, zucchini, and summer squash and saute, stirring frequently, for about 10 minutes. 
3.  Pour in the vegetable broth and bring to boiling.  Then reduce the heat to medium-low and simmer for 10-15 minutes.  
4.  Pour in the coconut milk and the arugula, adding more salt and pepper at this point if necessary.
5.  Using either an immersion blender or a traditional blender, blend the soup until smooth.  (If you're using a traditional blender, blend in small batches or allow the soup to cool before blending so that you don't blow the top off your blender.)
6.  Serve with a little dollop of coconut cream (or sour cream or yogurt if you can do dairy) and a slice of crusty bread. 


The blend of the broccoli and peppery arugula with the creamy coconut milk is absolutely delicious. And the zucchini and squash give it a little more substance.


I hope you enjoy!


Katie

Chunky CSA Spaghetti


We didn't get our acts together this year in time to sign up for a CSA (community supported agriculture).  We hoof it to the farmers market a lot, but I'm apt to buy less there than I would get in a weekly box from the farm.  The folks we're housesitting for belong to a CSA, and the abundance of veggies at our disposal is quite nice.  And we're under strict orders to eat them all so they don't go bad.


Yes ma'am!


A chunky veggie-ful spaghetti sounded like just the thing to me.  And it's quick, which is especially nice these days, especially now that our commute from work is a wee bit longer.


I love a good recipe that involves just throwing whatever you have into the mix (as shown here and here and here), and this one's no different.  I used the veggies I had - carrots, zucchini, yellow squash, broccoli, onions, and garlic scapes.  But you could use whatever you have around - cauliflower, kale, spinach, bok choy, mushrooms, green onions.  I wouldn't generally think of root vegetables (aside from carrots) in there, but let me know if you try that out!


The cool thing about CSAs (aside from the tons of delicious veggies at a lower cost than the farmers market) is that you get vegetables you might not buy on your own.  And then you figure out how to cook with them.  I only learned what a garlic scape was a couple years ago, but I always love when they show up.  They look a little like a more substantial, swirly green onion, and they taste like garlic.  They're more mild, though, so you wouldn't put them in at the beginning of a dish like you would with actual garlic because the flavor will just cook out.  I chop them up (down to the white part and then stop) and throw them in at the last minute - just so they can get a little soft.  They give a really nice fresh garlic flavor.


And who doesn't love that?


Chunky CSA Spaghetti

1 onion
1 zucchini
1 yellow squash
2 carrots
1/2 head broccoli
5-6 garlic scapes
1 12 oz jar strained tomatoes
1 package pasta (we used brown rice spaghetti)
2 teaspoons oregano
1 1/2 teaspoon basil
1 teaspoon rosemary
1 1/2 teaspoon salt
pepper, to taste
1 tablespoon olive oil

1.  Chop all the vegetables into whatever size suits your fancy.
2.  Saute the onions and carrots in olive oil over medium heat with salt until soft.
3.  Add in the zucchini, squash, broccoli and the rest of the seasoning.  Stir occasionally, making sure that the bottom doesn't burn.  
4.  Prepare the pasta according to package directions.
5.  Once all the vegetables have begun to soften, add in the garlic scapes and continue to saute for 3-5 minutes.
6.  Pour in the strained tomatoes and let simmer for 3-5 minutes.
7.  Mix with your pasta, and enjoy!


Katie

Artichoke and Asparagus Quinoa Risotto (GF, vegan, sugar-free)


Quinoa's on the menu at our place a lot these days. As a complete protein, it's an excellent way to get extra nutrients into a simple and delicious meal like a risotto. For a potluck we attended last night, I whipped this up so I'd be sure we had something healthy to put on our plates.


It was a hit with everyone - we didn't have a smidge to bring home!


It's a pretty easy but time-intensive dish, so you'll need to leave yourself at least an hour to prepare it when you can be close to the stove. 


If you've never cooked with quinoa before, give it a try. It packs more nutrients than rice - even brown rice - and the subtle nutty flavor is really excellent.


Artichoke and Asparagus Quinoa Risotto


1 can of artichokes in water
1 bunch of asparagus
1 cup of quinoa, dry
1 tablespoon coconut oil (or other oil)
1/2 teaspoon oregano
1/2 teaspoon thyme
1 cup vegetable broth
1 cup almond milk 
1/2 cup nutritional yeast
1/2 tablespoon white miso
1 tablespoon lemon juice
salt and pepper to taste 


1.  Chop and steam the asparagus until bright green and slightly tender.
2.  While the asparagus is steaming, add the quinoa, spices, and coconut oil to a pan over medium heat. Stir it all in the pot to ensure that the quinoa is coated, especially if the coconut oil is still hard.
3. Once the quinoa starts to sizzle and pop a bit, add in the broth, almond milk, nutritional yeast, miso, and salt and pepper.  Allow to come to a rolling boil, and then reduce to a sizzle and cover. Stir again ever 5-10 minutes. This is a good time to do some dishes or putter around the kitchen. Music helps. Resist the urge to leave or it might burn.
4. Once the quinoa starts to soak up a lot of the liquid and you notice there's not much left in the pan, do a quick taste test to see whether it's soft. If the quinoa seems too crunch, you might want to add a little more liquid. You can add in more broth or milk or a little water in 1/4 cup increments. You don't want it to be soupy or mushy - just creamy and soft. 
5. Once the quinoa is finished - all the liquid is incorporated and the quinoa itself is soft and perhaps slightly chewy (not crunch) - mix in the asparagus and the drained can of artichokes along with the lemon. Add a little more salt and pepper if necessary and serve. 


Enjoy!

Katie

{UPDATE:  Check out my friend Tori's comment below if you're interested in some non-vegan substitutions!}

Simple Summer Slaw with Honey Vinaigrette


I'm a sucker for an easy summer salad. I hate to turn the oven or the stove on once it gets warm outside, and I'm not really in the mood to eat anything hot anyway. Instead I crave simple, refreshing foods. So salads that can function as a whole meal - especially at lunch time - are one of my main summer staples.


Salads based on cabbage can't be beat on that front because you can put basically anything in them, and they stay fresh much longer than your average garden salad, which can get all sad and wilted in the span of a day.


And, like the creamy quinoa salad I made a couple weeks ago, you can mix in just about anything you have in your fridge, and it'll be delicious. Some of my favorites that didn't make it into this version - hearts of palm, avocado, artichoke hearts, craisins, slivered almonds, cherry tomatoes, broccoli, and apples. There really are no rules for this salad.
I like to make mine with purple cabbage when I have it because it's just so pretty. With a few other colorful veggies thrown in, it's like I'm eating a work of art. In a really good way.

Simple Summer Slaw with Honey Vinaigrette

1/2 head of cabbage
Frozen edamame, thawed
1/2 yellow pepper
1/4 medium red onion
1/4 cup pumpkin seeds
1/4 cup raisins

Honey Vinaigrette
4 tablespoons olive oil
3 tablespoons honey
1 tablespoon balsamic vinegar
1 tablespoon dijon mustard
salt and pepper to taste

1.  Thinly slice the cabbage and chop up the rest of your veggies.
2.  Throw them all in a bowl together.
3.  Mix together all the ingredients for the honey vinaigrette and pour over the slaw.
4.  Thoroughly mix everything together.

That's it! So easy, eh?

And bonus - it's even better the second day.

Katie

Kale Puttanesca...sort of


I've gotten to the point where hardly a day goes by that I don't eat kale. Most often, it's in my morning smoothie, but I'm still a big fan of the leafy green on its own. After being introduced to raw kale in a salad, I throw it in mine whenever possible. And if I'm cooking, I would choose it over spinach every time. It holds together so much better, and I've never, ever had slimy kale. Unfortunately, I can't say the same for spinach. 


I got an email from my sister this morning with a recipe for a kale breakfast casserole, and I spent the rest of the day with kale on the mind. The breakfast casserole didn't work with the things we had around the house, but a kale-themed dish for dinner was a definite. 


I'm calling this a kale puttanesca because it has many of the signature ingredients of a traditional puttanesca - onions, capers, tomatoes, olives, served over pasta. But it's a bit of a misnomer since I left out the anchovies, threw in a few extra things, and made the dish a little less sauce-y. 


Perfect for a late May evening. 


My version of the kale puttanesca is gluten-free (we used brown rice pasta) and vegan. But you could use whatever pasta you like or add cheese. It would be delicious with grated parmesan sprinkled on top. 


Oh, and bonus points for being able to prepare the whole thing in the time it takes to boil the pasta. Perfecto.


Gluten-free, Vegan Kale Puttanesca


1 tablespoon oil (we used coconut)
1-2 cups kale, chopped
1-2 tomatoes, chopped
2 cloves garlic, minced
1 small onion, chopped
1 tablespoon capers
1/4 cup pitted kalamata olives, halved
1/2 cup white wine
1/4 teaspoon each dried oregano, basil, and thyme
salt and pepper, to taste
1 box penne pasta (we used brown rice)


1.  Prepare the pasta according to the package.
2.  Heat the oil over a medium flame.  Add onions and garlic and saute slowly, stirring occasionally. Add the oregano, basil, thyme, salt, and pepper. 
3. When the onions have turned clear, add the tomatoes and capers and continue to cook over medium heat, about 3-4 minutes. 
4. Add the chopped kale and the white wine. Cover and let simmer gently for about 5 minutes. While you're waiting, drain the pasta. 
5.  Mix the drained pasta and the kalamata olives into the saucepan with the kale, making sure the pasta is full incorporated with the "sauce."
6.  Enjoy!

Katie

Whole Wheat Fried Dough


One of my all-time favorite treats as a kid was fried biscuits from a can. I felt like they were something special my family did to approximate beignets because we were cajun but not great with the beignet-making. Ours never puffed up.


I've since learned that lots of people make them, but it hasn't lessened my enjoyment one bit. I've made them for other folks on various occasions, and it has won me undying devotion in certain circles. You think I'm kidding, but I'm not.


Of course, I don't think there's a single ingredient in a can of Pillsbury biscuits that Navah can eat. I still make them for myself sometimes, but fried dough is something she's never gotten to enjoy.


Until this past weekend.


When I made the honey whole wheat biscuits a few weeks back, I had a bit of dough leftover that wasn't big enough to make into a full biscuit. While the others were baking, I heated up some oil and plopped the little bit in and...Kabam! A little ball of puffy, fried dough!


So this weekend, I whipped up a batch of the biscuit dough - using a flax egg in place of the real egg, rolled it out, cut it into little squares and made us some fried biscuits. I sprinkled them with cinnamon and "sugar" (xylitol) to take the place of the powdered sugar that I would normally sprinkle on fried biscuits.


They look a little like chicken nuggets here, but I assure you they are not. They're sweet and delicious. I also recommend making them when you have friends around. Or only making a half batch. We had a little self-restraint issue, which led to a big food coma issue.

Honey Whole-Wheat Fried Dough
Adapted from King Arthur Flour Whole Grain Baking


3 cups whole wheat pastry flour
2 1/2 teaspoons baking powder
1/2 teaspoon baking soda
3/4 teaspoon salt
1/2 cup (or 1 stick) cold earth balance
1 flax egg (1 tbsp ground flax seeds mixed with 3 tbps warm water)
3/4 cup almond milk (or soymilk or buttermilk if you can have it)
3 tablespoons honey


1. Whisk together the dry ingredients in a large bowl.
2. Cut the butter into the dry ingredients with a pastry cutter, a fork, or your hands until it's a dry, crumbly mixture. Set aside.
3. In a separate bowl, whisk together the flax egg, almond milk, and honey. Then pour into the dry ingredients and mix until just moistened.
4. Turn the dough out onto a lightly floured surface, and fold over onto itself several times to bring it together. A dough scraper is great for this, but if you don't have one, just use your hands.

5. Now's about the time to start heating up your oil. Pour canola (or other mild vegetable oil) about 1 inch deep into a pot. Using a candy thermometer, heat the oil until it's between 360 and 375 degrees. If it's too hot, the outside of the dough will burn before the inside gets cooked. If it's too cold, the dough will soak up the oil - not good, I promise. You'll have to monitor the temperature throughout, as it will fluctuate once you start putting the dough in.5. With a lightly floured rolling pin, roll the dough out until it's about 3/4 inch thick.
7. Using a sharp knife or pizza cutter, cut the dough into squares.
8. Depending on the size of your pot, drop the dough into the oil a few pieces at a time. Turn each piece over when it starts to get slightly golden on the top. 
9. Scoop out with a slotted spoon and place on a plate that's been covered with paper towels. Sprinkle with cinnamon and sugar, or xylitol for a sugar-free version. 


Katie 

Raspberry Thumbprint Cookies

After starting a new (short-term) job last week, I've been spending a little less time in the kitchen. But when I saw this recipe for raspberry thumbprint cookies from one of my favorite bloggers over at Oh She Glows, I knew I had to carve out some time with my mixing bowls.

 
Luckily these cookies take only a few minutes to pull together, but the result is absolutely delicious. The sweetness of the raspberry jam and the the richness of the almond butter blend together into a perfect nibble of a dessert.

The only changes I made to these were to use vanilla extract instead of almond extract and not to use coconut on the outside - both just because of what I had in the house.

I'd say that they're surprisingly delicious for being vegan and gluten- and sugar-free, but I'm rarely surprised by the yumminess of alternative baking.
Be careful, though.


You might end up eating four in the span of a few minutes.


Just a possibility, of course.


Katie
 *Can't wait to get my camera back. These camera phone pictures leave a little to be desired.

Whole Grain Pancakes

Is there anything better than a lazy weekend morning with homemade pancakes?


It almost seems like time slows down a bit to let you enjoy the unbeatable smell of pancakes on the stove, steeping coffee, and sweet maple syrup.


I recently purchased the King Arthur Flour Whole Grain Baking tome. Seriously, it weighs about 10 pounds. I'm constantly adapting recipes to make them with whole grain flours, without eggs, without dairy, with alternative sweeteners, and it's really a hit-or-miss sort of affair. I've got nothing against trial and error, but sometimes you want a loaf of bread that doesn't feel like an anvil or cookies that don't crumble into a thousand piece the moment you pick them up off the pan. And you don't want it to take 50 tries to get there. 


I decided it was time to buy a whole grain baking book so that I could at least limit the number of ingredients I was substituting or futzing around with, and perhaps learn a little about different types of flours and why they act like they do. 


After just flipping through the pages I bit, I'd already learned important things about how I'm measuring my flour and the temperature of my ingredients. 


I started with the first recipe - Simple Spelt Pancakes.


Of course, after all that talk about not making too many substitutions, I was out of spelt flour and running quite low on some others. So I made these with a little buckwheat flour and the rest whole wheat bread flour. 


If the pancakes are any sign of what's to come, the cookbook is going to be a great addition to our kitchen. Light, fluffy, and flavorful, we gobbled these pancakes up - perhaps a bit faster than we should have! Pancake-induced comas followed.


Whole Grain Pancakes
Adapted from The King Arthur Flour Company's Simple Spelt Pancakes


1/2 cup buckwheat flour
1 1/2 cups whole wheat flour (I used whole wheat bread flour)
2 tablespoons xylitol (or sugar)
1 tablespoon baking powder
3/4 teaspoon salt
1 3/4 cups almond milk (or regular milk)
2 tablespoons earth balance, melted (or butter)
2 teaspoons vanilla 

1. In a medium bowl, whisk together the flour, sugar, baking powder and salt.

2. Combine the milk, melted earth balance, and the vanilla.

3. Form a well in the center of the dry ingredients, and pour the wet ingredients into the dry. Stir the batter
just until the dry ingredients are thoroughly moistened. Let the batter sit for 15 minutes before you use it. (Hardest part! I was a hungry lady!)
4. Heat your pan. When the surface of your pan is hot enough that a drop of water sputters across the surface, melt in a teensy bit of earth balance, and spoon the batter onto the hot surface, 1/4-cupful at a time.
6. Let the pancakes cook on the first side until bubbles begin to form around the edges of the cakes, about 2 to 3 minutes. You may need to adjust your heat up or down to get the pancakes to cook through without scorching the surface, or being too pale.

7. When the cakes are just beginning to set, flip them and let them finish cooking on the second side, about 1 minute more, until they’re golden brown on both sides.
Enjoy!
Katie