This Week in My Garden: June 4, 2015

The garden has made me a murderer. 

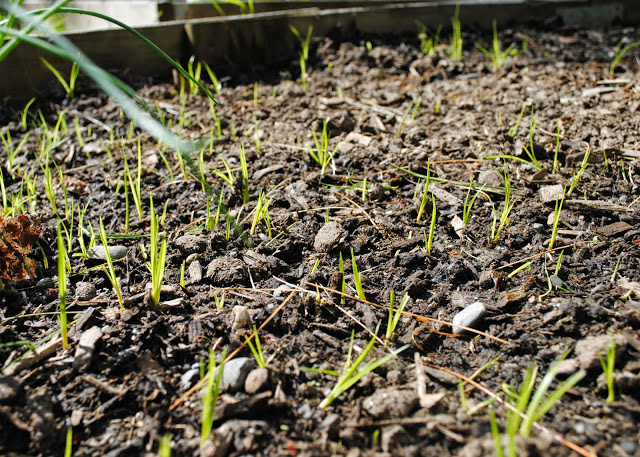
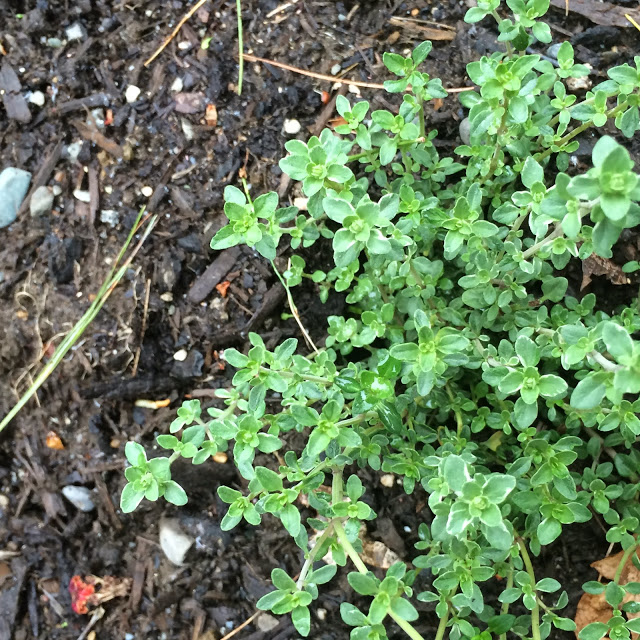
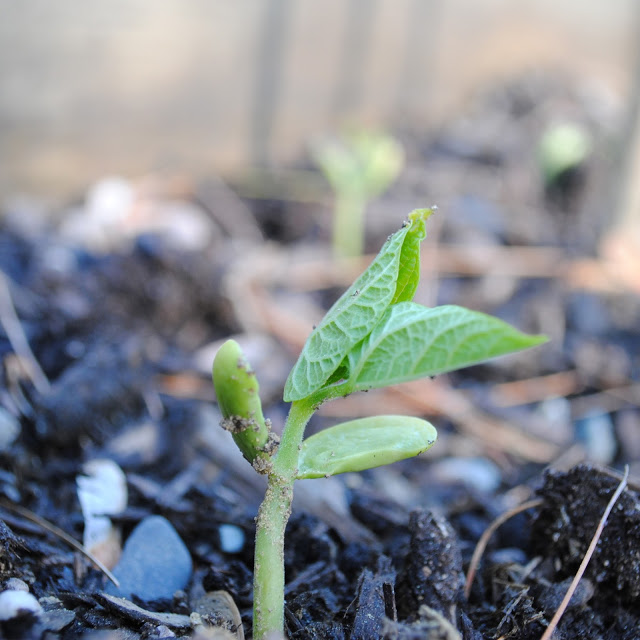
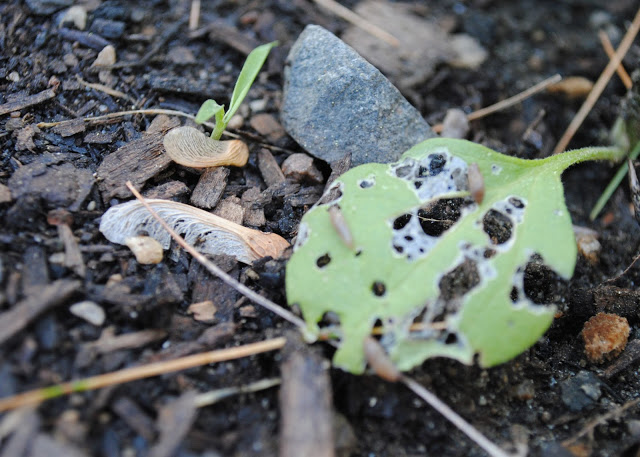
The slugs are on my basil and my eggplant already, teeny tiny baby ones chewing dozens of little holes in each leaf. 

I like slugs. Snails too. Their slow, seemingly magical movement fascinates me. And around here, they're often small enough to fall into cute territory, at least for me. So I'm not super excited about killing them. But I know what happens when I let my ambivalence take over - plants so obliterated that they don't even have enough green left to soak up the sun. 

I tried the humane method last year, going out each night and picking off each slug and moving them to another part of the yard. The next night, along with dozens of new holes, there would be dozens of new slugs. Or the same ones, back again?

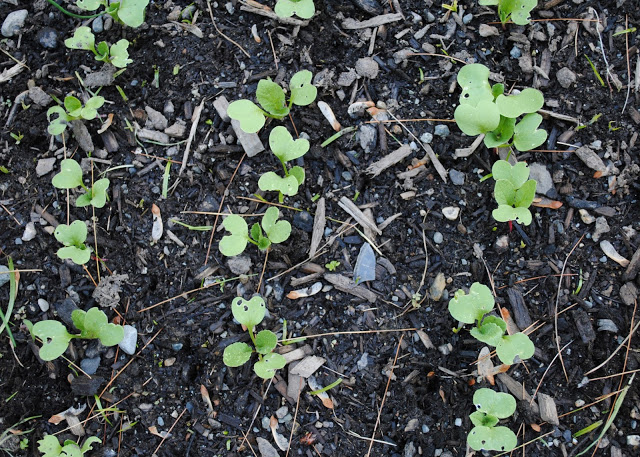
I finally realized that either we were going to get the basil (and the kale and the sugar snap peas) or the snails were. There were so many of them that there just weren't enough green leaves to go around. So I put out little containers of beer, finding a sad few drowned in the morning. But there were still more. Still holes. So I tried cornmeal, which they shunned. 

At this point, my basil plants were hardly plants anymore. More like stems with fragile green lace hanging off them. I headed to the garden store and begged for help, which is how I came home with Slugg. I sprinkled it on the ground around the plants, and it did the dirty work while I slept. 

As long as I reapplied every week or so, the snails were gone. 

Of course, gone is a bit of a euphemism. They were dead. I sent a contract killer to do my bidding, too cowardly (or worse, too busy) to do my own murdering. 

I sprinkled this year's first batch this week after picking off five or six slugs no bigger than grains of rice. Around the basil and the eggplants and the sugar snap peas. If I keep it up, I won't even know they were ever there. Perhaps they'll stop coming at all, signaling somehow to each other that it's a dangerous place. 

I hope so, at least - that there aren't dozens of them sliding to the slaughter each night. 

I'll think of them as I pluck off that first sweet sugar snap pea, the fruits of my labor. And my ruthlessness.

p.s. Previous weeks in my garden: May 28th, May 21st, May 14th, May 7th

Like what you just read? Share it with a friend! You can also follow ktmade on TwitterFacebook, or Instagram so you'll never miss a post. And you'll earn my undying affection!

10 Awesome Craft Projects You Can Do In An Afternoon

I'm still working on my sweater a few rows at a time (but now on sleeves!), and my scrap blanket it still in the bag ready for knew knitted rows. But these long-term projects provide very little instant gratification. Sometimes I just need to whip out a project in an afternoon and feel awesome about it. I haven't been allowing myself the luxury of a quick and easy project since I really want to finish that sweater before I move on to something else. So like a dieter roaming the aisles of a chocolate shop, I've been thinking about all the projects I wish I were working on right now. 

Weaving From Playful Learning

I have been wanting to try my hand at weaving every since this project started taking over the DIY and craft blogs. I'm the perfect candidate with all my leftover scraps of yarn. All I need to do is make a little loom and get to it. This tutorial shows you how to make a loom from cardboard, which I have plenty of, so there's really no excuse for delay. 

Wool Blanket From The Purl Bee

I love the look of these wool blankets with the cheerful trim, and I've been telling myself I'd make some for the guest room for ages. The single layer blanket looks stunning but is actually quite simple. The problem: do you know how expensive wool is? Once I strike it rich, I'll definitely be taking this on. 

Pom Pom Coasters From Inspired By Charm

I can think of no good reason I haven't made these yet. They would take maybe 2 hours, and then drinking an evening cup of tea would be so cheerful! And I even have a set of drab coasters I could spruce up with these little pom poms. (Also, I like this project so much that I've pinned it twice.)

Hand-Painted Planter From Sand and Sisal

Our deck is freshly power washed and ready for a new stain and sealant and then maybe I'll finally add a little something functional and pretty, like a plant that repels mosquitos in a lovely little planter. I love the different colors and patterns and the idea of using something I already have. 

DIY Instagram Magnets from ktmade

I planned to make a bunch more of these after I made the first set, and I simply haven't set aside any time to make them. They're so simple, and I so enjoy looking at all the happy memories on the side of the refrigerator that I really need to hop to it. 

Hummingbird Feeder From The Garden-Roof Coop

We have one of those little plastic hummingbird feeders that's red with yellow "flowers" outside the kitchen window, and I love to see the hummingbirds come by. The look of the feeder itself leaves a little to be desired, though. Pretty ones usually cost upwards of $50. I can't get over how lovely this one is, and it's so easy (and inexpensive)!

Firefly Night light from Muy Ingenioso

I am deeply in love with this night light made from an old coffee can. Obviously it would be great for a kid's room, but I think anyone - young or old - would be delighted by a whimsical little light like this. 

Rope Coil Baskets from We Are Scout

I can never have too many little baskets to hold the odd assortment of things I have hanging around, especially in my studio. I've been wanting to make a rope coil basket (or two) for quite some time. This seems like a perfect project to make while watching a good old movie on a rainy afternoon. 

Hand-dotted Tumblers from Pop Sugar

I don't really have room in my kitchen cabinets for new little tumblers, but these are so pretty and simple to make that I might just have to throw caution to the wind and assume I'll find a place to put them. How fun would it be to use these at a dinner party and be able to tell someone I made them myself?

Stamped Tea Towels from Centsational Girl

These towels might be the simplest project on this list - it doesn't get much easier than stamping onto fabric. Of course, I might have to force myself to actually use them afterwards since they're so darn pretty. 

Hopefully I'll set aside time to make something this weekend!

p.s. For more of my crafting desires, be sure to follow me on Pinterest.

Like what you just read? Share it with a friend! You can also follow ktmade on TwitterFacebook, or Instagram so you'll never miss a post. And you'll earn my undying affection!

90210 Lesbians

"You know why I'm not getting my hair cut, right?" my wife asked me the other morning as we stood in front of our shared closet, each trying to figure out what to wear.

I looked at her, my eyebrows raised in a question mark.

"Because then we'd have the same hair," she said, the silent "duh" remaining unspoken.

I laughed and told her she was ridiculous. 

She continued to avoid making a hair appointment.

My wife has thick, curly hair that hasn't been touched by a brush for more than a decade. I've always loved her curls for their wildness. They're a bit all over the place, and it suits her. Her favorite way to wear it is chin length, a little stacked in the back, but right now it's grown out to her shoulders.

Mine has, for the bulk of our almost-8 years together, been straight by virtue of blow drying and flat ironing and generally taming into place. I've always known that I have some curl, but I wasn't sure how to work with it. It's been long and short and everywhere in between, always a bit of a hassle. And then a series of good hair events led me to my perfect hair.

Joy of joys.

But without realizing it, I walked straight into a situation no less horrible than the

Kelly and Brenda spring dance dress debacle.

Because apparently my perfect hair is also my wife's perfect hair. 

And I'll be damned if I'm going to give it up. 

I mean, let's take a little lesson from our friends in Beverly Hills - they both looked awesome in that dress (at least by 90s style standards). After a little scuffle, Brenda got busy with Dylan, and Kelly got crowned spring princess. There was room at that dance for two high school hotties in off the shoulder black and white dresses. They lived it up and both went home happy. 

So to my wife I say

There is room in this relationship for two hotties with perfect hair. 

Let's live it up, 90210 style. 

p.s.

Our Wedding

Like what you just read? Share it with a friend! You can also follow ktmade on 

Twitter

Facebook

, or 

Instagram

 so you'll never miss a post. And you'll earn my undying affection!

Saratoga Springs: Ducklings

This past weekend, I visited Saratoga Springs, New York with my dad and sister for our annual father-daughter weekend. None of us had ever been, but it proved to be a delightful town with great restaurants, a fun main drag for strolling and popping into stores, a charming bed and breakfast, and a lovely little public park filled with ducks and precious little ducklings.

We spent a good twenty minutes following them around paparazzi style, trying to get close enough for good photos without getting pecked to death by their protective mamas. I got a bunch with my iphone, including this video, and then went back with my real camera later in the day.

Taking pictures of these cute little things was the only way I kept myself from trying to reach for one because all I really wanted to do was pick them up and pet and snuggle them. When I was really still, some of them got close enough that I might've tried, but I know it would've ended disastrously, so I turned on my adult brain and just happily snapped these photos.

p.s.  Butterflies

Like what you just read? Share it with a friend! You can also follow ktmade on TwitterFacebook, or Instagram so you'll never miss a post. And you'll earn my undying affection!

Friday Photo Gratitude

Stealing a bit from Soulemama's weekly {this moment}, I will be posting a single photo, no words, every Friday as a practice of gratitude - for the simple and extraordinary pleasures of life, for the ability to capture them with my camera, and for the honor of sharing them with you. 

Photo credit: Navah Spero


Like what you just read? Share it with a friend! You can also follow ktmade on TwitterFacebook, or Instagram so you'll never miss a post. And you'll earn my undying affection!

This Week in My Garden: May 28, 2015


This time of year, I want to rename my blog ktgrew and focus entirely on the garden. Not only does it take a lot of time and energy, but I want to be out there constantly. I love the quiet, meditative work of weeding, and my favorite thing to do when I get home from work is to walk among the beds, checking on each little plant to see what changes they've made. 

I finally have everything in the ground, though I may end up needing to plant more flowers if I want something to grow there. That bed is not looking promising, which doesn't surprise me since I had my doubts from the beginning

But everything else is in there, at the very least in seed form underground. 

And of course, I bought more plants and more seeds. I've now added spinach, pattypan squash, and delicata squash to the mix. 


The one unpleasant piece of the garden right now (aside from the mosquitos) is watering. I bought two soaker hoses to attach to each other and run throughout the garden, connecting to our regular garden hose. I spent a few hours setting that up last week and then finished over the weekend, turned the water on, and... meh. The beds closer to the beginning of the line were getting doused, but the beds at the end of the soaker hose got almost nothing. That was pretty disappointing, but I think the system was too long and winding, so I took it apart. Now I'm only using the side that waters the tomatoes and the squash plants, since addressing squash mold was the reason we put in the soaker hose (and the black plastic) in the first place. I haven't decided whether I'll use the other soaker hose for the other beds - it's not quite long enough to get everything. 

And now I've gotten the hose nozzle stuck and can't get it off. I spent 20 minutes yesterday trying to twist it, putting gloves on and twisting, using a wrench. It's not coming off. I think it's threaded incorrectly because water is squirting out the bottom as well. So until I can fix that, I can't use the soaker hose at all!

I'm trying to chalk it up to learning experiences. And it helps that I love it so much. I'm willing to forgive a lot of hassle for the joy of walking outside and picking vegetables from my own front yard. 


p.s. I can't believe how early I got started this year compared to a couple years ago


Like what you just read? Share it with a friend! You can also follow ktmade on TwitterFacebook, or Instagram so you'll never miss a post. And you'll earn my undying affection!

These Days: May

At Shelburne Farms - not our chicken, unfortunately

Trying not to scratch all the mosquito bites I've gotten in the garden
Listening to Invisibilia and wishing I were a neuroscientist
Baking pies (still, and happily)
Laughing at Jammer's new haircut 
Relishing the hot days
Loving my curly hair 
Weeding in the garden beds, especially around the radish sprouts (but not enough)
Looking forward to a weekend away with my sister and my dad 
Wishing we could figure out how to fix our riding lawn mower
Getting excited for our summer farm share 
Marveling at how different May feels from April 
Giving my wife a high five for snagging a good deal on our Christmas flights so early
Wondering when I'm going to find time to finish knitting my sweater
Enjoying a little small town Vermont
Feeling a little lag in writing motivation, and breathing through it
Listening to birds chirping outside our windows in the morning 
Soaking up the new growth of Spring 
Cheering for Ireland 

p.s. My travel wish list


Like what you just read? Share it with a friend! You can also follow ktmade on TwitterFacebook, or Instagram so you'll never miss a post. And you'll earn my undying affection!

Vergennes Memorial Day Parade


Vergennes is about 40 minutes south of Burlington and is both the oldest and the smallest chartered city in Vermont. Their Memorial Day Parade, the biggest in the state, draws crowds from around the region. Because of some odd circumstances, I had to attend the parade yesterday for work. Thankfully, I got an opportunity to take some pictures. Even though it was rainy and cold, the crowd and the parade participants were committed to a celebration. 


Like what you just read? Share it with a friend! You can also follow ktmade on TwitterFacebook, or Instagram so you'll never miss a post. And you'll earn my undying affection!


Project Pie: Vegetarian Taco Pie with Cornbread Topping


Project Pie: I'll be baking 24 pies before Pi Day 2016 to get over my fear of baking pies. And to eat delicious things. You can join me by posting about your pies in the comments or tagging your twitter, instagram, or facebook posts with #projectpie. Make something gooey and delicious!

If I could only eat one type of food for the rest of my life, it would be Tex-Mex. I should probably be embarrassed by that, but I'm not. I love cheese and salsa and cilantro, refried beans, guacamole, tortillas. Margaritas. Tamales, enchiladas, quesadillas, burritos, tacos. Nachos. All of it. I can't think of a dish in a Tex-Mex restaurant that I don't like. 

Now I've made myself hungry. 

It made sense that one of my pies would hail from that land of delicious fusion. I drew from one of our favorite recipes for the flavor profile and then added in a few extras, making a definite Tex-Mex win. And it's healthy. Sure, it has some cheese and that cornbread topping, but the bulk of this pie is sweet potato and black beans. So you can pat yourself on the back for getting in some good-for-you veggies while you're chowing down. 


(I apologize for the dark photos. I worked late in the garden, and when this came out of the oven, we were both so hungry and it smelled so good. We needed to eat it asap!)

Vegetarian Taco Pie with Cornbread Topping

Favorite cornbread (this is the one I use)
2 medium sweet potatoes, peeled and diced
1 1/2 cup canned black beans, drained
1 cup corn, fresh or frozen
2 cups spinach, roughly chopped
2 red peppers, roasted
3 tablespoons cilantro, chopped
3 cloves garlic
1 1/2 teaspoons cumin
1 teaspoon chipotle chili powder (or regular)
1 teaspoon salt
1 tablespoon lime juice
1 8 oz can sliced black olives, drained
1 1/2 cup shredded cheddar cheese

1. Preheat the oven to 425 degrees. 
2. Put the diced sweet potatoes into a pot and cover with water. Place on a burner at high heat, cover, and bring to a boil. Let boil for 10-15 minutes or until sweet potatoes are soft. 
3. While the sweet potatoes are cooking, prepare your favorite cornbread recipe and set aside. (Note: I had already-roasted red peppers in the freezer. You could use roasted red peppers from a jar, but if you're using fresh, now would be a good time to throw them into the oven.)
4. Once the sweet potatoes are soft, drain the water. Mix in the next 10 ingredients.
5. Pour the sweet potato and black bean mixture into a pie plate. You will have extra left over if you are not using a deep dish pie plate. 
6. Smooth the mixture, and spread the sliced black olives on top. Then sprinkle the shredded cheese on top of the olives. 
7. Finally, top with the cornbread mixture, spreading gently to cover the whole surface. 
8. Bake for 30-35 minutes, or until a toothpick inserted into the middle comes out clean. (It might have the taco mixture on it, but make sure there is no uncooked cornbread batter.)
9. Serve with sour cream, salsa, and a few avocado slices. 


p.s. Happy Memorial Day! And thank you to all those who have served (and to their spouses and children for sharing them).


Like what you just read? Share it with a friend! You can also follow ktmade on TwitterFacebook, or Instagram so you'll never miss a post. And you'll earn my undying affection!

This Week in My Garden: May 21, 2015


 Not out of the woods yet! 

Man, these New England temperature drops are rough. I don't think it ended up dipping below 38 degrees last night, but I pulled things into the garage and covered plants that were already in the ground just in case. And they're warning of frost for Friday night. I'm getting quite good at this moving the plants in-moving the plants out business. 

I'm about ready to throw up a greenhouse in our front yard.  

The garden is such a hodge podge this year. Some plants from seed, some starts from Gardener's Supply, some from Jericho Settlers Farm, some from Red Wagon Plants. And we don't even have everything in the ground yet. 

Jericho Settlers is a small farm about 5 miles from us, and I stopped by there Sunday for their annual plant sale. $38 later, I left with 5 tomato plants (2 slicers, 3 roma-style), 3 eggplant plants, and 4 zucchini plants. 

Then yesterday outside the grocery store, someone from Red Wagon Plants was putting out their seedlings and I chatted with him a bit about the beautiful day and our garden. He asked me if I needed a tray, and I said I didn't because I was just grabbing a pot or two. We chatted some more while I grabbed a rosemary plant, and then a dill plant, and then a basil plant, and then another basil plant. And then, as I juggled 4 pots in my arms, we laughed, and he gave me a tray and I added another basil plant and an oregano plant. I just can't help myself with the plants!

As you can see, I've begun putting in our soaker hose, which will hopefully help out with happier plants and no squash mold. And I planted three rows of radishes and some wildflowers this week. I'm skeptical about the wildflowers. The back of the package told me to sprinkle them across the growing area and then "rake them in," which I did. But I can't see that working super well. 

What's left to do? Put down black plastic for the squash and melon plants (also, buy those or put in the seeds - haven't decided yet), finish the soaker hose, plant the green beans, put the new herbs in the ground, plant the cucumbers, and plant some more flowers.

Oh, and address the little grass infestation we have here. 


But we're getting close to having everything in the ground, and I'm feeling that excitement from seeing new growth, even while I rush plants in and out of the garage. 

I'll be sharing our garden progress every Thursday during this growing season. I'd love to hear what's happening in your garden, and if you write about it, please share a link to your blog in the comments!

p.s. Previous weeks: May 14, May 7

p.s.s. I've never grown oregano before and don't use it much in my cooking, but it looked so pretty. If you have a way you love to use oregano, please share!


Like what you just read? Share it with a friend! You can also follow ktmade on TwitterFacebook, or Instagram so you'll never miss a post. And you'll earn my undying affection!

The Robin


A robin tried to make a nest in the light fixture on our back porch.

I realized it one day as I was working at the dining room table, and I heard a scratching sound at the wall. I went over to investigate, and as I stuck my face up against the glass of our back door, a robin flew away. I poked my head out and saw the mess of straw and bits of this and that packed in between the metal fixture and our siding - not quite a nest yet but clearly the result of hours of flying back and forth and tucking it all into place.

That evening I told my wife about it, and she said that we had to get the nest down.

Why? I asked, suddenly dismayed. Wouldn't we love to have little baby robins outside our door?

The weather was warming up, she reminded me. And once we started using the deck and going in and out of the door, the robin wouldn't want to be there. She would be afraid and might leave her eggs.

We got on the computer just to be sure, and there were countless posts about people dealing with the same issue. If we let the robin finish building her nest and lay her eggs there, there was a good chance she would get disturbed or scared by our constant in and out and likely end up abandoning her eggs.

So the next afternoon, I reached up and began pulling down each piece of straw from the light fixture. I could feel her looking at me, her beak hanging open, her eyes filled with pained horror. I stopped and looked around.

How could you do this? she was asking me. How could you rip apart this home that I've been so carefully building? Why? Why? Why?

I'm so sorry, I said out loud. I looked around into the trees.

I'm so sorry, I said to the sky.

I know you put so much into building this little home for them. I know you don't understand, but you'll find another place. You will find another place. I promise.

I leaned against the wall of our house and closed my eyes and held the mass of prickly straw and grass in my hands.

I promise. 

There's a message for me in there, I think.

I'm trying to listen.


p.s. Two years ago, talking about girls and bullying.

Like what you just read? Share it with a friend! You can also follow ktmade on TwitterFacebook, or Instagram so you'll never miss a post. And you'll earn my undying affection!


Know When to Fold 'Em


Sometimes you just have to laugh at yourself. And then call other people over and encourage them to laugh at you too so that you remember not to take things so freaking seriously (at least things that are really, truly not that serious).

Like infinity scarves.

I was attempting to make this scarf - so cool, right? It's a scarf that you can snap together to wear as an infinity scarf or unsnap to use as a blanket on long trips (or in my frigid office). And then my sewing machine broke, and I brought it to get fixed, and they fixed it. Except it still wouldn't work. And there was a lot of cursing and stomping of feet and feeling very sorry for myself about the stupid sewing machine.

One of my neighbors had mentioned a while ago that she taught a sewing class, so I stopped by her house to ask if she had any ideas. She did. I took her suggestions and changed the needle (ballpoint wasn't working for the knit + the snap tape I was using), and I put tissue paper between the knit and the machine to help with the feeding. Bam. It worked.

I was so jazzed. I sewed that sucker right up, patted myself on the back, and...realized I had sewn the snap tape on the wrong side. So the scarf snaps but in a bulky, obvious way. Not at all cute like the tutorial.

I gave up. Ripping out the seams would destroy the soft knit.

So I headed to the bathroom to take pictures of myself in the mirror with the scarf  - I hoped they would convey my frustration, give-up-ness, and annoyance while not looking terrible. I was writing a post in my head about trying again when things don't work out, and it was going to be very profound, and I was thinking about how the perfect facial expression would convey that I was defeated but would rise again. Guys, I was really trying. This was serious business. But I was so cranky, and none of them looked right. I put down my phone in a huff and walked away.

When I picked it up again and scrolled through the photos, I couldn't help but laugh. What a ridiculous, vain way to spend 10 minutes of my life - the blogger mentality run amuck. And I just had to share it with you guys because I'm not always good at laughing at myself. When I am, I figure I should let other people join in.


p.s. The Messy Shot


p.s.s. I recognize that the scarf looks relatively cute in these photos, and I may still wear it. But it's a little uncomfortable with the enormous snap bulky situation at the back of my neck. I'll play with it a bit when I'm not so cranky. 


Like what you just read? Share it with a friend! You can also follow ktmade on TwitterFacebook, or Instagram so you'll never miss a post. And you'll earn my undying affection!


Cheese + Chive Fried Grits


I made these with stoneground yellow grits from Sylvan Falls Mill in Georgia (courtesy of my step-mom). 

I'm a grits girl. Always have been. Always will be.

And in a kind of surprising coincidence, my wife is too. Though she had not or could not eat many of my favorite Southern or Cajun foods (being Jewish and from the North), she had grown up eating grits because one of her best childhood friends had a mother from South Carolina who made them. And she actually introduced me to stoneground yellow grits, which have a nuttier flavor than the traditional white grits I grew up eating and are now what we keep around the house.

We have a new favorite brunch spot in downtown Burlington, and we almost always get a side of grits. The first time we ordered them, we were surprised when the server brought two triangular patties to our table rather than a bowl of grits. I've had fried polenta, which is essentially the same thing, but these tasted like the delicious cheese grits I've always loved - just fried.

And we all know the only way to make a perfect food better is to fry it.

I think The Swingin' Pinwheel deep fries theirs (though not battered), but that's a lot of work and also mostly unnecessary. We just pan fried ours in a little oil, and they were heavenly. A little crunch on the outside and cheesy, creamy goodness on the inside. Yes please.


Cheese + Chive Fried Grits 

1 cup yellow grits
3 cups water
1 teaspoon salt
1 cup grated cheddar cheese
2 tablespoons chopped chives

1. Pour grits, salt, and water into a pot and bring to a boil.
2. Once the water is boiling, turn the heat down, cover, and simmer for about 15 minutes, stirring frequently to avoid sticking.
3. While the grits are cooking, line a 9x9 pan with two pieces of parchment paper - one going in each direction.
4. Once the grits are creamy and have soaked up all the water, stir in the cheese and the chopped chives. (If you don't want to fry your grits, you could enjoy them just like this.)
5. Pour the grits into the pan and place in the refrigerator for at least an hour (overnight is fine).
6. Once the grits have chilled, cut them into triangles and pan fry them over medium high heat with a little oil. You don't need much - maybe a tablespoon. Canola or grapeseed oil works best because of the temperature.
7. Let the triangles fry on each side for about 3-4 minutes. Once both sides are nice and brown, put the fried grits onto a paper towel and then serve.

A note about the grits to water ratio: if you look up how to make grits online, most recipes will tell you to use a 4:1 ratio of water to grits. I always use a 3:1 ratio because they cook faster, and I like that the grits retain a little of their structure for a denser, nuttier dish.

These can be a breakfast food, but they don't have to be. I served ours with salad for dinner.


p.s. Boiled peanuts


Like what you just read? Share it with a friend! You can also follow ktmade on TwitterFacebook, or Instagram so you'll never miss a post. And you'll earn my undying affection!


Weekend Reading: Become a Better Person


Get outside. And when you've gotten all the fresh air and sunshine you can handle, here's your quick and dirty weekend reading list from around the web, guaranteed to make you a better human being.*

Become...

A more social person: At least at networking events, that bane of introverts' existence.


A fancier person: Or look like one, because only fancy people make pavlovas

A more accepting person: Stop the abuse. 


A more mindful person: Maybe you're tired or hungry or restless. Or avoiding. Cultivate curiosity for what you are experiencing

A more hopeful person: In all the mess, see also the goodness of people, the way they allow themselves to be cracked open for others


A tidier person: Perhaps the Universe is telling you to get on this like it seems to be telling me to.

*As I've said before, simply reading these articles probably won't make you a better person. But they're interesting, and anyway, I recommend seriously considering whether you're perfect already - just the way you are.


p.s. When Life is Hard


Like what you just read? Share it with a friend! You can also follow ktmade on TwitterFacebook, or Instagram so you'll never miss a post. And you'll earn my undying affection!

This Week in My Garden: May 14, 2015


Even though I had to move the cherry tomatoes into the garage last night because of a frost warning, we're getting going here! I got all the rest of the beds prepared last weekend - a ton of work, but such high reward.

After talking more about what we wanted and getting feedback from you guys, some of my colleagues, and the people at the local garden supply store, we made a few little changes to our garden plan - adding in eggplant, cucumbers, brussels sprouts, and radishes and moving our herb location. We spread the brussels sprouts out because they take up so much space. Also, this gives us an opportunity to do a little experimenting and see which bed works best for them.


The good news at the garden store is that lots of people lost their herbs over the winter. Not good for them, of course, but it let me know that we probably didn't do something wrong with the chives, rosemary, and thyme - it was just a crazy cold season.

We only put in those plants that are hearty enough to withstand the last lingering frosts - the brussels sprouts, chives, and thyme (we'll be adding rosemary too, but I got sidetracked and left the garden store without it) - and the cherry tomatoes because I can move them in and out of the garage. With the sugar snap pea plants finally sprouting after several days of heavy rain, I'm ready to get more seeds and starts into the ground. I thought I'd get more seeds in the ground this week, but with lots of late nights at work, it was all I could do to snap these pics with my iphone on a Jammer walk.

We're planning to get a little fancier this year too. On the recommendation of Jess in last week's comments, we bought a soaker hose to use in the beds to limit the possibility of squash mold and help conserve water. We haven't installed it yet, and I'm considering returning it and buying a different kind. The one we bought has evenly spaced holes throughout, and I want to get one where you can cut it to specific lengths and mix in regular garden hose so that we don't end up watering the ground in between the beds.

We'll also be using black plastic with our melon plants, a suggestion from one of my colleagues. The plastic helps heat the soil and retain moisture, both major issues for melons.

And on the other side of the yard, the raspberry bushes that we put in last year look about as healthy as a plant could be!


I'm curious what's going on in your garden. Share in the comments, and leave a link to your blog if you're writing about it!


p.s. Last week in my garden


Like what you just read? Share it with a friend! You can also follow ktmade on TwitterFacebook, or Instagram so you'll never miss a post. And you'll earn my undying affection!


Eyes on the Prize


I'm having one of those weeks where your eyes are locked on the finish line, and you're just hoping you can make it there without tripping over your own shoes. 

The good news is that I've never experienced a Wednesday that wasn't followed by a Thursday, or  a Thursday that wasn't followed by a Friday. I don't know about you, but no matter what I do, the next morning, there it is. The week keeps moving forward. 

While I do try not to spend my life in a constant "it'll be better when..." cycle (or at least I think about trying not to), sometimes a little future thinking helps to soften the rough days. 

In that vein, here are the top 10 things I'm using as motivation to keep those feet moving:

1. Vacation. 

We're still in the planning stages, but I will definitely be taking time off in the coming months to see friends and family and enjoy the beauty of Vermont (an absolutely necessary move so that we can be chummy again after that frigid winter). 

2. Raspberries. 

I check the bushes every day. They look healthy and happy and bigger than last year, and I think I'll burst from excitement when I pluck off that first red berry. It's like growing candy in our own yard. 

3. Reading on the back deck. 

It's been weeks since I've settled in with some fiction, and the idea of the sun on my face, a cool drink in my hand, and a good book on my lap is ecstasy.

4. Slow weeding. 

I won't deny that weeding can get overwhelming when I'm trying to rip out the major offenders as I run by the garden on my way to work. But I actually love it when I have an hour to wander through the rows, thinking about nothing and everything as I tend to my plants.

5. Homemade ice cream.

Enough said. 

6. A screen door in the rain. 

In my opinion, the smell of summer rain is a sign that there is a divine being. We don't have screens on our oddly-sized front windows or a screen door, but we'll be getting one soon. I can't wait to enjoy the sound and the smell of a good soaking while I putter around the house. (also, puttering)

7. CSA pick-up. 

Thursday afternoons during the summer find me at Intervale Community Farm grabbing up vegetables and fruit and flowers. And since I pay in full at the beginning of the season, it feels like I'm walking out each week with the best bag of free swag ever. 

8. Flowers on the dining room table. 

I don't allow myself the luxury of flowers most of the year because they feel like an unnecessary expense and because I know I'll have more flowers than I know what do with once the CSA begins in the summer. My dining room table is ready.

9. Lazy breakfasts on the front porch. 

I love eating breakfast in our adirondack chairs (plastic, from the hardware store) while Jammer monitors the comings and goings in the yard almost as much as I love brunch. More? Perhaps.  

10. Sleeping in. 

Maybe this is just the tiredness talking, but there is really nothing that I want more right now than to sleep until I can't sleep anymore and then to force myself to stay in bed and sleep some more. There's always a little sadness for the loss of the morning hours, but at this moment, I'm willing to make the trade.

What's on your list?


p.s. The Great Outdoors


Like what you just read? Share it with a friend! You can also follow ktmade on TwitterFacebook, or Instagram so you'll never miss a post. And you'll earn my undying affection!

DIY Photography Background


This isn't a tutorial so much as a general description of this simple project, mainly because it was so easy that it didn't even occur to me to put it on the blog until my wife asked, "Are you putting this on the blog?"

By then I was almost finished, but I figured I'd snap a few shots of the final stages and share it here with anyone who's trying to find a super quick and inexpensive way to add a little diversity to their photography backgrounds for food or product shots. 

Because I had deconstructed a falling-apart shelving unit in our utility room, I had a pile of 2 x 4s just hanging out in my garage. So I spent zero dollars on this project, which was the perfect price point for me. 

Using a circular saw, I cut the boards so that they were all an equal length - 5 of them. My process was about as haphazard as you could get. I cut the first board about how long I thought I'd like it to be, and then I used it as a rough guide for the other cuts. Once those were done, I cut two other pieces a little shorter to work as the cross supports. 

I set down the support pieces parallel to each other about a foot and a half apart, covered the tops of both of them in wood glue and then laid each of the 5 equal length pieces perpendicular across those two support pieces. 

Then I put a heavy board on top of the whole thing (one of the shelves in the shelving unit I took apart), put some more heavy stuff on that and let it sit overnight so the glue could really do its thing. 

And it's the first time I took a picture: 


Fancy work space, huh?

The next day, I used some leftover white paint to give it a quick couple coats in the morning.


Then I came back in the afternoon and sanded it down very lightly with my power sander (but you could just use sandpaper) to give the paint a little softer look. 

And that's it. Aside from the time for the glue and paint to dry, I spent about an hour and a half on the project. 


I've been enjoying trying to improve my food photography game - it is not my strongest area, for sure, and having very little natural light in our house doesn't help. A portable background that I can carry outside or to whichever window is getting the best sun in that moment is quite useful. 


p.s. I've come a long from here (wheat-free yogurt pancakes).


Like what you just read? Share it with a friend! You can also follow ktmade on TwitterFacebook, or Instagram so you'll never miss a post. And you'll earn my undying affection!

Project Pie: Vegan Maple Pecan Pie with No Refined Sugar


Project Pie: I'll be baking 24 pies before Pi Day 2016 to get over my fear of baking pies. And to eat delicious things. You can join me by posting about your pies in the comments or tagging your twitter, instagram, or facebook posts with #projectpie. Make something gooey and delicious!

Pecan pie was pretty standard holiday fair in my childhood home. There might be some discussion about whether we added on an apple pie or pumpkin pie (which I didn't like as a kid), but there was no question that twice a year - Thanksgiving and Christmas - my mom would make that sweet, gooey dessert.


One Thanksgiving in high school, I was tasked with putting together the pie - not a difficult job since we used a prepared pie crust and the filling essentially involves mixing a bunch of things together. But it looked funny when I put it into the oven, not quite brown enough. I figured maybe it caramelized in the heat and got that dark rich hue from cooking. Unfortunately, after an hour at 350, it looked even worse, like a puffed up pecan cake inside a pie shell.

"But I did everything the directions said!" I told my mom. She picked up the recipe and scanned it. I looked over her shoulder.

"Oh," I said quietly.

 I looked at her sheepishly. "I put in two cups of flour instead of two tablespoons."

She burst out laughing. "Well that'll do it."

I think we ate it anyway. Perhaps I'd invented some new confectionary delight, and we didn't even realize it.

That was the only time I ever made pecan pie, in part because we had it less as I got older, and in part because I've never made it in my own home.

When I started Project Pie, one of the first pies my wife asked about was pecan. And I told her there was no way I could make a pecan pie that could meet our dietary restrictions. It was all eggs (me) and corn syrup (her). But the idea stuck in my head, and a week ago, I googled "pecan pie without corn syrup" and "maple pecan pie" and "pecan pie flax egg" just to see if anything like that was in the realm of possibility. Turns out, it is. I combined a bunch of different recipes and added in some of my own substitutions, and folks, I am redeemed.

When you bite into a piece of gooey, pecan-y goodness, you can't deny that Southerners know what they're doing. It even works when you change everything up and prepare it with ingredients that would make my grandmother shudder!


Vegan Maple Pecan Pie
Adapted from Epicurious 

One crust (of your choice - this is my go-to*)
2 tablespoons chia seeds, ground
6 tablespoons warm water
1 cup maple syrup
3/4 coconut palm sugar
1 tablespoon flour (I used whole wheat)
3 tablespoons earth balance (or other vegan margarine), melted
2 teaspoons vanilla
1 1/2 cup chopped pecans
1 1/2 cup pecan halves for topping (optional)

1. Preheat oven to 350, and prepare crust.
2. Mix together ground chia seeds (fresh ground are best, but you can find them pre-ground in some health food stores) and the warm water. Place in the refrigerator for 5-10 minutes.
3. Combine the maple syrup, coconut sugar, flour, earth balance, and vanilla in a bowl. Once the chia seeds and water have reached an egg-y consistency, pour them into the maple syrup mixture.
4. Pour the chopped pecans into your pie crust, and top with the maple syrup mixture.
5. Arrange the pecan halves on top and place in the oven on a baking sheet (to catch drips) and bake for 55 minutes. Remove from oven and place on a pie rack to cool.

p.s. Making recipes from my childhood that my wife can eat is my favorite

* I prepared my crust this time by hand instead of in the food processor with this recipe - just to see how that would go. I didn't like it nearly as well - it was dry and crumbly. I did have to roll it out twice because I got it stuck the first time, so perhaps that's what went wrong?

Like what you just read? Share it with a friend! You can also follow ktmade on TwitterFacebook, or Instagram so you'll never miss a post. And you'll earn my undying affection!

Weekend Reading: Become a Better Person


Happy Friday, folks. I always think I've never needed Friday to arrive more than I did that week. And it's true once again. Hopefully I can be present to happiness this weekend so it doesn't whoosh by without my noticing! 

Here's your quick and dirty weekend reading list from around the web, guaranteed to make you a better human being.*

Become...

A well-spoken person: Good news. When you're talking about the interwebs, the dictionary (and John Green) say either pronunciation - Gif or Jif - is correct


A more satiated person: Make this chicken.  Not fancy, but the best chicken I've ever made.

A more caring person
Never say the wrong thing again. Comfort in. Dump out.  

A happier person: How could quotes from goats not make you happier?

A healthier person: If you have a desk job, it's time to take the plunge and look ridiculous sitting on a giant ball all day


A more appreciative personOf your mama. And of the power of showing up for the people you love. 

*As I've said before, simply reading these articles probably won't make you a better person. But they're interesting, and anyway, I recommend seriously considering whether you're perfect already - just the way you are.


p.s. Cherry Chocolate (Green) Smoothie


Like what you just read? Share it with a friend! You can also follow ktmade on TwitterFacebook, or Instagram so you'll never miss a post. And you'll earn my undying affection!