Project Pie: Pear Cranberry Pie

Project Pie: I'll be baking 24 pies before Pi Day 2016 to get over my fear of baking pies. And to eat delicious things. You can join me by posting about your pies in the comments or tagging your twitter, instagram, or facebook posts with #projectpie. Make something scrumptious and gooey!

I was pretty worried as I walked out of the house with the sticky pie plate, setting it gingerly on a towel in the passenger seat. The pie looked okay, but I could see whole cranberries poking through the top, and I was concerned they hadn't squished down and mixed with the pears while it cooked. What if they weren't sweet? What if the whole thing tasted like crap, and here I was bringing it to a big Friendsgiving potluck? 

I was first at the dessert table after I'd finished my meal, anxious to test a piece out before anyone else got to it. I had a notion that if it wasn't any good, I'd just grab the pie plate and walk it out to my car before anyone else had a chance to eat any. 

I cut myself a slice and took a bite. 

You guys.

It's hard to pick favorites among the 18 pies I've made so far. Can I really compare the flavors of something I ate this weekend to something I ate six months ago?

Probably not, but even so, this pie is my favorite. 

The distinct sweetness of the pears, thinly sliced and perfectly soft, combined with the slightly tart pop of a cranberry, combined with the buttery, flaky crust? It's the closest to perfection I've come in the pie-making process. 

It tastes like a cozy fall afternoon and a fresh spring day at the same time. I want to eat this pie forever and always. 

Pear Cranberry Pie (with spelt crust)
Adapted from The Joy of Cooking

Crust:
2 1/2 cups white spelt flour (or sub all purpose)
1 teaspoon white sugar
1 teaspoon salt
8 tablespoons cold unsalted butter
1/2 cup shortening, room temperature
1/2 cup plus 1 tablespoon ice water
egg or milk + sugar for glaze

1. Quickly mix the flour, sugar, and salt together in a large bowl. 
2. Break the shortening into large chunks and cut your butter (from the freezer) into small pieces. Add the butter and shortening to the flour mixture. Cut it into the dry ingredients by chopping vigorously with a pastry blender or cutting it with two knives. Work quickly so the butter does not melt. Make sure you are getting all the flour off the bottom of the bowl. Stop when the mixture has some pea-sized pieces and is mostly a consistency of dry, coarse crumbs, like cornmeal. 
3. Drizzle the ice water over the top. Using the blade side of a rubber spatula, cut into the mixture until it is evenly moistened and small balls begin to form. If balls of dough stick together, you're done. If they don't, drizzle 1-2 more tablespoons of water over the top. 
4. Press the dough together until it forms a ball. It should be rough, not smooth. Divide the dough in half and press each into a flat, round disk. Wrap tightly in plastic and refrigerate for at least 30 minutes. You can refrigerate for up to several days. 

Cranberry Pear Filling:
5 barlett pears, peeled and sliced thinly
1 1/2 cups whole cranberries
3/4 cup sugar
2 tablespoons cornstarch
2 tablespoons lemon juice

1. Combine all ingredients and let stand for 15 minutes.

Putting it together:
1. Preheat the oven to 425 degrees. 
2. Roll out the dough on a lightly floured surface, beginning in the center and rolling out from all directions. Roll the dough about 3-4 inches wider than your pie pan.
3. Transfer the dough into your pie pan by rolling it loosely around your rolling pin and then unrolling it into the pie pan. Press the dough over the bottom and into the corners of your pan. Trim the edges of the dough, leaving a 3/4 inch overhang, and then tuck that overhang underneath itself.  (If you're able to eat eggs, do an egg wash over the bottom crust to seal it from the pie filling.)
4. Put the bottom crust into the refrigerator (preferably for at least 30 minutes). Roll out the top crust in the same way, though a little smaller. Pour your filling into the bottom crust and top with the top crust. Cut steam vents in the middle. Crimp the rim with a fork or make a decorative edge. 
5. Place the pie pan on a large baking sheet and place in the oven. Bake for 30 minutes.
6. Reduce the oven temperature to 350 degrees and bake 25-30 minutes or until bubbles juice through the vent. 
7. Let cool completely on a rack (this step is important so that all the juices don't just flow out when you cut the first piece).

p.s. I can't even decide on a runner up in the sweet category. Maybe the blueberry pie?

Like what you just read? Share it with a friend! You can also follow ktmade on TwitterFacebook, or Instagram so you'll never miss a post. And you'll earn my undying affection!
Project Pie: Vegan Pumpkin Pie

image.jpg

Project Pie: I'll be baking 24 pies before Pi Day 2016 to get over my fear of baking pies. And to eat delicious things. You can join me by posting about your pies in the comments or tagging your twitter, instagram, or facebook posts with #projectpie. Make something scrumptious and gooey!

You're probably not surprised to learn that I am such a delight to be around that I rarely do anything that bothers my wife. 

It's true. She is especially not bothered by the way I always choose to make a complex, brand new recipe right before we have guests coming for dinner and then freak out about whether it will be any good at all, while simultaneously freaking out about the inevitable mess I've made. Obviously, delightful. And she's not bothered by how I decide to throw something in the oven that needs to bake for, say, 30 minutes when we need to be walking out the door with it for a potluck in, say, 25 minutes. Again, delightful. 

And, I mean, can you blame her? Who wouldn't love those things about me?

Sigh.

Luckily we didn't have to bring this pie to a potluck, and we weren't serving it to guests. (Though I did make us late for a dinner date because I forgot the pumpkins were in the oven, and we had to drive back and take them out and, you know, turn off the oven.)

But this step of my 24-pie journey has me thinking about how I like to keep things exciting in the kitchen. When I started Project Pie, I envisioned each pie in my future getting progressively more delicious, more beautiful, more restaurant/cover of a magazine-worthy. I imagined taking a bite of pie, my eyes lifting slightly before I shut them, my head bowing in a tiny prayer, my mouth chewing slowly before opening and saying in a hushed whisper, "Voila. I have done it. A vegan whole wheat pie crust for the masses!" 

I have weird fantasies. 

If you've been following along, you know that's not how it has happened. Not at all. 

For starters, I rarely make the same thing twice. And when I do, I'm hardly precise about it. It's difficult to perfect a pie crust you've only made once, but I'm always ready to try something new, check out a different variation, substitute this fat for that one because I forgot to buy the one the recipe calls for. 

When the new crust is falling apart or sticky or won't come out of the pie plate, I curse and promise myself I'll use the trusty ol' standby recipe next time. And then next time rolls around, and I find a new one with coconut oil and spelt flour, and I'm off to the races. 

I never seem to learn. 

But, you know, we haven't once thrown away a pie. Or even a slice (except for that one piece of peach ginger pie that molded as a lesson in how stupid self restraint is). 

Because, hello-o. It's pie. 

And pie is delicious even if the crust is a little crumbly or the filling leaks all over the pie plate when you cut it. 

I'm not going to re-post the recipe here because I followed Angela's almost note for note. The big difference is that I used half white spelt and half whole wheat flour and subbed in coconut palm sugar. My crust was...less than stellar. In the end, it tasted fine, but it definitely did not roll out. I basically smushed it into the pie plate and hoped for the best. The filling on the other hand? Delicimous. 

So, eyes closed, low whisper, "Voila! I made a pumpkin pie! It was yummy!"

The end. 

p.s. Opting out. (Like opting out of perfection when it comes to pies)

Like what you just read? Share it with a friend! You can also follow ktmade on TwitterFacebook, or Instagram so you'll never miss a post. And you'll earn my undying affection!

Project Pie: Banoffee Pie

Project Pie: I'll be baking 24 pies before Pi Day 2016 to get over my fear of baking pies. And to eat delicious things. You can join me by posting about your pies in the comments or tagging your twitter, instagram, or facebook posts with #projectpie. Make something scrumptious and gooey!

Sometimes it is 9:00 on a Saturday night, and you're using a vegetable peeler to shave chocolate onto a pie that has taken you entirely too long to make for your neighbors because they are so nice and help you out when you can't get the oil filter off the riding lawn mower and tell you what to do when your carbon monoxide monitor is going off and you can't figure out why and walk the dog when you get home later than you thought and are simply your surrogate parents up here in the (rural suburban) wilds of Vermont, and you are rushing out the door with a freshly topped pie so that you don't get to their house later than is acceptable to drop off a fresh pie on a Saturday night, and you realize that it's gotten dark since you started this endeavor and you haven't taken any photos of the finished pie, and though the pie was created as a thank you, it is also part of your pie project and you must take photos of it, and so you slap it down on the dining room table and take a couple terrible photos and run out the door into your car because walking the 0.2 miles to your neighbors' house would take too long, so you drive, holding the pie in one hand while steering with the other, and for a moment you wonder if this is completely ridiculous, if anyone actually makes pies for their neighbors anymore, and then you see the look of surprise and delight on your neighbor's face and you get a hug and you realize this is why you wanted to live in a neighborhood in the first place, and you drive home and make yourself a little snack out of the leftover ingredients and eat it over the sink. 

Because sometimes that's how pie-making goes.

Banoffee Pie
Adapted from First Prize Pies

Crust

6 full sheets of graham crackers
5 tablespoons unsalted butter, melted

1. Crush up the graham crackers in a plastic bag with a rolling pin or whirl them in the food processor until they are finely ground. 
2. Pour in the melted butter and mix with your hands.
3. Press the mixture into a 9-inch pie pan and chill in the fridge.

Filling

1 can (14 oz) sweetened condensed milk

1. Remove the label from the can of sweetened condensed milk. 
2. Place the unopened can on its side in a pot of water deep enough to cover the can with at least 2 inches of water. 
3. Bring the water to a boil and allow the can to boil for 2-3 hours. IMPORTANT: Do not let the water level fall below the can. The can must remain submerged or it could burst.
4. Remove the can from the water with tongs and allow the can to cool COMPLETELY before opening (or it could shoot hot dulce de leche at you). 

Putting it Together

3 bananas
1 1/2 cups heavy whipping cream
1/4 cup sugar
Shaved dark chocolate (optional)

1. Into the chilled graham cracker crust, spread the now-cooled dulce de leche (made from the condensed milk).
2. Top with rounds of the bananas. 
3. With a mixer, whip the cream with the sugar until stiff peaks form. Spread on top of the bananas.
4. Top with shaved chocolate.

Keep in the refrigerator. Best eaten within 2-3 days. 

Though I didn't have a piece of the pie, my neighbors reported good things, and my little snack made up of the components was divine. Also, all I want to do all the time now is make my own dulce de leche and eat it out of the can. 

Double Chocolate Whole Wheat Zucchini Bread

So far I have been unable to grow zucchini. I long for that experience others bemoan - the zucchini overload, where everything they make has shreds of the green veggie, where they are bringing armloads to work colleagues or leaving a few each day in unsuspecting neighbors' mailboxes. 

But no. Last year we successfully grew a single zucchini. This year, none. One started, got about the size of my thumb and then died on the vine. I'm at a loss. Squash in general does not appear to be our thing. 

Thankfully we're getting zucchini from our farm share, and I pretended that the one I had left in the refrigerator was so overwhelming that I had no choice but to make a loaf of double chocolate zucchini bread. I mean, what else could I do with that guy??

With all the pies I've been making of late (one had zucchini!), cookies and cakes and other baked goods have been missing from our kitchen. As a pie lover, I wasn't really feeling the loss, but when my wife started making puppy dog eyes at me before a busy week of trial (for her), my mind went straight to that zucchini in the fridge and the container of cocoa powder in the cabinet. 

Double Chocolate Zucchini Bread 2.jpg

Double Chocolate Whole Wheat Zucchini Bread
Adapted from Sally's Baking Addiction

1 cup whole wheat pastry flour
1/2 cup unsweetened cocoa powder
3/4 teaspoon baking soda
1/4 teaspoon baking powder
1/4 teaspoon salt
1/2 teaspoon instant coffee powder
3/4 cup dark chocolate chips (I use Sunspire Grain Sweetened)
2 eggs
1/4 cup canola oil
1/4 cup plain yogurt (I use lactose-free Green Valley Organics)
1/2 cup coconut palm sugar
1 teaspoon vanilla extract
1 1/2 cup shredded zucchini

1. Preheat the oven to 350 degrees and grease a loaf pan. 
2. In a large bowl, whisk together the first seven ingredients and set aside. 
3. In a separate bowl, whisk together the next five ingredients and then pour the wet ingredients into the dry and mix until just combined. 
4. Fold in the shredded zucchini. 
5. Pour the batter into the prepared loaf pan, sprinkle a few extra chocolate chips on top, and bake for 40-50 minutes, or until a toothpick inserted into the middle comes out clean. 
6. Allow to cool before serving (though don't beat yourself up if you can't wait - the smell is divine). 

p.s. Since this bread tastes basically like brownies, if you wanted to be a little crazy, you could bake it in a 9x9 pan (reduce the cooking time slightly) and then slather it with this 4-ingredient chocolate frosting

Like what you just read? Share it with a friend! You can also follow ktmade on TwitterFacebook, or Instagram so you'll never miss a post. And you'll earn my undying affection!

Project Pie: Strawberry Rhubarb Crumb Pie (Whole Wheat + Vegan)

Project Pie: I'll be baking 24 pies before Pi Day 2016 to get over my fear of baking pies. And to eat delicious things. You can join me by posting about your pies in the comments or tagging your twitter, instagram, or facebook posts with #projectpie. Make something scrumptious and gooey!

Strawberry Rhubarb Pie sounds like the perfect dessert for a Southern luncheon on a summer afternoon, but I didn't have a slice until I was an adult living in New England. I'm not sure I'd ever even heard of rhubarb before a few years ago. 

The notion that this reddish, greenish stalk that looks a lot like celery can, when mixed with sugar, turn into a deliciously sweet confection is a bit magical to me. And when I decided to bake 24 pies, there was absolutely no question that a strawberry rhubarb would be in the mix. 

We haven't grown rhubarb in the garden because apparently it takes over everything, but I do think it would be a good problem to have - Ugh. I have sooo. much. rhubarb. I guess I'll have to make ANOTHER batch of rhubarb jam.  Damn.

You see what I'm saying? 

Instead, I hunted rhubarb this year like a hungry animal, asking everyone I saw with a rhubarb-based treat where they'd gotten theirs. Person after person told me it was from their garden, and it was all gone. I despaired that perhaps there would be no strawberry rhubarb pie for me. 

And then a couple weeks ago my wife called from the co-op and told me there was rhubarb - should she get some? Oh, I despaired. I was leaving for BlogHer in New York that week and wouldn't have time to bake a pie. But would it last while I was gone? Buying rhubarb and having it go bad in my refrigerator would be deeply depressing. I took a gamble and told her not to buy any, hoping there would still be rhubarb at the store when I returned. 

And glory of glories, there was. 

I even have a little left over. Ugh. So much rhubarb. I guess I'll have to make a little rhubarb compote this week. 

Darn.

Strawberry Rhubarb Crumb Pie (Whole Wheat)
Adapted from Strawberry Rhubarb Pie

Crust

1 1/4 cups whole wheat pastry flour
1/2 teaspoon salt
4 tablespoons cold Earth Balance (or other non-dairy butter)
1/4 cup shortening, room temperature
1/4 cup ice water

1. Quickly mix the flour and salt together in a large bowl. 
2. Break the shortening into large chunks and cut your butter (from the freezer) into small pieces. Add the butter and shortening to the flour mixture. Cut it into the dry ingredients by chopping vigorously with a pastry blender or cutting it with two knives. Work quickly so the butter does not melt. Make sure you are getting all the flour off the bottom of the bowl. Stop when the mixture has some pea-sized pieces and is mostly a consistency of dry, coarse crumbs, like cornmeal. 
3. Drizzle the ice water over the top. Using the blade side of a rubber spatula, cut into the mixture until it is evenly moistened and small balls begin to form. If balls of dough stick together, you're done. If they don't, drizzle 1-2 more tablespoons of water over the top. 
4. Press the dough together until it forms a ball. It should be rough, not smooth. Press into a flat, round disk. Wrap tightly in plastic and refrigerate for at least 30 minutes. You can refrigerate for up to several days. 

Filling

3-4 cups rhubarb, cut into 1/2 inch pieces
3-4 cups strawberries, halved
3/4 cup coconut palm sugar (or sub cane sugar)
3 tablespoons whole wheat flour
1 teaspoon lemon juice
2 tablespoons Earth Balance (or sub butter), cut into small chunks

1. Mix together the sugar and flour and set aside. 
2. Mix together the rhubarb, strawberries, lemon juice, and Earth Balance and set aside.

Crumb Topping

1/2 cup whole wheat flour (or whole wheat pastry flour)
1/4 cup + 2 tablespoons coconut palm sugar (or sub brown sugar)
1/4 cup Earth Balance (or sub butter), melted

1. Mix flour, sugar, and Earth Balance together until crumbly. 

Putting it Together:

1. Preheat the oven to 400 degrees. 
2. Roll out the dough on a lightly floured surface, beginning in the center and rolling out from all directions. Roll the dough about 3-4 inches wider than your pie pan.
3. Transfer the dough into your pie pan by rolling it loosely around your rolling pin and then unrolling it into the pie pan. Press the dough over the bottom and into the corners of your pan. Trim the edges of the dough, leaving a 3/4 inch overhang, and then tuck that overhang underneath itself.  
4. Sprinkle the crust with about 1 tablespoon of the sugar and flour mixture.
5. Mix the remaining sugar and flour mixture with the strawberry rhubarb mixture and pour into the pie crust. 
6. Top with the crumble mixture, and place the pie pan on a large baking sheet and into the oven. Bake for 30 minutes.
7. Let cool for 10-15 minutes on a rack. Slice and enjoy.

 p.s. Remember my strawberry basil pie? Yum. 

Like what you just read? Share it with a friend! You can also follow ktmade on TwitterFacebook, or Instagram so you'll never miss a post. And you'll earn my undying affection!


Strawberry Basil Pie (Vegan)

Project Pie: I'll be baking 24 pies before Pi Day 2016 to get over my fear of baking pies. And to eat delicious things. You can join me by posting about your pies in the comments or tagging your twitter, instagram, or facebook posts with #projectpie. Make something gooey and delicious!

I should have waited until later in the summer to make this pie, when strawberries are in season and I'll be able to pick pints of them when I pick up my farm share. But what can I say? I'm impatient. I got this pie cookbook at a cute little kitchen store in Saratoga Springs. I was immediately drawn in by the stunning photos and a few of the recipes that looked not only fabulous but also adaptable to our particular dietary needs. 

The book is separated into sections based on season and then further into months. When I told my wife I was going to be making the strawberry basil pie, she asked if I shouldn't wait a little longer, until strawberries are really in season here.

But it's one of the pies for June! I exclaimed. And it's June!

With the cold lingering these last few weeks and me spending most of my time in long sleeves, I'm looking for summer wherever I can get it. And this strawberry basil pie tastes pretty much like summer on a plate. Even warm, its subtle flavors are refreshing and light. If you're a little skeptical of the salad-like ingredients, don't be. The basil, balsamic vinegar, and pepper just provide hints of a more sophisticated flavor and keep the pie from being overly sweet.

And this crust. Yum. 

It's the best one I've made so far, significantly more like pastry dough than my regular go-to pie crust.

I also think the spelled-out method for creating the dough in the food processor was helpful for me to understand exactly when to stop processing. I might try her method with my go-to and see if that results in a flakier crust. 

Vegan Strawberry Basil Pie 
Adapted from First Prize Pies

Cornmeal Crust

1 cup Earth Balance, cut into 1/2-inch pieces and chilled
1/2 cup almond milk (or other non-dairy milk)
1 tablespoon apple cider vinegar
2 1/4 cups whole wheat pastry flour, chilled
3/4 cup cornmeal, chilled
1 1/2 teaspoons salt

1. Stir together the milk and vinegar and place in the refrigerator until ready to use. 
2. Fit the food processor with a metal blade and add the dry ingredients, pulsing once to blend. 
3. Take your milk mixture and Earth Balance out of the refrigerator. Pour the Earth Balance into the food processor and turn it on. 
4. After a couple seconds, begin slowly pouring the milk mixture through the feed tube of the food processor. Once the mixture has been added, turn off the processor. 
5. Pour the dough onto plastic wrap, bind it tightly, and refrigerate for at least an hour. (Note: The dough should come together if pressed but will not have formed a ball on its own in the food processor.)

Filling

8 cups fresh or frozen strawberries, hulled and halved
10 large basil leaves, sliced very thinly
3 tablespoons balsamic vinegar
zest of 1 lemon
2/3 cup agave nectar
1/4 cup arrowroot powder (or sub cornstarch)
1 teaspoon freshly ground black pepper
1/4 teaspoon salt
Almond milk wash, for glaze
Coconut palm sugar, for garnish

1. Preheat the oven to 425 degrees.
2. In a large bowl, mix together the first 5 ingredients. If you are using frozen strawberries, thaw and drain them prior to mixing. 
3. In a separate bowl, mix together the arrowroot, pepper, and salt. Add this to the strawberry mixture right before adding the filling to the crust.

Putting it together

1. Remove the crust dough from the refrigerator and split in half. Place one half back into the refrigerator and roll the other half into a circle on parchment paper. Transfer it to a 9-inch pie plate and trim the overhang. 
2. Place the pie plate in the refrigerator and take out the other half of the dough. Roll this second half into a circle and cut into six strips. 
3. Pour the strawberry mixture (with the arrowroot mixture added in) into the pie pan and form a lattice on the top. Trim the edges and use a fork to crimp.  Brush the top with almond milk and sprinkle with sugar. 
4. Place the pie on a baking sheet and bake for 20 minutes, turning once halfway through. 
5. Lower the temperature to 375 degrees and bake for 30 minutes more, or until the crust is golden and the strawberry juices have thickened. Cool on a rack at least an hour before serving. 

Note: Earth Balance and nondairy milk are subbed one-for-one for butter and milk in this recipe - feel free to use dairy ingredients if you can. 

p.s. I'm 8 pies in on my 24 pie challenge. Here's what I've made so far:

Vegetarian Taco Pie with Cornbread Topping

Vegan Maple Pecan Pie

Chicken Pot Pie with Herb Crust

Very Berry Mousse Pie

Passover Chocolate Mousse Pie

Whole Wheat Maple Apple Pie

Vegan Shepherd's Pie

Like what you just read? Share it with a friend! You can also follow ktmade on TwitterFacebook, or Instagram so you'll never miss a post. And you'll earn my undying affection!

Project Pie: Vegan Maple Pecan Pie with No Refined Sugar


Project Pie: I'll be baking 24 pies before Pi Day 2016 to get over my fear of baking pies. And to eat delicious things. You can join me by posting about your pies in the comments or tagging your twitter, instagram, or facebook posts with #projectpie. Make something gooey and delicious!

Pecan pie was pretty standard holiday fair in my childhood home. There might be some discussion about whether we added on an apple pie or pumpkin pie (which I didn't like as a kid), but there was no question that twice a year - Thanksgiving and Christmas - my mom would make that sweet, gooey dessert.


One Thanksgiving in high school, I was tasked with putting together the pie - not a difficult job since we used a prepared pie crust and the filling essentially involves mixing a bunch of things together. But it looked funny when I put it into the oven, not quite brown enough. I figured maybe it caramelized in the heat and got that dark rich hue from cooking. Unfortunately, after an hour at 350, it looked even worse, like a puffed up pecan cake inside a pie shell.

"But I did everything the directions said!" I told my mom. She picked up the recipe and scanned it. I looked over her shoulder.

"Oh," I said quietly.

 I looked at her sheepishly. "I put in two cups of flour instead of two tablespoons."

She burst out laughing. "Well that'll do it."

I think we ate it anyway. Perhaps I'd invented some new confectionary delight, and we didn't even realize it.

That was the only time I ever made pecan pie, in part because we had it less as I got older, and in part because I've never made it in my own home.

When I started Project Pie, one of the first pies my wife asked about was pecan. And I told her there was no way I could make a pecan pie that could meet our dietary restrictions. It was all eggs (me) and corn syrup (her). But the idea stuck in my head, and a week ago, I googled "pecan pie without corn syrup" and "maple pecan pie" and "pecan pie flax egg" just to see if anything like that was in the realm of possibility. Turns out, it is. I combined a bunch of different recipes and added in some of my own substitutions, and folks, I am redeemed.

When you bite into a piece of gooey, pecan-y goodness, you can't deny that Southerners know what they're doing. It even works when you change everything up and prepare it with ingredients that would make my grandmother shudder!


Vegan Maple Pecan Pie
Adapted from Epicurious 

One crust (of your choice - this is my go-to*)
2 tablespoons chia seeds, ground
6 tablespoons warm water
1 cup maple syrup
3/4 coconut palm sugar
1 tablespoon flour (I used whole wheat)
3 tablespoons earth balance (or other vegan margarine), melted
2 teaspoons vanilla
1 1/2 cup chopped pecans
1 1/2 cup pecan halves for topping (optional)

1. Preheat oven to 350, and prepare crust.
2. Mix together ground chia seeds (fresh ground are best, but you can find them pre-ground in some health food stores) and the warm water. Place in the refrigerator for 5-10 minutes.
3. Combine the maple syrup, coconut sugar, flour, earth balance, and vanilla in a bowl. Once the chia seeds and water have reached an egg-y consistency, pour them into the maple syrup mixture.
4. Pour the chopped pecans into your pie crust, and top with the maple syrup mixture.
5. Arrange the pecan halves on top and place in the oven on a baking sheet (to catch drips) and bake for 55 minutes. Remove from oven and place on a pie rack to cool.

p.s. Making recipes from my childhood that my wife can eat is my favorite

* I prepared my crust this time by hand instead of in the food processor with this recipe - just to see how that would go. I didn't like it nearly as well - it was dry and crumbly. I did have to roll it out twice because I got it stuck the first time, so perhaps that's what went wrong?

Like what you just read? Share it with a friend! You can also follow ktmade on TwitterFacebook, or Instagram so you'll never miss a post. And you'll earn my undying affection!

Project Pie: Very Berry Mousse Pie


Project Pie: I'll be baking 24 pies before Pi Day 2016 to get over my fear of baking pies. And to eat delicious things. You can join me by posting about your pies in the comments or tagging your twitter, instagram, or facebook posts with #projectpie. Make something gooey and delicious!

Saturday afternoon, in the middle of making this pie, I stopped, took myself into my bedroom, and put myself to bed. I gave myself 5 minutes. A time-out to think about my own behavior. 

We had people coming for a not-yet-cooked dinner, the kitchen looked like we'd been bombed, I broke the shell of my pie crust, the coconut cream layer was too thick and wouldn't spread properly, the pie crust was out of proportion to the amount of filling, the sun was going down so I wouldn't be able to get natural light photographs, and I'd done almost nothing on my page-long to-do list. Naturally, I did what any reasonable person would do in this circumstance. I yelled at my wife, slapped a spatula down on the counter (spattering coconut cream everywhere), and had a full-on temper tantrum. 

Unaffected by Navah's attempts at logical problem-solving, I huffed around the kitchen, slamming cabinet doors and muttering under my breath. And then some mildly sane voice, which I suspect was my therapist telepathically sending me messages from her vacation in Turkey, suggested that I walk away for a few minutes. 

So I did.

And I learned what I assume every parent knows. Time-outs are not so much about punishment as they are about resetting. When you're in the middle of the temper tantrum, there's nothing but the temper tantrum. Everything is horrible and unfixable and must be blamed on someone. 

In the five minutes that I lay on my bed, these things happened: 

1. My breathing slowed down. 

2. The thoughts in my brain slowed down. 

3. I realized that the sun would could up again tomorrow, and I could take a picture then. 

4. I had the epiphany that a fruit compote on top of the coconut cream layer would be delicious and would (1) cover up the messiness of the coconut cream layer and (2) increase the height of the filling so it didn't look so stupid in my deep dish pie pan. 

5. I thought, "I love my wife. I'd like to apologize to her and give her a hug."

6. I said a little prayer of thanks that it took less than five minutes for some space in my brain to open up and allow rational, non-panicky thoughts. 

I sat on the edge of the couch and told Navah I was sorry, and we talked about why making a pie had sent me over the edge. "If this doesn't turn out," I told her, "I won't have any recipes for my blog this week. And I'll get behind on Project Pie." 

"Couldn't you write about the failure?" she asked.

I looked at her askance. 

"Wasn't the whole Project Pie thing supposed to be about facing your fear and allowing yourself to mess up?" she asked. 

Oh, how quickly the attitude of play and experimentation gets thrown out the window. 

With just three successful pies under my belt, that old familiar expectation of perfection had plunged me into the worst version of myself. Failure was no longer an option. Especially not with an audience.

And as it turns out, it wasn't a failure. Giving myself the time to step away and let the Perfection Monster slink back into its tidy little corner allowed new ideas to bubble to the surface. The fruit compote saved the day. After Navah and I tried a little of the pie without it, we decided the "fixed" pie was better than it would have been had I not had a few mess-ups in the first place. 

It's a constant practice, this acceptance of imperfection. 

It's better with pie. 


Very Berry Mousse Pie 
Adapted from Spunky Coconut 

Prepare and bake this pie crust (or your favorite) for 10 minutes at 325 degrees. 

Very Berry Mousse

Add to your blender or food processor:

3/4 cup canned coconut milk
1/4 cup honey
1 teaspoon vanilla
1 heaping cup frozen mixed berries
2 teaspoons lemon juice
1 tablespoon + 1 teaspoon gelatin, dissolved in boiling water (add last)

Puree and pour into the cooled crust. Place in the refrigerator to set for at least 30 minutes. 

Coconut Cream Whipped Topping

Add to your blender or food processor:

2 cups coconut cream
1 tablespoon honey
1 tablespoon agave nectar
3/4 tablespoon gelatin, dissolved in boiling water (add last) 

Puree and pour onto the very berry mousse layer. Refrigerator for 30-45 minutes to allow to set up fully. 

Fruit Compote

4 cups frozen mixed berries
1 tablespoon chia seeds
1/2 tablespoon agave nectar

Bring ingredients to boiling over medium-high heat. Once boiling, reduce to a simmer and stir frequently until a jam consistency. Spread onto the cooled coconut cream whipped topping layer. 


p.s. Another coconut cream favorite - four-ingredient vegan chocolate frosting.


Like what you just read? Share it with a friend! You can also follow ktmade on TwitterFacebook, or Instagram so you'll never miss a post. And you'll earn my undying affection!

Project Pie: Passover Chocolate Mousse Pie


Project Pie: I'll be baking 24 pies before Pi Day 2016 to get over my fear of baking pies. And to eat delicious things. You can join me by posting about your pies in the comments or tagging your twitter, instagram, or facebook posts with #projectpie. Make something gooey and delicious!

This chocolate velvet pie is my wife's favorite dessert. It comes with those special feelings that holiday baked goods always have, and it gets bonus points for being adaptable. My mother-in-law served it the first time I spent Passover with Navah's family, and I've made it almost every year since then for Navah's birthday - even with all the various eating restrictions we've worked with over time.

Unfortunately, the making of it has involved a lot of cursing (from me). I can never get the chocolate to melt well and fold into the eggs without getting fudgy, and then it breaks up into little bits throughout the mousse. Navah says it's delicious and she loves it anyway, but it drives me crazy every time.

Once I started the Project Pie challenge, I realized it was time - once and for all - to get this pie right. So I asked my mother-in-law if we could make it together this Passover.


She took out this stained piece of paper with the recipe on it and told me that Navah's aunt (her sister-in-law) found the recipe in a Seventeen magazine when she was sixteen years old, and they've used it ever since, adapting it slightly to meet their Passover needs (aka non-dairy so that it can be served with the meat meal). Navah's mom learned to make it in her mother-in-law's kitchen about 40 years before she taught me to make it in hers. 


We made it with non-dairy whipping cream and kosher for passover semi-sweet baking chocolate, and it turned out perfectly. I'm going to have to try it at home again with the ingredients I generally use - coconut cream and sunspire grain-sweetened chocolate chips - to see if precisely following my mother-in-law's method will turn out a smoother pie. 

Of course, you can make this with regular whipping cream if dairy isn't an issue.


Passover Chocolate Mousse Pie (non-dairy)

7 ounces semi-sweet baking chocolate
3 tablespoons hot water
7 eggs, separated
2/3 cup sugar, separated
1 teaspoon vanilla
1 cup non-dairy whipping cream
pinch of salt

1. Preheat the oven to 350 degrees.
2. In a large mixing bowl, beat the egg whites with a pinch of salt until stiff peaks form. Gently fold in 1/3 cup of sugar and set aside.
3. In a separate bowl, beat the egg yolks with the other 1/3 cup sugar until lemon yellow.
4. Melt the chocolate and water over the stove or in the microwave. Watch closely and stop the heat (either on the stove or in the microwave) before the chocolate has completely melted. Stir to complete the melting process.
5. Mix the melted chocolate into the egg yolks.
6. Gently fold the chocolate mixture into the egg whites that you set aside earlier.
7. Pour half of the mix into a greased pie plate and bake in the preheated oven for 20 minutes. This chocolate crust should rise a bit but will sink while you let it cool (for at least 1 hour).
8. Once the crust is cool, whip one cup of the cream, reserving 1/4 cup for garnish.
9. Add the remaining 3/4 cup whipped cream to the remaining chocolate mixture and pour into the pie crust.
10. Place in the refrigerator for 2 hours - overnight.
11. Serve with a dollop of whipped cream.


p.s. As the snow melts and Spring comes to Vermont in earnest, this is something I'll be worrying about again soon.


Like what you just read? Share it with a friend! You can also follow ktmade on TwitterFacebook, or Instagram so you'll never miss a post. And you'll earn my undying affection!

Project Pie: Whole Wheat Maple Apple Pie


Project Pie: I'll be baking 24 pies before Pi Day 2016 to get over my fear of baking pies. And to eat delicious things. You can join me by posting about your pies in the comments or tagging your twitter, instagram, or facebook posts with #projectpie. Make something gooey and delicious!

After I announced my pie-baking intentions last week, I got a super nice email from Elizabeth sharing a pie crust recipe that she promised was "crazy easy." It was so kind of her to send the email ("I figure if you find a recipe that works, share the hell out of it, because sometimes finding good yummy recipes is not always easy."), and it pushed me from thinking about baking another pie to actually baking another pie this weekend. 

And she was right. Crazy easy pie crust - even with whole wheat. 

I went with an apple pie for #2. And here's the thing about apples: I am super picky about apples for eating straight. An apple must be crisp, juicy, and sweet. Not tough or grainy or mealy or tasteless or soft or bitter. I simply won't eat it. And this time of year can be a little rough on that front. My favorites are Honey Crisp and Pink Lady, but those are difficult to come by. What I see a lot of are big bags of apples that I don't really love to eat - Macintosh, Macoun, Empire. Generally not good for eating (in my opinion), especially when they've been stored since the Fall, but they are excellent for cooking. 

Those bagged apples were just begging me to make an apple pie. 

And thank goodness because apple pie is freaking delicious. I forgot a little bit until my taste buds reminded me. 

Of course everything we make in this house is a little bit wacky, so our apple pie has a 100% whole wheat pie crust (delicious) and is sweetened with maple syrup and coconut palm sugar (also delicious) and no refined sugars. But I would happily feed it to guests with no food restrictions. It's that's good. 

Navah proclaimed it the best thing I've ever baked. 


Maple Apple Pie (whole wheat, without refined sugar)

100% Whole Wheat Crust


2.5 cups flour (I used white whole wheat)
2 sticks (or 1 cup) butter or margarine (I used earth balance)
2 ounces cold water
2 ounces vodka

1. Preheat the oven to 375 degrees. 
2. Cut your butter into chunks (best if they're not all uniform in size) and put in the freezer for at least 10 minutes.
3. Add the flour and butter to your food processor and pulse 8-10 times, or until the mixture looks a little crumbly. Stop before it starts to look like cornmeal. You want some different sized buttery chunks. 
4. Pour in the water and vodka and pulse again 8-10 times until the dough starts to come together. Stop before it forms a big ball. 
5. Take the dough out of the food processor. It should all stick together at this point. Separate the dough into two equal chunks. Using a rolling pin, roll out 1 chunk of dough on a lightly floured surface until it is about an inch wider than your pie plate all the way around. 
6. Pick the crust up by rolling it onto your rolling pin and place it into your pie plate. Cut off any excess around the edges and put the crust into the refrigerator to chill while you make the apple filling. 
7. Wrap the other chunk of dough in saran wrap and put into the refrigerator. 

Maple Apple Filling

5-6 apples (I used Macintosh)
1 tablespoon butter or margarine (again, I used earth balance)
2 tablespoons whole wheat flour (I used white whole wheat)
2 tablespoons maple syrup
1 1/2 teaspoons pumpkin pie spice
1/4 teaspoon sea salt
1 tablespoon lemon juice

1. Peel and cut up the apples - I used a simple corer/slicer and then cut each slice two more times lengthwise. 
2. Put the apples into a microwave-safe bowl and microwave for 5-6 minutes. 
3. Drain the liquid from the apples and then add in the rest of the ingredients and mix until incorporated. 

Putting the pie together

1. Pour the apple mixture into your chilled pie crust. 
2. Roll out your second chunk of dough until it's about 1/8 inch thick and use cookie cutters to cut out shapes. 
3. Place the shapes onto the pie crust in a pattern that suits your fancy. 
4. Bake the pie at 375 degrees for 1 hour. If the edges start to brown or burn, use tin foil to cover them and continue cooking. 
5. Serve warm. 


As you can see from the pictures, I'm not perfect at pie crust making - the edges of my crust don't go over the edge of the pie plate. I underestimated how much crust (and how many apples) I would need to fill up the deep dish pie pan. But the idea here was to bake more pies and to stop feeling intimidated, not to be perfect. Remember the rules?

1. Make some pies.
2. Don't cry if they're not perfect.

Anyone else out there baking a pie this week? What kind? I need ideas for pie #3!

p.s. This vegan apple crisp is another great way to use those bagged apples.


Easy Chocolate Bark: 5 Flavors


Peppermint chocolate bark was one of my favorite holiday treats growing up. It still is - the perfect thing to make when you want to have something delicious that feels like the holidays but you don't have much time. It's one of those easy desserts that looks a little fancy. The whole production takes less than ten minutes.

More recently, I've discovered the joy of chocolate bark all year round. If it's possible to be easier than my childhood holiday bark with peppermint and white chocolate (melt chocolate, mix with peppermint, spread in pan), it is (melt chocolate, spread in pan, sprinkle with goodies).  If you have the right ingredients at home, you can make it in the 8 minutes before guests arrive once you remember that you forgot to pick up something sweet to finish off the meal. Or in the few minutes before bed on a Sunday night so you'll have a treat throughout the week.

The "right" ingredients are some chocolate and whatever fun goodies you can find to throw on top. You might have everything you need in your pantry right now.

I've started you off with five options for easy chocolate bark here, but the possibilities are endless.


Peppermint chocolate bark
chocolate + crushed peppermint candies

Pretzel chocolate bark
chocolate + pretzels

Fruit and nut chocolate bark
chocolate + diced apricots, raisins, and sliced almonds

Lavender chocolate bark
chocolate + dried lavender

Berry chocolate bark 
chocolate + warmed berry jam, drizzled on top and swirled with a toothpick


You could use the chocolate bark that comes in big chunks, but I like to be decadent and use chocolate chips. We're partial to Sunspire grain sweetened dark chocolate chips. They have the perfect rich flavor that I'm looking for from dark chocolate, and they help us reduce our refined sugar intake while we're shoving delicious goodies into our mouths. It's a win win.

If I haven't made it clear yet, the method for this is simple. I'm not even going to call it a recipe.

Here are the steps:

Chocolate Bark

1. In a microwave-safe bowl, microwave 2 cups chocolate chips at 15-30 second intervals, stirring in between, until melted. (You could also use a double-boiler on the stove, but I go the quickest route)
2. While it's melting, lightly grease a cookie sheet and then place a piece of parchment paper onto the cookie sheet to cover it.
3. Pour the melted chocolate onto the cookie sheet, and spread it into a thin layer.
4. Sprinkle goodies on top.
5. Place in refrigerator for about an hour. Break up the pieces once hard.
6. Store chocolate bark in a sealed container in the refrigerator.

Other yummies to sprinkle on top:
cinnamon and chili powder
dried cherries and cranberries
sea salt and swirls of caramel
pistachios and pomegranate
marshmallows and peanuts

You can really go wild with the options. Think of your favorite ice cream flavor, and then throw on toppings that would be in that ice cream. Deconstruct your favorite candy bar - what makes it delicious? Put those things on top of your chocolate bark.

And while you think about that, I'll be over here trying to keep from cleaning out the whole stash before breakfast.


p.s. This post on candy-coated pretzel sticks proves I have a distinct chocolate candy making style: easy. 

Pistachio and Coconut Stuffed Dates


One of my favorite new food blogs is Cassie's Back to Her Roots.  Her focus is on healthy cooking and  living, but she doesn't go overboard with it.  As she says, "Now I understand that kale, birthday cake, rest days, flax seeds, strenuous hikes and good beer can all be healthy."  Cassie doesn't forgo all the pleasure of good food in favor of a smaller pant size.  Instead, she takes a holistic approach - good food (some hardcore healthy meals, some a little more decadent, but all made with good wholesome ingredients), lots of enjoyable physical activity, and a commitment to self care.

I swear, every time I read one of her posts, I feel better about life.

Besides that, she's just smart in the kitchen.  Her salads in a jar are genius, and her Sunday food prep regime has me spending a little extra time preparing on the weekends and being so glad for it during the busy week.

A couple weekends ago, I tried my hand at one of her recipes, and it was a huge success.

In preparation for a potluck, I made her stuffed dates and dipped one end in chocolate, a little added excitement that she mentioned in the brilliant post about how she preps food for the week.

They were a huge hit.  I had none to take home, and several people specifically sought me out to tell me how delicious they were.  Potluck score.

I followed Cassie's pistachio and coconut stuffed dates recipe completely.  And after they were all stuffed, I melted chocolate chips in a bowl in the microwave, dipped one end of the dates in and then let them cool on some parchment paper in the fridge.  (We use Sunspire grain-sweetened chocolate chips, which we buy in the bulk section of our local health food store.)


The bad news was that I discovered I'm allergic to pistachios.  Major fail.  I developed a cashew allergy as an adult that's gotten progressively worse in the last few years.  And now pistachios are also on the no-eat list.  What a shame.  I'd forgotten how delicious they are.

I'll have to come up with another version - maybe with pecans...


Five Ingredient Chocolate Nut Butter Cups (Sugar-free!)


The chocolate options for a person who's lactose intolerant and  doesn't eat sugar have exploded in the last few years.  At one of our local health food stores, we can buy peppermint patties and dark chocolate bars sweetened with honey, agave nectar, or coconut palm sugar.  We even recently found hot chocolate mix sweetened with coconut sugar.  And our favorite grain-sweetened chocolate chips are back in stock in the bulk section.

It's a far cry from the days when I used to sweeten my own chocolate and break it up into chunks so I could make chocolate chip cookies for my sweetie.  

But a girl who loves a cooking challenge can't stop when there are so many exciting ideas out there. When Angela from Oh She Glows posted this recipe for making your own vegan chocolate candies, I knew I had to try it.  Chocolate and maple syrup sounds just about as good as it gets.  

Well, until I decided to add in almond butter.

And jam.
 

Then...well, then I was in heaven. 


Five Ingredient Chocolate Nut Butter Cups
Adapted from Easy Homemade Vegan Chocolate

1 cup cacao butter chunks
1/2 cup cocoa powder
1/2 cup maple syrup, at room temperature
1/4 cup almond butter (or nut butter of your choice)
2 tablespoons jam (we used fig preserves sweetened with white grape juice)
(optional: a pinch of sea salt)

1.  Melt the cacao butter over low heat, stirring continuously.
2.  Once it is melted, stir in the cocoa powder and maple syrup.  Add in the sea salt if you're using it.
3.  Pour the melted chocolate into a blender and blend for a few seconds.  Be careful to allow the steam to release before blending so that your blender doesn't explode!
4.  Using 12 silicone mini muffin cups, pour a little layer of chocolate into the bottom of each cup. 
5.  Let the muffin cups sit for a few minutes in the refrigerator while you quickly mix together the nut butter and jam.
6.  Take the muffin cups back out, put a dollop of nut butter/jam mixture into each cup, and then pour the rest of the chocolate into each cup to cover the nut butter/jam mixture. 
7.  Freeze for about 30 minutes and then enjoy.


Store in the refrigerator, and try not to eat them all in one sitting.  :)


Apple Crisp - Vegan, Sugar-Free, Whole Wheat


Picking your own fruit is always a big commitment, a fact that can sometimes get lost in the excitement of getting out into the field and wielding a giant apple-picking implement.


Oh that doesn't happen to you?

I've never used one of these contraptions before, but you can bet that when the woman at the barn pointed them out, we (my friends and I) snatched them up and delighted in trying to get the apples at the tippy tip top of the trees.


And we got tons of them.

These are just the ones I brought home!

Which brings me back to the commitment.

I spent Sunday afternoon cutting apples, peeling apples, and cutting more apples.  I filled my crockpot to the brim and made one big batch of applesauce.  I made an apple crisp, and I still have more than half of the apples left. 


Those are awaiting the chopping block - to be made into apple muffins and apple butter and maybe one more of these apple crisps because it's just that good.


Apple Crisp - Vegan, Sugar Free, Whole Wheat
Adapted from Betty Crocker

5-6 medium apples, peeled, cored, and sliced very thinly
2/3 cup coconut palm sugar (or 3/4 cup brown sugar)
1/2 cup whole wheat pastry flour
1/2 cup old-fashioned oats
1/3 cup earth balance (or butter or margarine), softened but not melted
3/4 teaspoon ground cinnamon
3/4 teaspoon ground nutmeg

1.  Layer the apple slices overlapping each other in rows in a baking dish.  I used a 9 x 13, and I got 4 rows, alternating the direction of the apples with each row.  You could also use a 9 x 9 or a go wild and use a circular dish!
2.  Preheat your over to 350 degrees while you mix the rest of the ingredients in a small bowl until it's all nice and sticky.
3.  Crumble the mixture over the top of the apples, making sure to cover evenly.
4.  Bake for 35-30 minutes. Serve warm.

Yum.


Katie


PS - I tried to take a photo of the apple crisp in action - i.e. on a plate with some ice cream, but every single one turned out looking like...well, I won't say what it looked like.  Delicious, but not beautiful!

Carrot Apple Lemon Juice (with Spinach!)


I'm still loving my new juicer, though I do feel a bit guilty about squeezing out the juice and throwing away all that fiber!


Even so, I drink away. 


A friend of mine commented on my first post about the juicer with a suggestion to make carrot apple lemon juice. And it was a big hit. Both Navah and I had it for breakfast one morning last week, and it has been our favorite thus far. The blend of carrots and apples gives the perfect amount of sweetness without the grass-y flavor from the all-green juice I had on the first day. We thought the celery was the culprit there. 


Of course I added some spinach because I'm trying to put some greens into any juice I make. Spinach is a good choice because you can't really taste it. (I've learned that kale is not the same.)


So, without further ado:


Carrot Apple Lemon Juice (with Spinach!)


6 carrots
4 apples
2 lemons
1 or 2 handfuls spinach


Juice!

Katie 

Whole Wheat Fried Dough


One of my all-time favorite treats as a kid was fried biscuits from a can. I felt like they were something special my family did to approximate beignets because we were cajun but not great with the beignet-making. Ours never puffed up.


I've since learned that lots of people make them, but it hasn't lessened my enjoyment one bit. I've made them for other folks on various occasions, and it has won me undying devotion in certain circles. You think I'm kidding, but I'm not.


Of course, I don't think there's a single ingredient in a can of Pillsbury biscuits that Navah can eat. I still make them for myself sometimes, but fried dough is something she's never gotten to enjoy.


Until this past weekend.


When I made the honey whole wheat biscuits a few weeks back, I had a bit of dough leftover that wasn't big enough to make into a full biscuit. While the others were baking, I heated up some oil and plopped the little bit in and...Kabam! A little ball of puffy, fried dough!


So this weekend, I whipped up a batch of the biscuit dough - using a flax egg in place of the real egg, rolled it out, cut it into little squares and made us some fried biscuits. I sprinkled them with cinnamon and "sugar" (xylitol) to take the place of the powdered sugar that I would normally sprinkle on fried biscuits.


They look a little like chicken nuggets here, but I assure you they are not. They're sweet and delicious. I also recommend making them when you have friends around. Or only making a half batch. We had a little self-restraint issue, which led to a big food coma issue.

Honey Whole-Wheat Fried Dough
Adapted from King Arthur Flour Whole Grain Baking


3 cups whole wheat pastry flour
2 1/2 teaspoons baking powder
1/2 teaspoon baking soda
3/4 teaspoon salt
1/2 cup (or 1 stick) cold earth balance
1 flax egg (1 tbsp ground flax seeds mixed with 3 tbps warm water)
3/4 cup almond milk (or soymilk or buttermilk if you can have it)
3 tablespoons honey


1. Whisk together the dry ingredients in a large bowl.
2. Cut the butter into the dry ingredients with a pastry cutter, a fork, or your hands until it's a dry, crumbly mixture. Set aside.
3. In a separate bowl, whisk together the flax egg, almond milk, and honey. Then pour into the dry ingredients and mix until just moistened.
4. Turn the dough out onto a lightly floured surface, and fold over onto itself several times to bring it together. A dough scraper is great for this, but if you don't have one, just use your hands.

5. Now's about the time to start heating up your oil. Pour canola (or other mild vegetable oil) about 1 inch deep into a pot. Using a candy thermometer, heat the oil until it's between 360 and 375 degrees. If it's too hot, the outside of the dough will burn before the inside gets cooked. If it's too cold, the dough will soak up the oil - not good, I promise. You'll have to monitor the temperature throughout, as it will fluctuate once you start putting the dough in.5. With a lightly floured rolling pin, roll the dough out until it's about 3/4 inch thick.
7. Using a sharp knife or pizza cutter, cut the dough into squares.
8. Depending on the size of your pot, drop the dough into the oil a few pieces at a time. Turn each piece over when it starts to get slightly golden on the top. 
9. Scoop out with a slotted spoon and place on a plate that's been covered with paper towels. Sprinkle with cinnamon and sugar, or xylitol for a sugar-free version. 


Katie 

Raspberry Thumbprint Cookies

After starting a new (short-term) job last week, I've been spending a little less time in the kitchen. But when I saw this recipe for raspberry thumbprint cookies from one of my favorite bloggers over at Oh She Glows, I knew I had to carve out some time with my mixing bowls.

 
Luckily these cookies take only a few minutes to pull together, but the result is absolutely delicious. The sweetness of the raspberry jam and the the richness of the almond butter blend together into a perfect nibble of a dessert.

The only changes I made to these were to use vanilla extract instead of almond extract and not to use coconut on the outside - both just because of what I had in the house.

I'd say that they're surprisingly delicious for being vegan and gluten- and sugar-free, but I'm rarely surprised by the yumminess of alternative baking.
Be careful, though.


You might end up eating four in the span of a few minutes.


Just a possibility, of course.


Katie
 *Can't wait to get my camera back. These camera phone pictures leave a little to be desired.

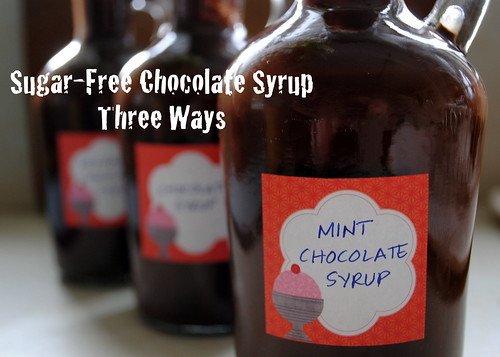
Sugar-Free Chocolate Syrup Three Ways


chocolate syrup 3
About 10 years ago, I went through a fad dieting phase. I would read about a celebrity who swore by the blood type diet, and I'd be off to the library to check out my copy of the book. Three weeks later, after I drank my eighteenth glass of fruit juice with lecithin granules (hint: they don't dissolve), I'd break while standing outside a Starbucks staring creepily at someone eating a piece of pound cake. Or it was Atkins, and I would throw down my fork in the middle of a sausage, bacon, and cheese omelet with sour cream and spend the next 20 minutes making sweet love to an enormous bowl of pasta. 

The diets were always my own choice - to try to get "healthy" - and they never lasted for more than a few weeks. But during those weeks? Beware the crazy lady on the fad diet. I was a terror. I deemed anyone eating a cookie the enemy. It wasn't a good look for me. 

I mention all of this simply as a means of comparison. 

About three months into mine and Navah's relationship, she began an incredibly restrictive diet prescribed by her doctor to deal with some ongoing health problems. Like many such diets, it had an initial super-strict period and has gotten less restrictive over the years. But in the beginning (which lasted for about a year), her diet consisted mainly of meat, eggs, nuts, and green vegetables. As her health improved, she was able to slowly add in more foods, and now she can eat most things, with the exception of refined flours and sugars (or things like splenda), mushrooms, and some very high glycemic fruits like bananas and pineapple. We've discovered many great food items that cater to people with similar restrictions, but there are still many things she can't enjoy. Add this to the fact that she's long been lactose intolerant, and she certainly can't hop up to the counter at Starbucks and order a piece of pound cake. 

But none of that has ever kept her from coming home with a box of chocolates or a cupcake for me, or encouraging me to order that piece of pie after dinner. And she has never once glared at me as if trying to decapitate me with her eyes (which seems pretty standard with people you love, but based on my experience of restrictive dieting, is actually a fairly big deal). Instead she's always just been happy to vicariously enjoy my pleasure. 

It's something I both appreciate and admire. So when she mentions that she's having a hankering for something, I delight in being able to whip up something that might satisfy her craving. I don't always succeed (and remembering her eating a truly atrocious "pound cake" and pretending to like it will forever rank at the top of my reasons-I-love-Navah list), but sometimes I do. And this is one of those times.

While we were studying for the bar, Navah kept talking about wanting a chocolate ice cream float. I had never heard of one, but I learned that it's like a root beer float except with chocolate soda. You put chocolate syrup into seltzer to make chocolate soda, and then you put your ice cream in and voila! Chocolate ice cream float. 

The problem, of course, was that we didn't have any chocolate syrup without refined sugar in it. (Navah eats a fabulous ice cream made from coconut milk and sweetened with agave nectar called Coconut Bliss). So, with a little experimentation, I whipped up a batch of sugar-free chocolate syrup. It took about 4 1/2 minutes, and it did not disappoint.

Many chocolate ice cream floats were had. And there were smiles all around.

And then, and THEN, I decided the chocolate syrup would be even better if I made them in different flavors. I was right. I love it when I'm right.

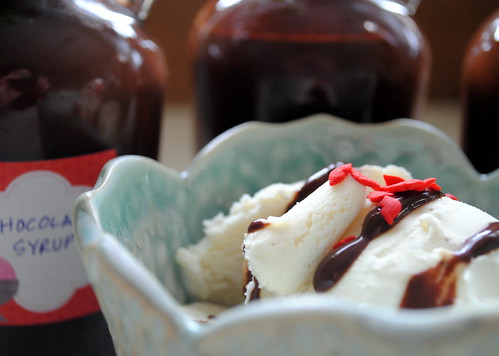
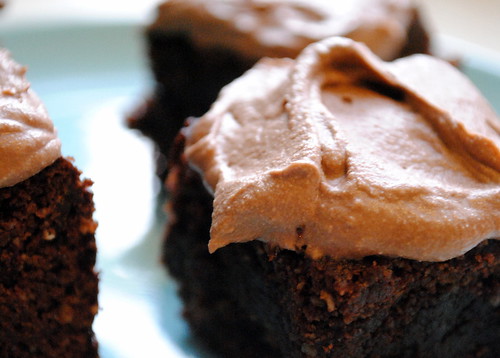
We've been enjoying this sugar-free chocolate syrup in chocolate soda floats, over ice cream, over brownies, and maybe even just licking it off our fingers. It's that good.

chocolate syrup 2

Now that your mouth is watering, here you go.

chocolate syrup

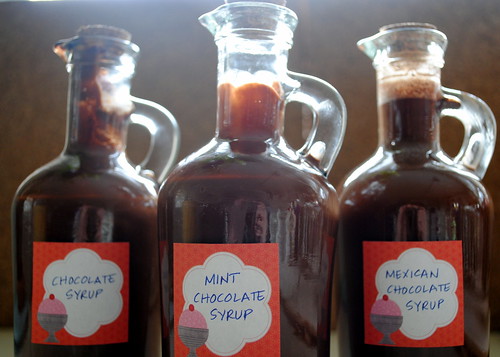
Sugar-Free Chocolate Syrup Three Ways

1/2 cup unsweetened cocoa powder
2/3 cup water
1/8 teaspoon salt
1/3 cup agave nectar

Plus:
For original: 2-3 teaspoons vanilla
For mint flavored: 1/4 teaspoon mint flavoring 
For Mexican-style: 1/8 teaspoon chili powder, and 1/8 teaspoon cinnamon

Whisk all of the ingredients together over low-medium heat in a small saucepan.  
Pour into a jar or bottle and store in the refrigerator. 

So easy! And so delicious!

As always, let me know if you make any of your own and especially if you do any different flavoring. I love to hear how these things turn out for you guys!

And check back in tomorrow for an update on the pillowcase project. Teaser: Thank goodness I have a big suitcase!

Katie

Four-Ingredient Vegan Chocolate Frosting

Chocolate Frosting


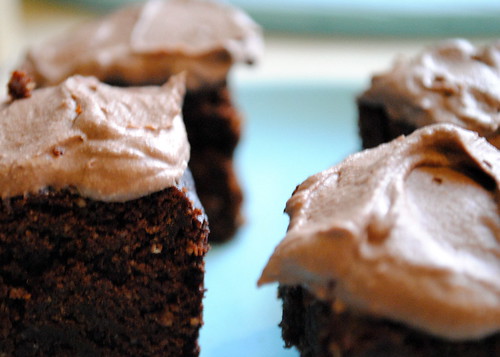
Yesterday, I whipped up a batch of vegan and gluten free brownies from Oh She Glows, one of my favorite healthy food blogs.  Unfortunately, I haven't gotten totally accustomed to this oven and ended up baking them a  bit too long. They're tasty but a little dry and crumbly and not quite as chewy as I think hers were.

What to do?

Frost them, of course!  Who cares if cake or brownies are dry if there's frosting on them?!  Okay, I admit that moist and chewy brownies with frosting are better than dry and crumbly brownies with frosting.  But you get what you get.  Today it's dry and crumbly.  Hopefully tomorrow it'll be something better.

On to the frosting!


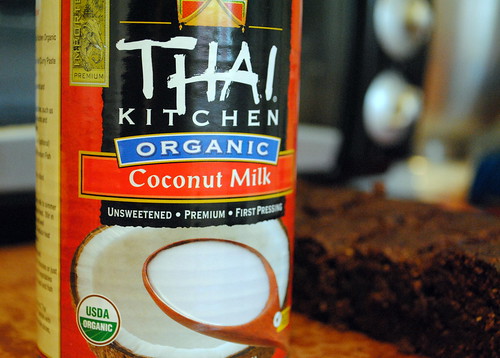
Coconut milk


I've written before about the wonders of coconut milk.  It's great for pulling together a quick vegan frosting that's oh so delicious.  And this one's sugar-free chocolate frosting to boot!


Coconut cream 1

For the record, though we eat very little meat, we're not vegans.  But Navah is lactose intolerant, and I can't eat eggs.  So when it comes to baking, vegan tends to be the way we roll.  And Navah doesn't eat refined flours or sugars, so our kitchen tends to look like a giant baking chemistry project.


Coconut cream


When my mom was helping me unpack, she told me (and this is a direct quote), "Katie, you've acquired a lot of things in your 31 years, and the majority of them are different types of flour."  

Enough chatter.  On to the frosting! 

Chocolate Frosting 1


Four-Ingredient Vegan Chocolate Frosting

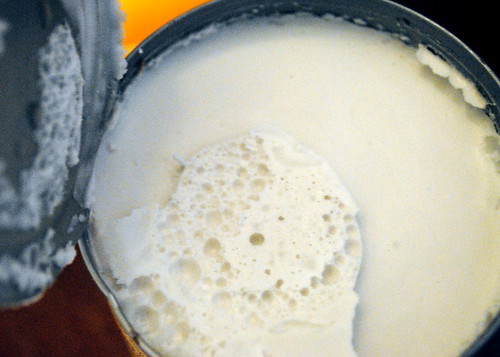
1 can coconut milk, refrigerated overnight
3 tablespoon cocoa powder
3 teaspoon agave nectar
2 teaspoon vanilla

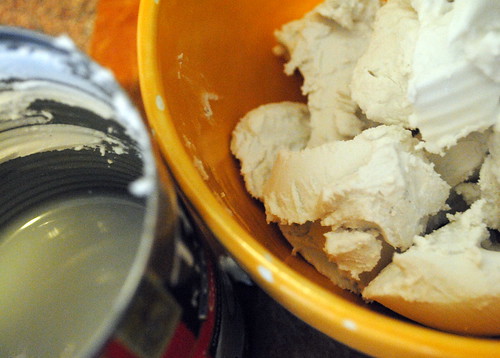
1.  Scoop the coconut cream top out of the coconut milk can, making sure not to dig down too deep into the liquid part (which you can use in other recipes, like coconut curries, or put into a smoothie).
2.  Combine the coconut cream with the cocoa powder, agave nectar, and vanilla.  
3.  Frost!  

Amazingly quick and easy, eh?  You can add another tablespoon of cocoa powder if you want a richer flavor, but I like how light this one is, especially with already-chocolatey brownies.  

You'll need to keep the frosting in the fridge if you can manage not gobbling it up right away. Coconut cream frosting that sits out overnight will spoil.

Today's MVP Award goes to the vanilla.


Vanilla

Well played, dear.  

I hope you enjoy!

Katie 

This is linked up at Allergy Free Wednesdays.

Candy-Coated Pretzel Sticks

Candy-Coated Pretzel Sticks 5

If you woke up this morning and thought to yourself, Oh my god, how is it the Wednesday before Christmas already?! I still have to make holiday goodies for my office party/dogwalker/coworkers/mailman/neighbor/Christmas Eve shindig!!!, then this recipe is for you.  In fact, it's not even really a recipe.  It's more like a series of quick and easy tasks.

First, go to the store and buy a bag of large pretzel sticks, some Christmas sprinkles, and some candy melts or melting chocolate.  I used candy cane flavored candy melts from Michaels, but you can get that kind of thing at the grocery store.

When you get home, melt your candy melts or chocolate according to the package directions.  I just poured mine into the bowl and zapped them in the microwave.
Candy-Coated Pretzel Sticks 1

Pour your sprinkles onto a plate.

Dip the pretzel sticks into the melted chocolate/candy, making sure not to coat it too thickly.  I used the back of a spoon to smooth off any excess.

Stick the pretzel in a cup to let it dry for 15-20 seconds, and then roll it in the sprinkles.   Heavy toppings like chocolate chips (even miniature ones), don't work so well.

Candy-Coated Pretzel Sticks 4

I rested those on wax paper to dry.

When they're all finished, put them in the refrigerator to chill for a couple of hours.

Then put them in a cute little bag, pair with a card, and voila!

Candy-Coated Pretzel Sticks 7
I made a little peppermint bark while I was at it because I am all about easy this year.

Other combos that could be delicious:

Dark or milk chocolate rolled in crushed peppermints
White chocolate drizzled with milk or dark chocolate
Dark or milk chocolate with sprinkles
Milk chocolate rolled in crushed hazelnuts

I hope my assistant thinks they're as yummy as I do!
Katie