Cheese + Chive Fried Grits


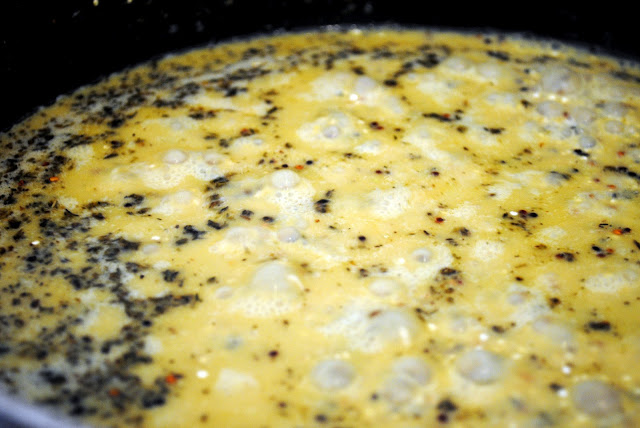
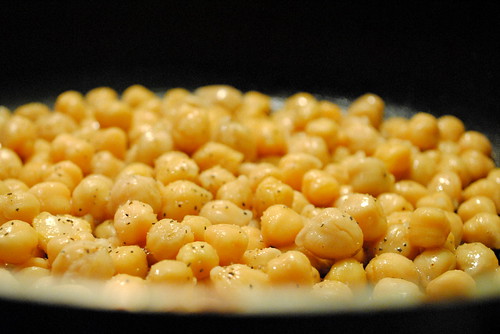
I made these with stoneground yellow grits from Sylvan Falls Mill in Georgia (courtesy of my step-mom). 

I'm a grits girl. Always have been. Always will be.

And in a kind of surprising coincidence, my wife is too. Though she had not or could not eat many of my favorite Southern or Cajun foods (being Jewish and from the North), she had grown up eating grits because one of her best childhood friends had a mother from South Carolina who made them. And she actually introduced me to stoneground yellow grits, which have a nuttier flavor than the traditional white grits I grew up eating and are now what we keep around the house.

We have a new favorite brunch spot in downtown Burlington, and we almost always get a side of grits. The first time we ordered them, we were surprised when the server brought two triangular patties to our table rather than a bowl of grits. I've had fried polenta, which is essentially the same thing, but these tasted like the delicious cheese grits I've always loved - just fried.

And we all know the only way to make a perfect food better is to fry it.

I think The Swingin' Pinwheel deep fries theirs (though not battered), but that's a lot of work and also mostly unnecessary. We just pan fried ours in a little oil, and they were heavenly. A little crunch on the outside and cheesy, creamy goodness on the inside. Yes please.


Cheese + Chive Fried Grits 

1 cup yellow grits
3 cups water
1 teaspoon salt
1 cup grated cheddar cheese
2 tablespoons chopped chives

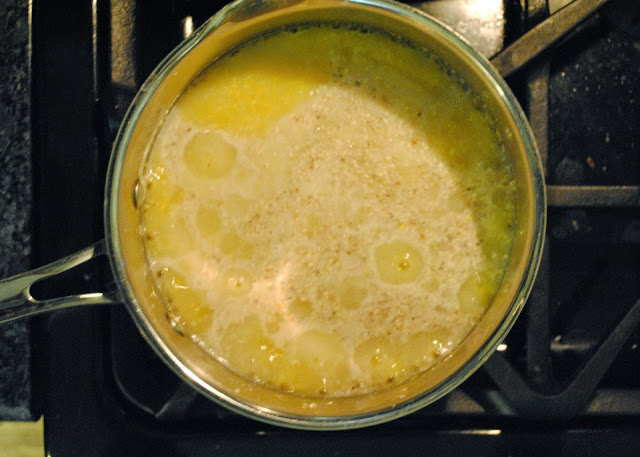
1. Pour grits, salt, and water into a pot and bring to a boil.
2. Once the water is boiling, turn the heat down, cover, and simmer for about 15 minutes, stirring frequently to avoid sticking.
3. While the grits are cooking, line a 9x9 pan with two pieces of parchment paper - one going in each direction.
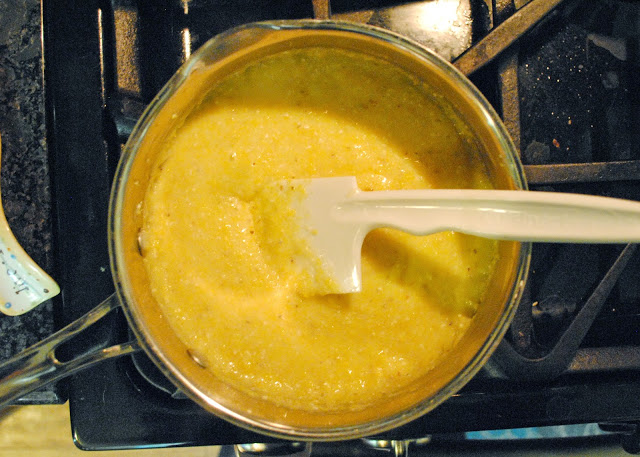
4. Once the grits are creamy and have soaked up all the water, stir in the cheese and the chopped chives. (If you don't want to fry your grits, you could enjoy them just like this.)
5. Pour the grits into the pan and place in the refrigerator for at least an hour (overnight is fine).
6. Once the grits have chilled, cut them into triangles and pan fry them over medium high heat with a little oil. You don't need much - maybe a tablespoon. Canola or grapeseed oil works best because of the temperature.
7. Let the triangles fry on each side for about 3-4 minutes. Once both sides are nice and brown, put the fried grits onto a paper towel and then serve.

A note about the grits to water ratio: if you look up how to make grits online, most recipes will tell you to use a 4:1 ratio of water to grits. I always use a 3:1 ratio because they cook faster, and I like that the grits retain a little of their structure for a denser, nuttier dish.

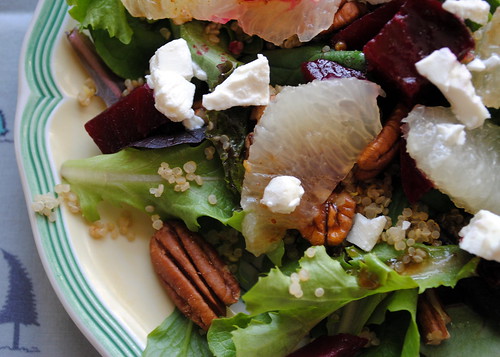
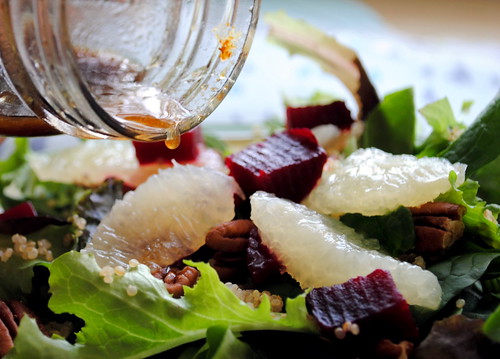
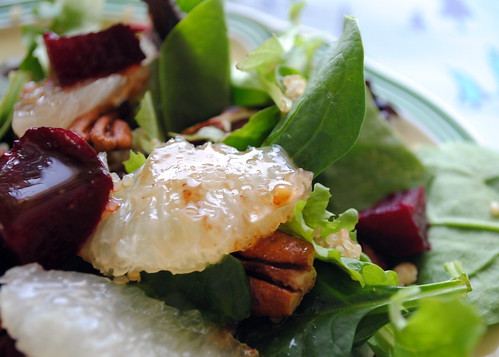
These can be a breakfast food, but they don't have to be. I served ours with salad for dinner.
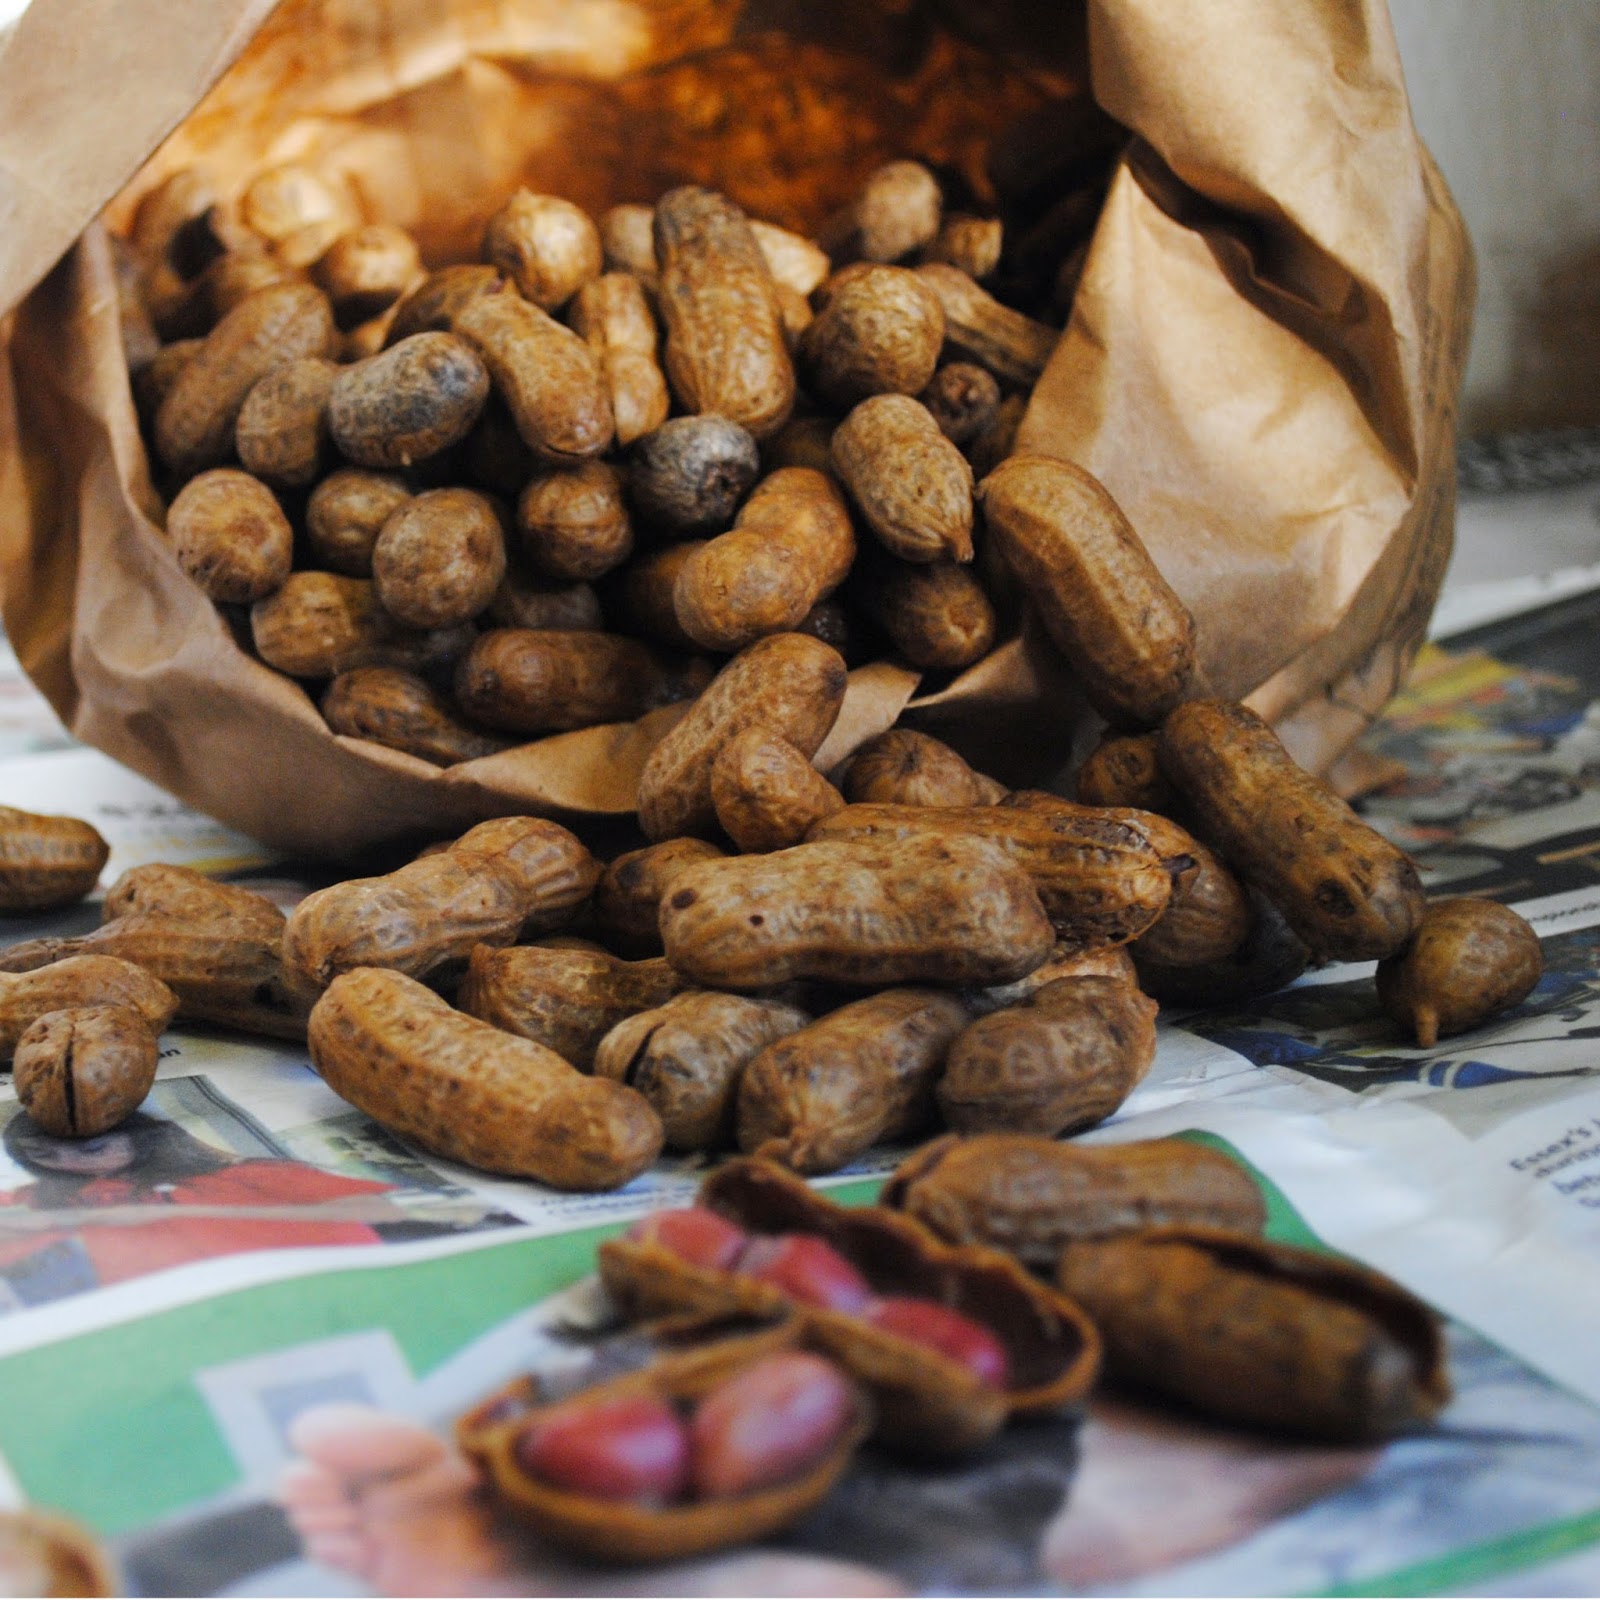
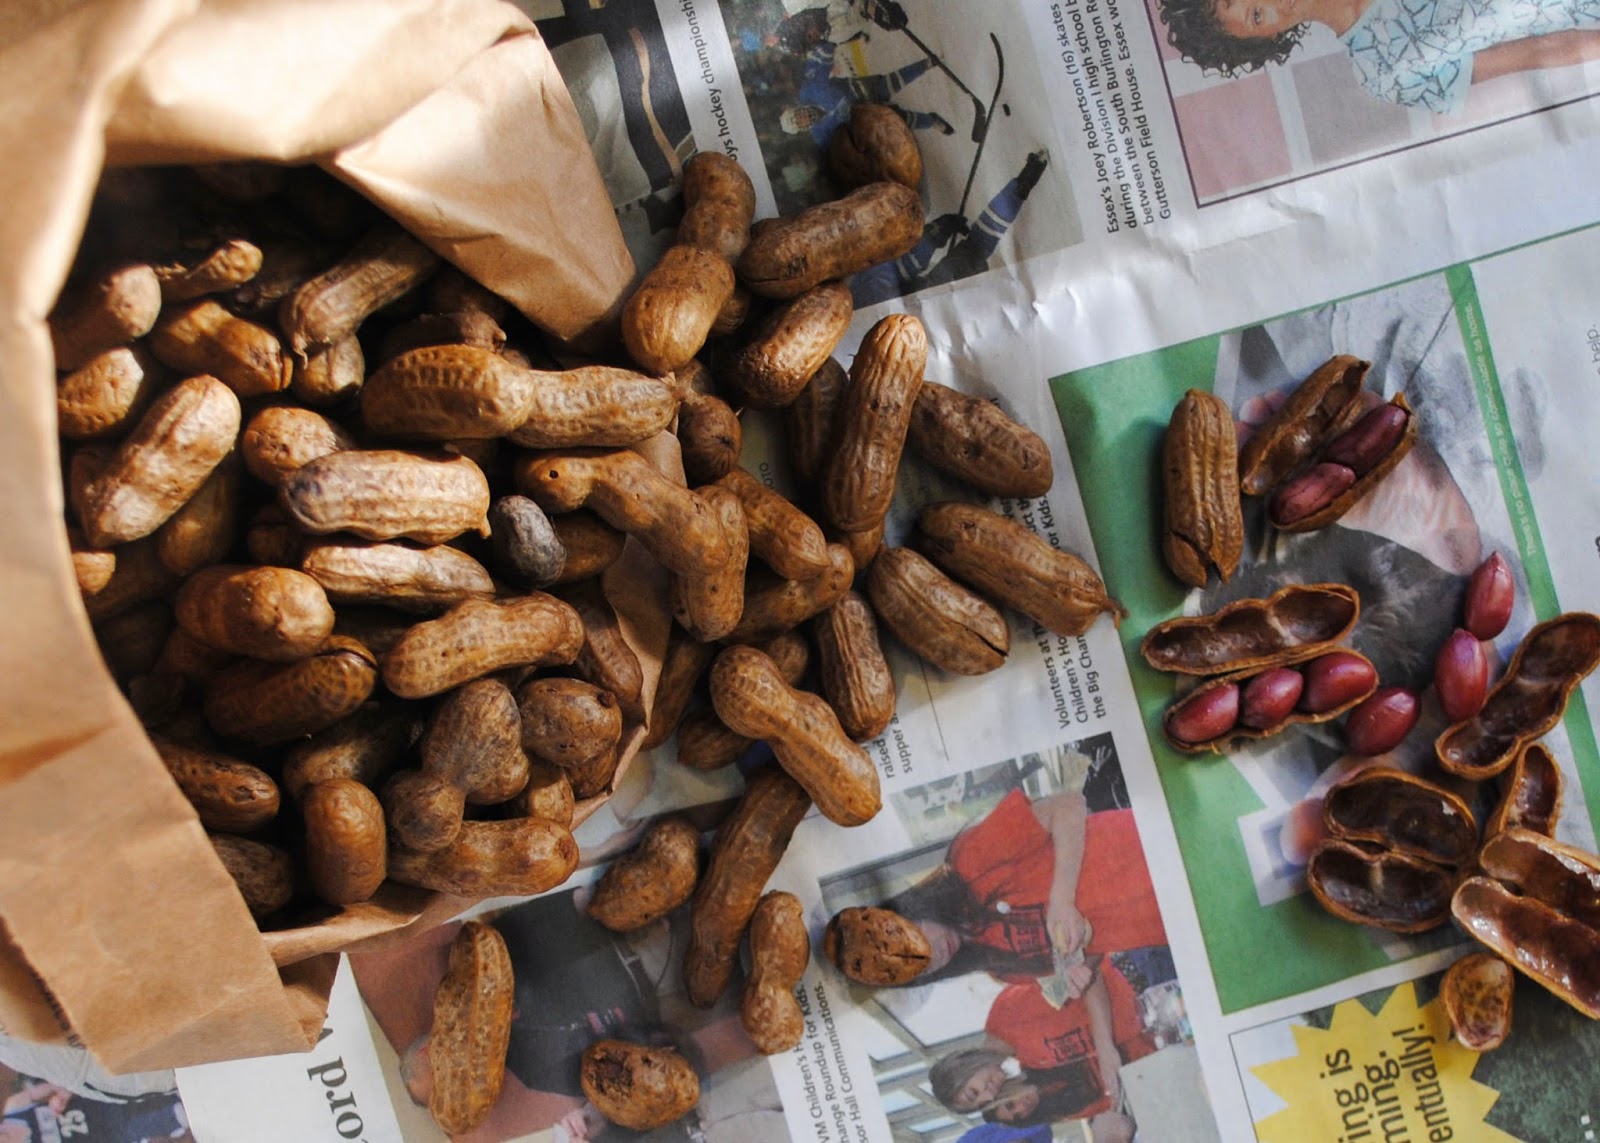

p.s. Boiled peanuts


Like what you just read? Share it with a friend! You can also follow ktmade on TwitterFacebook, or Instagram so you'll never miss a post. And you'll earn my undying affection!


Boiled Peanuts (or How to Be a Southerner)

My college roommate got married last May down in that part of northern Florida that is essentially synonymous with southern Georgia. 95 degrees without a cloud in the sky, the air hugged us tightly as soon as we walked outside. We spent a day and a half fanning ourselves while we cut stunning gladiolas from her mother's front yard for the centerpieces, swatting away mosquitos under the Spanish moss, and wiping the sweat (excuse me, the

glisten

) and melting sunscreen from our brows as we carried tablecloths and homemade strawberry cake into the garden center where she would say "I do" to her long-time boyfriend under the oak trees.

We woke happy and hungover the day after the wedding, rummaged through the refrigerator in our bathing suits, and dumped leftover corn on the cob and barbecue sandwiches and beer into a cooler. We shoved ourselves into a couple cars with the bride and groom (now husband and wife) and headed south for a few hours at the beach, a little friend-accompanied pre-honeymoon.

Before we turned left onto the long straight road aimed toward the Gulf, we stopped at a little wooden hut where an older gentleman sold us boiled peanuts for five dollars. We breathed in the smell of the salty brine and with soggy napkins crumpled in our fingers, we passed the hot bag around the car.

The beige sand stretched along for miles, and we sat on the edges of a sheet under the pop-up canopy drinking and snacking and telling stories. When it got too hot, we waded into the calm water and tried not to step on the horseshoe crabs zipping around underneath us. The sun started to dip below the horizon, and we rolled up the sheet and walked barefoot back to the cars.

We drove back in the dark, tired and sandy and satiated.

Boiled Peanuts 

From

EJ

, with much gratitude

Raw peanuts in their shells (not roasted)

Salt

1. Dump about 2 pounds of peanuts in their shells into a stock pot and cover with water plus an inch or two more.

2. Bring to a boil.

3. Add 1/2 cup salt and turn down to a simmer.

4. Simmer covered for 1 1/2 - 2 hours and then check to see if the peanuts are soft. (I actually had to cook mine for about 4-5 hours. I think I didn't add enough water in the beginning - I added more - and perhaps had them on too low of a simmer).

5. Once the peanuts are soft, turn off the heat and let them sit in the salty water for at least a half hour.

6. Drain the peanuts in a colander and store in an airtight container in the refrigerator. They can be reheated in the microwave or eaten cold.

Shout out again to EJ

, who made this walk down memory lane possible by sending me the peanuts and the recipe. Thank you thank you thank you!

p.s.

You can go home again

.

Like what you just read? Share it with a friend! You can also follow ktmade on 

Twitter

Facebook

, or 

Instagram

 so you'll never miss a post. And you'll earn my undying affection!

Chocolate Raspberry Chia Parfait


What is it about layered desserts that sets my mouth watering? I've always loved the process of dipping down into a parfait to get a little bit of each delicious element on a single spoonful. There's a bit of a challenge built into every layered dish - can you eat this is just the right ratio that every bite has a little bit of every thing until the very end?

Just me?

This chocolate raspberry chia parfait was the most delectable challenge.


If you're not familiar with chia seeds, they look like...well, like teeny tiny little seeds. But when they mix with liquid, they puff up and become a little gelatinous - a bit like a smaller version of tapioca. And I love tapioca. They're also crazy good for you with all their fiber and calcium.

So when you eat this parfait, you can pat yourself on the back for making excellent, healthy food choices.

Chocolate Raspberry Chia Parfait

Chocolate Chia Pudding Layer:
2 cups almond milk
3 tablespoons chia seeds
3 tablespoons unsweetened cocoa powder
2 tablespoons maple syrup
1 teaspoon vanilla extract

1. Quickly blend all ingredients together in your blender and then pour into a bowl with a lid. (If you don't have a blender, you can stir them all together - the cocoa powder will be a little difficult to incorporate.)
2. Place in the refrigerator overnight or for at least 2 hours.
3. For the raspberry chia jam layer and the whipped coconut cream, follow this recipe (just the jam) and this recipe from Oh She Glows.
4. Once the chocolate pudding layer is set, place a few tablespoons of the pudding into a pretty glass, then a couple tablespoons of the raspberry chia jam, then a few more tablespoons of the pudding, and then top with a dollop of whipped coconut cream and a raspberry.
5. Serve and enjoy!

p.s. Want more chocolate? I've been thinking about these almond butter and jam chocolates a lot lately...


Like what you read? Never miss a post: follow me on twitter, instagram, or facebook

New Favorite Meal: Chipotle Twice-Baked Sweet Potatoes


There are some meals that are always in our regular rotation.  Pasta and spaghetti sauce.  Vegetarian chili.  Bean burritos. A simple tomato and hearts of palm salad.  Stir fry with rice.  And then there are meals that we're obsessed with for a while but that somehow fall off our radar.  Beer and sausage pasta.  Tofu scramble.  We'll eat it once a week for a month and then not eat it again until, a year later, one of us says, "Hey.  Remember when we used to make [insert delicious dish here] all the time?"

Well, I'm hoping this new favorite doesn't disappear anytime soon because it is so delicious and different from our normal flavor palate that just knowing I'm going to have it for dinner can sustain me through a rough day.  I'm serious.

You can find the recipe over here at The Stay At Home Chef.  I've traded out the spinach for kale when that's what I had on hand, and it was just as delicious.  I leave out the chopped chipotle pepper and just use chipotle chili powder, and it's plenty spicy enough for me.  But if you can't find chipotle chili powder, I would definitely recommend using a chipotle pepper because that taste is delicious and way better than just regular chili powder.  And we use cheddar cheese rather than mozzarella because Cabot cheddar is all aged long enough to be lactose free (hurrah!).

(Word of caution:  Chipotle chili powder is spicier than chili powder.  If you add a bottle of it to your spice rack, don't accidentally interchange them in other dishes.  I say this from experience!)

What's your favorite meals these days?


Pistachio and Coconut Stuffed Dates


One of my favorite new food blogs is Cassie's Back to Her Roots.  Her focus is on healthy cooking and  living, but she doesn't go overboard with it.  As she says, "Now I understand that kale, birthday cake, rest days, flax seeds, strenuous hikes and good beer can all be healthy."  Cassie doesn't forgo all the pleasure of good food in favor of a smaller pant size.  Instead, she takes a holistic approach - good food (some hardcore healthy meals, some a little more decadent, but all made with good wholesome ingredients), lots of enjoyable physical activity, and a commitment to self care.

I swear, every time I read one of her posts, I feel better about life.

Besides that, she's just smart in the kitchen.  Her salads in a jar are genius, and her Sunday food prep regime has me spending a little extra time preparing on the weekends and being so glad for it during the busy week.

A couple weekends ago, I tried my hand at one of her recipes, and it was a huge success.

In preparation for a potluck, I made her stuffed dates and dipped one end in chocolate, a little added excitement that she mentioned in the brilliant post about how she preps food for the week.

They were a huge hit.  I had none to take home, and several people specifically sought me out to tell me how delicious they were.  Potluck score.

I followed Cassie's pistachio and coconut stuffed dates recipe completely.  And after they were all stuffed, I melted chocolate chips in a bowl in the microwave, dipped one end of the dates in and then let them cool on some parchment paper in the fridge.  (We use Sunspire grain-sweetened chocolate chips, which we buy in the bulk section of our local health food store.)


The bad news was that I discovered I'm allergic to pistachios.  Major fail.  I developed a cashew allergy as an adult that's gotten progressively worse in the last few years.  And now pistachios are also on the no-eat list.  What a shame.  I'd forgotten how delicious they are.

I'll have to come up with another version - maybe with pecans...


Five Ingredient Chocolate Nut Butter Cups (Sugar-free!)


The chocolate options for a person who's lactose intolerant and  doesn't eat sugar have exploded in the last few years.  At one of our local health food stores, we can buy peppermint patties and dark chocolate bars sweetened with honey, agave nectar, or coconut palm sugar.  We even recently found hot chocolate mix sweetened with coconut sugar.  And our favorite grain-sweetened chocolate chips are back in stock in the bulk section.

It's a far cry from the days when I used to sweeten my own chocolate and break it up into chunks so I could make chocolate chip cookies for my sweetie.  

But a girl who loves a cooking challenge can't stop when there are so many exciting ideas out there. When Angela from Oh She Glows posted this recipe for making your own vegan chocolate candies, I knew I had to try it.  Chocolate and maple syrup sounds just about as good as it gets.  

Well, until I decided to add in almond butter.

And jam.
 

Then...well, then I was in heaven. 


Five Ingredient Chocolate Nut Butter Cups
Adapted from Easy Homemade Vegan Chocolate

1 cup cacao butter chunks
1/2 cup cocoa powder
1/2 cup maple syrup, at room temperature
1/4 cup almond butter (or nut butter of your choice)
2 tablespoons jam (we used fig preserves sweetened with white grape juice)
(optional: a pinch of sea salt)

1.  Melt the cacao butter over low heat, stirring continuously.
2.  Once it is melted, stir in the cocoa powder and maple syrup.  Add in the sea salt if you're using it.
3.  Pour the melted chocolate into a blender and blend for a few seconds.  Be careful to allow the steam to release before blending so that your blender doesn't explode!
4.  Using 12 silicone mini muffin cups, pour a little layer of chocolate into the bottom of each cup. 
5.  Let the muffin cups sit for a few minutes in the refrigerator while you quickly mix together the nut butter and jam.
6.  Take the muffin cups back out, put a dollop of nut butter/jam mixture into each cup, and then pour the rest of the chocolate into each cup to cover the nut butter/jam mixture. 
7.  Freeze for about 30 minutes and then enjoy.


Store in the refrigerator, and try not to eat them all in one sitting.  :)


Broccoli Arugula and Squash Soup


It's a little strange to be sharing a soup recipe in July, I suppose.  There are some of you will set this aside for the winter, but soup's an all-year-round dinner for me.  It's not what I reach for in the middle of the day when I'm sitting outside in the sun.  But at night, when I'm cozied in for the evening, soup is comforting - especially on those nights up here where things really cool down.  


I made this soup when I was doing a cleanse a couple years ago, and then I forgot about it.  I remembered it when I did the cleanse this time, and now, with a few modifications, it has become a staple of our diet.  


The coolest thing about it is that - for the most part - it's incredibly seasonal.  All the veggies in this pot came from the farm CSA that we got while we were housesitting.  


Broccoli Arugula and Squash Soup
Adapted from GOOP


One onion, chopped
One head broccoli, chopped
One zucchini, chopped
One summer squash, chopped
4 cups vegetable broth
One can coconut milk
Two cups arugula
Salt and pepper to taste


1.  In large pot over medium heat, saute onions in olive oil with salt and pepper for 3 - 5 minutes.
2.  Add in the broccoli, zucchini, and summer squash and saute, stirring frequently, for about 10 minutes. 
3.  Pour in the vegetable broth and bring to boiling.  Then reduce the heat to medium-low and simmer for 10-15 minutes.  
4.  Pour in the coconut milk and the arugula, adding more salt and pepper at this point if necessary.
5.  Using either an immersion blender or a traditional blender, blend the soup until smooth.  (If you're using a traditional blender, blend in small batches or allow the soup to cool before blending so that you don't blow the top off your blender.)
6.  Serve with a little dollop of coconut cream (or sour cream or yogurt if you can do dairy) and a slice of crusty bread. 


The blend of the broccoli and peppery arugula with the creamy coconut milk is absolutely delicious. And the zucchini and squash give it a little more substance.


I hope you enjoy!


Katie

Chunky CSA Spaghetti


We didn't get our acts together this year in time to sign up for a CSA (community supported agriculture).  We hoof it to the farmers market a lot, but I'm apt to buy less there than I would get in a weekly box from the farm.  The folks we're housesitting for belong to a CSA, and the abundance of veggies at our disposal is quite nice.  And we're under strict orders to eat them all so they don't go bad.


Yes ma'am!


A chunky veggie-ful spaghetti sounded like just the thing to me.  And it's quick, which is especially nice these days, especially now that our commute from work is a wee bit longer.


I love a good recipe that involves just throwing whatever you have into the mix (as shown here and here and here), and this one's no different.  I used the veggies I had - carrots, zucchini, yellow squash, broccoli, onions, and garlic scapes.  But you could use whatever you have around - cauliflower, kale, spinach, bok choy, mushrooms, green onions.  I wouldn't generally think of root vegetables (aside from carrots) in there, but let me know if you try that out!


The cool thing about CSAs (aside from the tons of delicious veggies at a lower cost than the farmers market) is that you get vegetables you might not buy on your own.  And then you figure out how to cook with them.  I only learned what a garlic scape was a couple years ago, but I always love when they show up.  They look a little like a more substantial, swirly green onion, and they taste like garlic.  They're more mild, though, so you wouldn't put them in at the beginning of a dish like you would with actual garlic because the flavor will just cook out.  I chop them up (down to the white part and then stop) and throw them in at the last minute - just so they can get a little soft.  They give a really nice fresh garlic flavor.


And who doesn't love that?


Chunky CSA Spaghetti

1 onion
1 zucchini
1 yellow squash
2 carrots
1/2 head broccoli
5-6 garlic scapes
1 12 oz jar strained tomatoes
1 package pasta (we used brown rice spaghetti)
2 teaspoons oregano
1 1/2 teaspoon basil
1 teaspoon rosemary
1 1/2 teaspoon salt
pepper, to taste
1 tablespoon olive oil

1.  Chop all the vegetables into whatever size suits your fancy.
2.  Saute the onions and carrots in olive oil over medium heat with salt until soft.
3.  Add in the zucchini, squash, broccoli and the rest of the seasoning.  Stir occasionally, making sure that the bottom doesn't burn.  
4.  Prepare the pasta according to package directions.
5.  Once all the vegetables have begun to soften, add in the garlic scapes and continue to saute for 3-5 minutes.
6.  Pour in the strained tomatoes and let simmer for 3-5 minutes.
7.  Mix with your pasta, and enjoy!


Katie

Artichoke and Asparagus Quinoa Risotto (GF, vegan, sugar-free)


Quinoa's on the menu at our place a lot these days. As a complete protein, it's an excellent way to get extra nutrients into a simple and delicious meal like a risotto. For a potluck we attended last night, I whipped this up so I'd be sure we had something healthy to put on our plates.


It was a hit with everyone - we didn't have a smidge to bring home!


It's a pretty easy but time-intensive dish, so you'll need to leave yourself at least an hour to prepare it when you can be close to the stove. 


If you've never cooked with quinoa before, give it a try. It packs more nutrients than rice - even brown rice - and the subtle nutty flavor is really excellent.


Artichoke and Asparagus Quinoa Risotto


1 can of artichokes in water
1 bunch of asparagus
1 cup of quinoa, dry
1 tablespoon coconut oil (or other oil)
1/2 teaspoon oregano
1/2 teaspoon thyme
1 cup vegetable broth
1 cup almond milk 
1/2 cup nutritional yeast
1/2 tablespoon white miso
1 tablespoon lemon juice
salt and pepper to taste 


1.  Chop and steam the asparagus until bright green and slightly tender.
2.  While the asparagus is steaming, add the quinoa, spices, and coconut oil to a pan over medium heat. Stir it all in the pot to ensure that the quinoa is coated, especially if the coconut oil is still hard.
3. Once the quinoa starts to sizzle and pop a bit, add in the broth, almond milk, nutritional yeast, miso, and salt and pepper.  Allow to come to a rolling boil, and then reduce to a sizzle and cover. Stir again ever 5-10 minutes. This is a good time to do some dishes or putter around the kitchen. Music helps. Resist the urge to leave or it might burn.
4. Once the quinoa starts to soak up a lot of the liquid and you notice there's not much left in the pan, do a quick taste test to see whether it's soft. If the quinoa seems too crunch, you might want to add a little more liquid. You can add in more broth or milk or a little water in 1/4 cup increments. You don't want it to be soupy or mushy - just creamy and soft. 
5. Once the quinoa is finished - all the liquid is incorporated and the quinoa itself is soft and perhaps slightly chewy (not crunch) - mix in the asparagus and the drained can of artichokes along with the lemon. Add a little more salt and pepper if necessary and serve. 


Enjoy!

Katie

{UPDATE:  Check out my friend Tori's comment below if you're interested in some non-vegan substitutions!}

Paging Jack Lalanne


I have tried to take an appetizing picture of the juice I've been making with my new juicer. 


It's not possible. 


I'll show you a picture of apples instead. 


They're in the juice. 


So I'm juicing. 


The impetus was a cleanse that I'm doing for the next three weeks. It's the most moderate one out there, and I could technically do the "liquid meal" portion with smoothies, like I normally make in the mornings. But I decided that I needed something to keep me excited about it while I'm doing without the things I crave (mainly sugar and cheesy things). And a fun new kitchen appliance does the trick. 


I bought a countertop version - the Waring Pro Juice Extractor - because many of them are huge and would've taken up all the available counter space in our kitchen. 


This one's not tiny, but it's manageable.


And it makes juice!


I know other folks have been doing it for years, but I'm still fascinated by the idea that you can shove a piece of kale down there, and JUICE comes out. From KALE. 


It's pretty awesome, and I've started out with the most basic green juice - a mix of kale, green apples, lemon, cucumber, and sometimes celery. Oh, and I've thrown some ginger in too. 


The flavor takes a little getting used to - it's not sweet but the green apples and the lemon help to make it not to bitter either. It's growing on me - it's refreshing, and I think once I start playing around with some other fruits and veggies in there - beets, carrots, parsley - I'll really start to enjoy it. Of course, yesterday I slipped up and accidentally called it grass juice instead of green juice. So maybe that's saying something?


Either way, the idea is to pump myself full of healthy fruits and veggies, and it certainly does that.


I may break the bank, though. The one glass of juice I made last night had 6 leaves of kale, 4 stalks of celery, 2 green apples, 1 cucumber, 1 lemon, and a bit of ginger! That's a lot of produce. 


Once I'm off the cleanse, I think juicing will become something I do occasionally - maybe once or twice a week - or else I'd have to get a second job just to keep paying for the vegetables. 


Of course, I'm eating a lot less of the other stuff - cheese and bread and donuts (I've developed an unfortunate Dunkin Donuts problem up here). So the cost might not be as much as I think it is in relation to what I would've been spending otherwise. 


Either way, I'm hoping to share a few juicing recipes here over the next three weeks, along with some new smoothie recipes, and maybe even a couple new healthy meals. 


Do you juice?

Katie

Simple Summer Slaw with Honey Vinaigrette


I'm a sucker for an easy summer salad. I hate to turn the oven or the stove on once it gets warm outside, and I'm not really in the mood to eat anything hot anyway. Instead I crave simple, refreshing foods. So salads that can function as a whole meal - especially at lunch time - are one of my main summer staples.


Salads based on cabbage can't be beat on that front because you can put basically anything in them, and they stay fresh much longer than your average garden salad, which can get all sad and wilted in the span of a day.


And, like the creamy quinoa salad I made a couple weeks ago, you can mix in just about anything you have in your fridge, and it'll be delicious. Some of my favorites that didn't make it into this version - hearts of palm, avocado, artichoke hearts, craisins, slivered almonds, cherry tomatoes, broccoli, and apples. There really are no rules for this salad.
I like to make mine with purple cabbage when I have it because it's just so pretty. With a few other colorful veggies thrown in, it's like I'm eating a work of art. In a really good way.

Simple Summer Slaw with Honey Vinaigrette

1/2 head of cabbage
Frozen edamame, thawed
1/2 yellow pepper
1/4 medium red onion
1/4 cup pumpkin seeds
1/4 cup raisins

Honey Vinaigrette
4 tablespoons olive oil
3 tablespoons honey
1 tablespoon balsamic vinegar
1 tablespoon dijon mustard
salt and pepper to taste

1.  Thinly slice the cabbage and chop up the rest of your veggies.
2.  Throw them all in a bowl together.
3.  Mix together all the ingredients for the honey vinaigrette and pour over the slaw.
4.  Thoroughly mix everything together.

That's it! So easy, eh?

And bonus - it's even better the second day.

Katie

Kale Puttanesca...sort of


I've gotten to the point where hardly a day goes by that I don't eat kale. Most often, it's in my morning smoothie, but I'm still a big fan of the leafy green on its own. After being introduced to raw kale in a salad, I throw it in mine whenever possible. And if I'm cooking, I would choose it over spinach every time. It holds together so much better, and I've never, ever had slimy kale. Unfortunately, I can't say the same for spinach. 


I got an email from my sister this morning with a recipe for a kale breakfast casserole, and I spent the rest of the day with kale on the mind. The breakfast casserole didn't work with the things we had around the house, but a kale-themed dish for dinner was a definite. 


I'm calling this a kale puttanesca because it has many of the signature ingredients of a traditional puttanesca - onions, capers, tomatoes, olives, served over pasta. But it's a bit of a misnomer since I left out the anchovies, threw in a few extra things, and made the dish a little less sauce-y. 


Perfect for a late May evening. 


My version of the kale puttanesca is gluten-free (we used brown rice pasta) and vegan. But you could use whatever pasta you like or add cheese. It would be delicious with grated parmesan sprinkled on top. 


Oh, and bonus points for being able to prepare the whole thing in the time it takes to boil the pasta. Perfecto.


Gluten-free, Vegan Kale Puttanesca


1 tablespoon oil (we used coconut)
1-2 cups kale, chopped
1-2 tomatoes, chopped
2 cloves garlic, minced
1 small onion, chopped
1 tablespoon capers
1/4 cup pitted kalamata olives, halved
1/2 cup white wine
1/4 teaspoon each dried oregano, basil, and thyme
salt and pepper, to taste
1 box penne pasta (we used brown rice)


1.  Prepare the pasta according to the package.
2.  Heat the oil over a medium flame.  Add onions and garlic and saute slowly, stirring occasionally. Add the oregano, basil, thyme, salt, and pepper. 
3. When the onions have turned clear, add the tomatoes and capers and continue to cook over medium heat, about 3-4 minutes. 
4. Add the chopped kale and the white wine. Cover and let simmer gently for about 5 minutes. While you're waiting, drain the pasta. 
5.  Mix the drained pasta and the kalamata olives into the saucepan with the kale, making sure the pasta is full incorporated with the "sauce."
6.  Enjoy!

Katie

Sugar-Free Chocolate Syrup Three Ways


chocolate syrup 3
About 10 years ago, I went through a fad dieting phase. I would read about a celebrity who swore by the blood type diet, and I'd be off to the library to check out my copy of the book. Three weeks later, after I drank my eighteenth glass of fruit juice with lecithin granules (hint: they don't dissolve), I'd break while standing outside a Starbucks staring creepily at someone eating a piece of pound cake. Or it was Atkins, and I would throw down my fork in the middle of a sausage, bacon, and cheese omelet with sour cream and spend the next 20 minutes making sweet love to an enormous bowl of pasta. 

The diets were always my own choice - to try to get "healthy" - and they never lasted for more than a few weeks. But during those weeks? Beware the crazy lady on the fad diet. I was a terror. I deemed anyone eating a cookie the enemy. It wasn't a good look for me. 

I mention all of this simply as a means of comparison. 

About three months into mine and Navah's relationship, she began an incredibly restrictive diet prescribed by her doctor to deal with some ongoing health problems. Like many such diets, it had an initial super-strict period and has gotten less restrictive over the years. But in the beginning (which lasted for about a year), her diet consisted mainly of meat, eggs, nuts, and green vegetables. As her health improved, she was able to slowly add in more foods, and now she can eat most things, with the exception of refined flours and sugars (or things like splenda), mushrooms, and some very high glycemic fruits like bananas and pineapple. We've discovered many great food items that cater to people with similar restrictions, but there are still many things she can't enjoy. Add this to the fact that she's long been lactose intolerant, and she certainly can't hop up to the counter at Starbucks and order a piece of pound cake. 

But none of that has ever kept her from coming home with a box of chocolates or a cupcake for me, or encouraging me to order that piece of pie after dinner. And she has never once glared at me as if trying to decapitate me with her eyes (which seems pretty standard with people you love, but based on my experience of restrictive dieting, is actually a fairly big deal). Instead she's always just been happy to vicariously enjoy my pleasure. 

It's something I both appreciate and admire. So when she mentions that she's having a hankering for something, I delight in being able to whip up something that might satisfy her craving. I don't always succeed (and remembering her eating a truly atrocious "pound cake" and pretending to like it will forever rank at the top of my reasons-I-love-Navah list), but sometimes I do. And this is one of those times.

While we were studying for the bar, Navah kept talking about wanting a chocolate ice cream float. I had never heard of one, but I learned that it's like a root beer float except with chocolate soda. You put chocolate syrup into seltzer to make chocolate soda, and then you put your ice cream in and voila! Chocolate ice cream float. 

The problem, of course, was that we didn't have any chocolate syrup without refined sugar in it. (Navah eats a fabulous ice cream made from coconut milk and sweetened with agave nectar called Coconut Bliss). So, with a little experimentation, I whipped up a batch of sugar-free chocolate syrup. It took about 4 1/2 minutes, and it did not disappoint.

Many chocolate ice cream floats were had. And there were smiles all around.

And then, and THEN, I decided the chocolate syrup would be even better if I made them in different flavors. I was right. I love it when I'm right.

We've been enjoying this sugar-free chocolate syrup in chocolate soda floats, over ice cream, over brownies, and maybe even just licking it off our fingers. It's that good.

chocolate syrup 2

Now that your mouth is watering, here you go.

chocolate syrup

Sugar-Free Chocolate Syrup Three Ways

1/2 cup unsweetened cocoa powder
2/3 cup water
1/8 teaspoon salt
1/3 cup agave nectar

Plus:
For original: 2-3 teaspoons vanilla
For mint flavored: 1/4 teaspoon mint flavoring 
For Mexican-style: 1/8 teaspoon chili powder, and 1/8 teaspoon cinnamon

Whisk all of the ingredients together over low-medium heat in a small saucepan.  
Pour into a jar or bottle and store in the refrigerator. 

So easy! And so delicious!

As always, let me know if you make any of your own and especially if you do any different flavoring. I love to hear how these things turn out for you guys!

And check back in tomorrow for an update on the pillowcase project. Teaser: Thank goodness I have a big suitcase!

Katie

Winter Salad with Maple Vinaigrette

winter salad I hated beets growing up.  In fact, I didn't eat a beet of my own volition until I was 28 years old.  It was roasted and served with soft goat cheese.  Not surprisingly, I was hooked.  It's no wonder I didn't want to eat the electric pink pickled ones that my mom served from a can (love you, mom!).  Why would anyone violate a beet in that way?  


Since I discovered the deliciousness of roasted beets, I am completely devoted to them.  On pizza, roasted with other root vegetables, in latkes, and even plain.  But my favorite way to have them is in a salad.  If there's a beet salad on the menu, I'm getting it.


In the past we haven't eaten a lot of salads at our house because Navah's not a huge salad fan, but I'm bringing them back.  And this one's at the top of the list.  It's hearty enough to serve right alongside any winter meal, and it's substantial enough that you could have it on its own.  Drawing from the fruits and veggies that are great this time of year, it's the perfect salad for a winter weekend brunch.   grapefruit We had ours alongside my vegan tofu scramble for dinner, and I liked it so much I had it again for lunch!


In fact, it was a winner all around.  The non-salad lover said - and I quote - "There's nothing about this salad that's not good."  The power of a double negative, my friends.  I think that says it all.
winter salad 3

Winter Salad with Maple Vinaigrette


1 bag mesclun or spring mix
1 white grapefruit
4 small beets
1/2 cup cooked quinoa
1/2 cup toasted pecans (in the oven for about 10 minutes at 350)
crumbled goat cheese (optional - I had, but Navah didn't)


For the dressing:
2 tablespoons maple syrup
2 tablespoons olive oil
1 tablespoon water
1 teaspoon dijon mustard


1. Preheat the oven to 375 degrees. Rinse the beets and then place on top of a piece of foil large enough to fold over and make a sealed foil pack. Drizzle the beets with olive oil and then seal up.  I place my foil pack on a cookie sheet to avoid spills. Place in the oven and roast for 30 minutes to an hour (check in on them at 30 and see how soft they are. If they need more time, continue checking every 10 minutes or so. Different ovens will vary).
2. Once the beets are cool, the skins should just slip right off. I had to remove some of mine with a peeler.
3. Cut off the peel and pith of the grapefruit, and then slice each section so that you get just the fruit and none of the membrane in between.
4.  Mix the mesclun or spring mix, the quinoa, the beets, the grapefruit sections, and the toasted pecans in a bowl.  Add the crumbled goat cheese if you're using it.
5.  Wisk together (or shake in a mason jar, like I did) the maple syrup, olive oil, water, and dijon mustard.  
6.  Pour the dressing over the salad, toss, serve, and enjoy.


The MVP Award goes to...
winter salad 2

This one was hard, and I'm going to have to get all kindergarten teacher up in here and say everyone was a winner.  Sorry for the competitive among you, but the team playing in this one can't be beat.  Each ingredient complements the others so thoroughly that it would be wrong to single out any one.  Everybody gets a trophy!


Have a wonderful weekend!  And let me know if you make the salad.  I love to hear about how these things turn out!

Katie 


This post is linked up at:
Pity Party at Thirty Handmade Days
EBTKS Link Party at A Little Knick Knack
Friday Link Party at Creation Corner
Weekend Bloggy Reading at Serenity Now


Four-Ingredient Vegan Chocolate Frosting

Chocolate Frosting


Yesterday, I whipped up a batch of vegan and gluten free brownies from Oh She Glows, one of my favorite healthy food blogs.  Unfortunately, I haven't gotten totally accustomed to this oven and ended up baking them a  bit too long. They're tasty but a little dry and crumbly and not quite as chewy as I think hers were.

What to do?

Frost them, of course!  Who cares if cake or brownies are dry if there's frosting on them?!  Okay, I admit that moist and chewy brownies with frosting are better than dry and crumbly brownies with frosting.  But you get what you get.  Today it's dry and crumbly.  Hopefully tomorrow it'll be something better.

On to the frosting!


Coconut milk


I've written before about the wonders of coconut milk.  It's great for pulling together a quick vegan frosting that's oh so delicious.  And this one's sugar-free chocolate frosting to boot!


Coconut cream 1

For the record, though we eat very little meat, we're not vegans.  But Navah is lactose intolerant, and I can't eat eggs.  So when it comes to baking, vegan tends to be the way we roll.  And Navah doesn't eat refined flours or sugars, so our kitchen tends to look like a giant baking chemistry project.


Coconut cream


When my mom was helping me unpack, she told me (and this is a direct quote), "Katie, you've acquired a lot of things in your 31 years, and the majority of them are different types of flour."  

Enough chatter.  On to the frosting! 

Chocolate Frosting 1


Four-Ingredient Vegan Chocolate Frosting

1 can coconut milk, refrigerated overnight
3 tablespoon cocoa powder
3 teaspoon agave nectar
2 teaspoon vanilla

1.  Scoop the coconut cream top out of the coconut milk can, making sure not to dig down too deep into the liquid part (which you can use in other recipes, like coconut curries, or put into a smoothie).
2.  Combine the coconut cream with the cocoa powder, agave nectar, and vanilla.  
3.  Frost!  

Amazingly quick and easy, eh?  You can add another tablespoon of cocoa powder if you want a richer flavor, but I like how light this one is, especially with already-chocolatey brownies.  

You'll need to keep the frosting in the fridge if you can manage not gobbling it up right away. Coconut cream frosting that sits out overnight will spoil.

Today's MVP Award goes to the vanilla.


Vanilla

Well played, dear.  

I hope you enjoy!

Katie 

This is linked up at Allergy Free Wednesdays.

Vegan Tofu Scramble: Copycat Recipe

Tofu Scramble 2

One of my favorite brunch places in DC is Open City in Woodley Park, primarily because they have a super interesting and varied menu, and they give you coffee in a cup only slightly smaller than your head. One of my favorite items there is the vegan tofu scramble.  It has such a fresh and unique flavor that I used to order it even before I knew I was somewhat allergic to eggs.


When I was there a couple of weekends ago - for what I knew would be the last time before I leave for Vermont (which, thankfully has many great brunch spots), I ordered the vegan tofu scramble, noted the ingredients in the menu listing, and studied the flavors while I ate so that I could attempt to recreate it at home.
Downloads
Before I share the results, I must admit that I am not one of those people who tastes a spoonful of something and instantly knows it needs more paprika or cumin or dill or anything really except salt.  I'm also not one of those people who can eat something and say, "yes, that thing you're tasting is cardamom."  Just not one of my skills.  So if the folks at Open City hadn't been so kind as to put the main ingredients on the menu, and if the dish weren't fairly straightforward, I probably never would've been able to make it.


With that being said, this was one of the best meals I've ever made.  The taste is complex and refreshing, and it's super simple to make - the best combination ever.


It was simply a matter of slightly browning the chickpeas,
Tofu Scramble 8
steaming the broccoli, and throwing that and the tofu in the pan
Tofu Scramble 3
while making the sauce.
Tofu Scramble 10
Tofu Scramble 6


The MVP Award goes to:
Tofu Scramble 7
Well played.  Seriously well played.


So, without further ado, here's the recipe:

Tofu Scramble 5

Vegan Tofu Scramble
Adapted from Open City's menu item


2 T tahini
Juice of 1 lemon
2 T water
2 T olive oil
1 tsp dried chives (I subbed these because I didn't have scallions)
1/2 block extra firm tofu
1 can chickpeas
1/2 small head of broccoli


1.  Rinse the chickpeas and pour into a pan with about 1/2 T olive oil over medium heat.  Add a little salt and pepper to taste.  You'll stir these occasionally while you prepare the rest of the ingredients.
2.  Take your tofu out and place it between two paper towels on a plate, and place a heavy object, such as a cast iron pan on top of it to squeeze out the water.  Let it rest like that until you're ready to cut it up.
3.  Steam the broccoli just until bright green - I used a traditional steamer in a pot, but a microwave steamer would work just as well.
4.  Prepare the sauce by combining the tahini, lemon, water, olive oil, and chives in a small bowl.  Set aside
5.  At this point, your chickpeas should be nice and golden, and your broccoli should be bright green. Cut up your tofu into small cubes and throw it and the broccoli in with the chickpeas.  Let that cook for about 2 minutes.
6.  At the last minute, just before serving, pour in the sauce and stir around until everything is coated.  You don't want it to be in there for more than a minute or so - just enough to heat the sauce.
7.  Serve!  I paired mine with mixed greens and a vinaigrette, but it would be great with toast and fruit or hash browns as well.


Enjoy!
Tofu Scramble 4

Katie 

Guest Post: Gluten-Free Ravioli


I am so delighted to have Amy of Things We Make on the blog today, and wait til you see this gorgeous gluten free pasta she made!  Amy's blog is filled with lots of farm-fresh food and recipes, as well as beautiful crafty goodness.  Her interviews with artisans are always inspiring, so I recommend you trot on over after you finish this post!


This is more of a story than a recipe, partially in response to the sometimes feeling of defeat that I feel when looking at gorgeous food blogs—does everything those lovely people cook look so stunning?—and partially just a chance to reflect on what goes on in my own kitchen. Okay, disclaimer aside, here we go.

I’ve always loved cooking for other people, which means that each year when my husband Josh’s birthday rolls around, I tend to walk the line of overdoing it in the kitchen. That’s usually fine with him because it means that he gets his once-a-year Huckleberry Cheesecake, among other goodies, but this year I was determined to make a celebration-worthy something that he and I could both enjoy.

Since I gave up gluten about 8 months ago on account of the searing headaches that they cause when it builds up in my system, a lot has changed in my kitchen. I bake less, simply because the ingredients are more expensive, and I haven’t been brave enough to try some specialty foods that I loved to make with regular flour—like pasta. I’m Italian, so part of me feels like the memory of excellent homemade pasta is better than a crappy version of gluten-free, but I’m also competitive and want to succeed at hard tasks. And since Josh loves ravioli, I decided it was time for me to give gluten free ravioli a shot for his big day.

I studied up on this recipe for Gluten free Egg Pasta from Shauna. I bought the ingredients intending to make the pasta exactly as she did it to avoid any potential blunders. I know what pasta dough should feel like so I was relatively relaxed about the endeavor—at least at first.  

To be honest, the dough was pretty hard to work with. It looked and felt okay when it was in a ball, but after putting strips through the pasta machine, it didn’t hold up well. At all. I’m not sure what I did wrong but I was concentrating so hard that at one point I kicked a well-meaning Josh out of the kitchen…I didn’t want him to see how hard I was trying to salvage our dinner.

I’d made a traditional cheese and herb filling and I kinda-sorta managed to make ravioli-esque shapes out of the uncooperative dough. As I tried to make pockets without any tiny rips, I attempted to focus on the taste. Maybe they would miraculously taste okay!

Turns out, the filling stayed put (hooray!) and the pasta dumplings floated to the top of the boiling water when they were ready, just like all purpose or semolina pasta. I cooked the whole batch I made, gently tossed them with pesto, and hoped for the best.

After the first bite, I realized that my mistake of adding 1 tbsp of salt instead of the 1 tsp called for in the recipe makes for very salty dough. Whoops! But also, and more importantly, pesto makes everything delicious. And despite the slightly manhandled appearance of our dinner, my darling husband was grateful for my efforts, not just the end result.

That evening reminded me that often times I am incredibly hard on myself when there’s no good reason to be. It was just dinner!


When our meal was done and we’d eaten the whole batch (we cut the saltiness by adding chopped fresh tomatoes), I decided that it wasn’t that bad after all—the finished texture was actually pretty great. So good that I’m going to keep making this recipe until I get it the dough to handle better. After that realization, I gave myself the credit that I deserved for even attempting to make homemade gluten free ravioli in the first place and vowed to try to relax a little…and to avoid kicking the man I love out of the kitchen for something as petty as not wanting him to see me struggle.

Am I the only one who has a little blog-induced performance anxiety every once in a while?

P.S. These are not vegan as they have eggs and cheese in them—but if you can tolerate eggs, try making the filling with a cashew cream base.  I bet that would be delicious.

Thanks for stopping by, and remember to go visit Amy's blog.  I'll be back next week with photos from the Smoky Mountains!


Katie 

All Year Latkes


When I met Navah a little over three years ago, I didn't really know what it would mean for my life to be in a relationship with someone who was Jewish (having been raised Christian in Georgia myself).  Neither of us could predict what it would mean to figure out our religious and cultural differences, but we both knew we wanted to be together.  Our interfaith journey has not been without trials, and I'm sure they will continue.  But it has also been filled with respect and understand and even some joy.  I have loved learning about and participating in Navah's traditions, especially the food ones.  Brisket!  Kugle! Matzo brei! Hello matzo ball soup!  How did I never know about that?!  Thanks to Navah's mom, I make a delicious one now.


This year was my first go-round with latkes, and let me say, they were the champions of Chanukah (after, of course, the miraculous light itself).  I myself came in a close third when I remembered all the words to the first part of the blessing.  Maybe next year I'll remember the whole thing!  (Languages = not my strong suit)


All Year Latkes

1 red onion, grated
1 sweet potato, grated
1/2 apple, grated
1 carrot, grated
1 beet, grated 
2 eggs
1/2 cup brown rice flour 
salt and pepper to taste
1-2 tbsp oil (I used grapeseed because I was cooking at a fairly high temperature)

1.  In a small pan, saute the onion on medium low heat about 5 minutes, or until the onion begins to turn clear. I'm pretty fuzzy with this part because I throw the onion on while I start grating the rest of the veggies.
2.  Set the onions aside to cool while you grate the rest of the veggies.  Once they're all grated, squeeze out any excess moisture in a colander.  Then mix the vegetables, onion, eggs, and flour.  Add salt and pepper.
3.  Heat the oil over medium high heat in a pan while forming the latke mixture into small patties.  You can squeeze out a little excess moisture as you go.
4.  Fry the patties on each side for about 2 minutes and then place on paper towels to drain.
5.  Serve with apple sauce.

Enjoy!

Katie 

"Free" Pumpkin Moon Pies


The weather these last few weeks has been wildly random.  One day I'm wearing boots, long sleeves, and a puffy vest.  The next day I'm in a t-shirt and flip-flops.  It's not that I don't like variety.  I'm just a sucker for the fall, and I'm delighted by the signs that autumn is finally getting ready to join us here in DC.  


The cooler, crisper weather just screams PUMPKIN! to me, and combined with a hankering for moon pies, I came up with this recipe (with the help of The Spunky Coconut).  


These are rich and super hearty, and the creamy filling tastes so delicious that  it just seems wrong!  You'll ask yourself - can this moon pie really be gluten-free, sugar-free, and vegan?  I'm here to tell you - Yes, it is!   


I will definitely be making these again.  Maybe this weekend - they're goin' like hotcakes!  Next time I'll flatten the cookies out a bit more before baking so I have a slimmer moon pie with a bit more filling.  

A note on coconut milk:  If you haven't worked with coconut milk before, it can be exceptional for making fillings and frostings if you refrigerate the can and separate out the cream from the water.  We have found that Thai Kitchen's coconut milk has the highest cream content and works best for these types of recipes.  If you live in the DC area, you might have seen me in the grocery store shaking cans of coconut milk to find the ones that seem to have the least liquid. Thai Kitchen wins.  When you take the can out of the refrigerator and open it, gently scoop out the creamy top until you get down to the water.  You can use the water in smoothies or curries - yum!  If all of this sounds confusing, just buy yourself a can of coconut milk, put it in the refrigerator, and check out the results.  

On to the recipe!


"Free Pumpkin Moon Pies"

Cookies:
1 cup almond meal flour
1/2 cup coconut flour
1 teaspoon baking soda
1 teaspoon baking powder (I used gluten-free)
2 teaspoons cinnamon
1 teaspoon ground ginger (I used powdered)
1/2 teaspoon nutmeg
1/2 cup pumpkin puree (or canned pumpkin)
3 tablespoons flax seed meal
1/2 teaspoon xanthan gum
1 tablespoon apple cider vinegar
12 drops liquid stevia (I used NuNaturals)
2 teaspoons vanilla extract
1/4 teaspoon sea salt
1/4 cup xylitol
1/4 cup coconut oil, liquified

1.  Preheat the oven to 350 degrees.
2.  Mix together the first seven ingredients and set aside.
3.  Mix together the rest of the ingredients with an electric mixer.
4.  Pour the dry ingredients into the mixing bowl and mix until just combined.  The mixture will be slightly crumbly.
5.  Start using your hands!  Roll the dough into balls and flatten - they will not spread or flatten while baking.  Place on a parchment-lined cookie sheet.  Bake for about 12 minutes.
6.  Allow the cookies to cool.

On to the filling!!

Filling:
One can coconut milk, refrigerated overnight
1 1/2 teaspoon vanilla
5 drops liquid stevia

1.  As described above, scoop the separated coconut milk cream into a bowl.  
2.  Add in the vanilla and stevia and stir until completely combined.  The stirring motion will have heated the cream, and you should have a mixture that's about the consistency of yogurt.  
3.  Place a dollop of filling on a cooled cookie and place another on top to create a sandwich.
4.  Refrigerate the moon pies for at least an hour before serving.  The filling will stiffen up again, allowing the moon pies to hold their shape. 

Enjoy!

Katie