Project Pie: Vegan Pumpkin Pie

image.jpg

Project Pie: I'll be baking 24 pies before Pi Day 2016 to get over my fear of baking pies. And to eat delicious things. You can join me by posting about your pies in the comments or tagging your twitter, instagram, or facebook posts with #projectpie. Make something scrumptious and gooey!

You're probably not surprised to learn that I am such a delight to be around that I rarely do anything that bothers my wife. 

It's true. She is especially not bothered by the way I always choose to make a complex, brand new recipe right before we have guests coming for dinner and then freak out about whether it will be any good at all, while simultaneously freaking out about the inevitable mess I've made. Obviously, delightful. And she's not bothered by how I decide to throw something in the oven that needs to bake for, say, 30 minutes when we need to be walking out the door with it for a potluck in, say, 25 minutes. Again, delightful. 

And, I mean, can you blame her? Who wouldn't love those things about me?

Sigh.

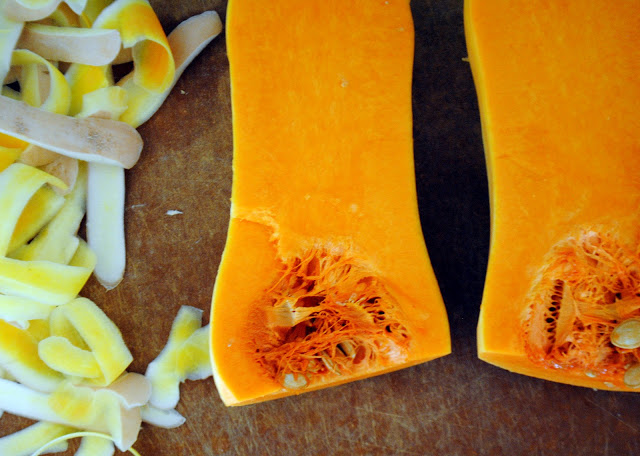
Luckily we didn't have to bring this pie to a potluck, and we weren't serving it to guests. (Though I did make us late for a dinner date because I forgot the pumpkins were in the oven, and we had to drive back and take them out and, you know, turn off the oven.)

But this step of my 24-pie journey has me thinking about how I like to keep things exciting in the kitchen. When I started Project Pie, I envisioned each pie in my future getting progressively more delicious, more beautiful, more restaurant/cover of a magazine-worthy. I imagined taking a bite of pie, my eyes lifting slightly before I shut them, my head bowing in a tiny prayer, my mouth chewing slowly before opening and saying in a hushed whisper, "Voila. I have done it. A vegan whole wheat pie crust for the masses!" 

I have weird fantasies. 

If you've been following along, you know that's not how it has happened. Not at all. 

For starters, I rarely make the same thing twice. And when I do, I'm hardly precise about it. It's difficult to perfect a pie crust you've only made once, but I'm always ready to try something new, check out a different variation, substitute this fat for that one because I forgot to buy the one the recipe calls for. 

When the new crust is falling apart or sticky or won't come out of the pie plate, I curse and promise myself I'll use the trusty ol' standby recipe next time. And then next time rolls around, and I find a new one with coconut oil and spelt flour, and I'm off to the races. 

I never seem to learn. 

But, you know, we haven't once thrown away a pie. Or even a slice (except for that one piece of peach ginger pie that molded as a lesson in how stupid self restraint is). 

Because, hello-o. It's pie. 

And pie is delicious even if the crust is a little crumbly or the filling leaks all over the pie plate when you cut it. 

I'm not going to re-post the recipe here because I followed Angela's almost note for note. The big difference is that I used half white spelt and half whole wheat flour and subbed in coconut palm sugar. My crust was...less than stellar. In the end, it tasted fine, but it definitely did not roll out. I basically smushed it into the pie plate and hoped for the best. The filling on the other hand? Delicimous. 

So, eyes closed, low whisper, "Voila! I made a pumpkin pie! It was yummy!"

The end. 

p.s. Opting out. (Like opting out of perfection when it comes to pies)

Like what you just read? Share it with a friend! You can also follow ktmade on TwitterFacebook, or Instagram so you'll never miss a post. And you'll earn my undying affection!

Double Chocolate Whole Wheat Zucchini Bread

So far I have been unable to grow zucchini. I long for that experience others bemoan - the zucchini overload, where everything they make has shreds of the green veggie, where they are bringing armloads to work colleagues or leaving a few each day in unsuspecting neighbors' mailboxes. 

But no. Last year we successfully grew a single zucchini. This year, none. One started, got about the size of my thumb and then died on the vine. I'm at a loss. Squash in general does not appear to be our thing. 

Thankfully we're getting zucchini from our farm share, and I pretended that the one I had left in the refrigerator was so overwhelming that I had no choice but to make a loaf of double chocolate zucchini bread. I mean, what else could I do with that guy??

With all the pies I've been making of late (one had zucchini!), cookies and cakes and other baked goods have been missing from our kitchen. As a pie lover, I wasn't really feeling the loss, but when my wife started making puppy dog eyes at me before a busy week of trial (for her), my mind went straight to that zucchini in the fridge and the container of cocoa powder in the cabinet. 

Double Chocolate Zucchini Bread 2.jpg

Double Chocolate Whole Wheat Zucchini Bread
Adapted from Sally's Baking Addiction

1 cup whole wheat pastry flour
1/2 cup unsweetened cocoa powder
3/4 teaspoon baking soda
1/4 teaspoon baking powder
1/4 teaspoon salt
1/2 teaspoon instant coffee powder
3/4 cup dark chocolate chips (I use Sunspire Grain Sweetened)
2 eggs
1/4 cup canola oil
1/4 cup plain yogurt (I use lactose-free Green Valley Organics)
1/2 cup coconut palm sugar
1 teaspoon vanilla extract
1 1/2 cup shredded zucchini

1. Preheat the oven to 350 degrees and grease a loaf pan. 
2. In a large bowl, whisk together the first seven ingredients and set aside. 
3. In a separate bowl, whisk together the next five ingredients and then pour the wet ingredients into the dry and mix until just combined. 
4. Fold in the shredded zucchini. 
5. Pour the batter into the prepared loaf pan, sprinkle a few extra chocolate chips on top, and bake for 40-50 minutes, or until a toothpick inserted into the middle comes out clean. 
6. Allow to cool before serving (though don't beat yourself up if you can't wait - the smell is divine). 

p.s. Since this bread tastes basically like brownies, if you wanted to be a little crazy, you could bake it in a 9x9 pan (reduce the cooking time slightly) and then slather it with this 4-ingredient chocolate frosting

Like what you just read? Share it with a friend! You can also follow ktmade on TwitterFacebook, or Instagram so you'll never miss a post. And you'll earn my undying affection!

Project Pie: Peach Ginger Pie (Whole Grain + Vegan)

peach ginger pie

Project Pie: I'll be baking 24 pies before Pi Day 2016 to get over my fear of baking pies. And to eat delicious things. You can join me by posting about your pies in the comments or tagging your twitter, instagram, or facebook posts with #projectpie. Make something scrumptious and gooey!

I sat next to my mom on her bed, a box of Cheez-its and a bag of grapes between us, J.B. Fletcher on the television. The glass of wine in my hand was sweet and pink. My parents' recent and surprising divorce had left me, at 21 years old, with the sense that everything I knew about the world up to that point had been wrong, or at the very least, lacking.

I leaned back on the pillows and watched as the maven of Murder She Wrote solved even the most impossible of crimes, proved to the skeptical cop that she was more than a meddling writer, made the killer confess. I fell into the odd happily-ever-after world where even when people are murdered, everything ends with a smile because the right person always pays.

It's the first memory I have of watching the show, and yet there was such a sense of warm, comfortable familiarity that I know I must have seen it many times before.

Thirteen years later, the feisty writer and mystery-solver from Cabot Cove is still my go-to on days that need a little constancy and predictability, when real life is playing a bit too fast and loose with my heart.

On Sunday, I snugged my laptop into the corner of the countertop and turned on Netflix as I pulled the ingredients for peach pie from the cabinets.  While I peeled and cut the peaches, Jessica Fletcher saved a wrongly convicted man from another 16 years in jail. As I mixed the dry ingredients and the wet, shuffling around the kitchen looking for just the right utensil, she hobnobbed with the wealthy and got a confession from the jewel thief murderer. I rolled out the pie crusts as Jessica saved a con man from a murder trial, exposing the jealous husband as the real killer. Over the sound of our vegetables sizzling in the pan for dinner, she set a cranky New York detective straight and proved the innocence of her old friend, recently out of prison. I pulled the pie from the oven, the smell of warm peaches and ginger filling the room.

I have guilt sometimes about watching television while I cook. You're not being present, I will tell myself. Sink into the feel of the food on your hands, the smells, the gentle meandering of your thoughts. At least if you are going to interrupt the process, let it be with music, I say.

But some days are not for being present. Some days are for letting the familiar formula wash over you and steal away your thoughts while you peel peaches.

The Dalai Lama and my mindfulness friends would disagree, I suppose, but I'd give them a piece of pie anyway.


Peach Ginger Pie
Adapted from First Prize Pies

Cornmeal Crust

1 cup Earth Balance, cut into 1/2-inch pieces and chilled
1/2 cup almond milk (or other non-dairy milk)
1 tablespoon apple cider vinegar
2 1/4 cups whole wheat pastry flour, chilled
3/4 cup cornmeal, chilled
1 1/2 teaspoons salt

1. Stir together the milk and vinegar and place in the refrigerator until ready to use.
2. Fit the food processor with a metal blade and add the dry ingredients, pulsing once to blend.
3. Take your milk mixture and Earth Balance out of the refrigerator. Pour the Earth Balance into the food processor and turn it on.
4. After a couple seconds, begin slowly pouring the milk mixture through the feed tube of the food processor. Once the mixture has been added, turn off the processor.
5. Pour the dough onto plastic wrap, bind it tightly, and refrigerate for at least an hour. (Note: The dough should come together if pressed but will not have formed a ball on its own in the food processor.)

Filling

2-3 pounds peaches, peeled and thinly sliced
1 teaspoon grated fresh ginger
1 teaspoon ground ginger
1/2 cup coconut palm sugar
1/4 cup arrowroot powder (or sub cornstarch)
1/4 teaspoon salt
Almond milk, for glaze
Coconut palm sugar, for garnish

1. Preheat the oven to 425 degrees.
2. In a large bowl, mix together the peaches and ginger.
3. In a separate bowl, mix together the sugar, arrowroot, and salt. Add this to the peach mixture right before adding the filling to the crust.

Putting it together

1. Remove the crust dough from the refrigerator and split in half. Place one half back into the refrigerator and roll the other half into a circle on parchment paper. Transfer it to a pie plate (I used an 8-inch deep dish) and trim the overhang. Brush the bottom crust with a thin layer of almond milk.
2. Place the pie plate in the refrigerator and take out the other half of the dough. Roll this second half into a circle.
3. Pour the peach mixture (with the arrowroot mixture added in) into the pie pan and top with the second crust. Fold the edges of the top crust under the bottom crust and then seal by pressing them together with your fingers. Brush the top with almond milk and sprinkle with sugar.
4. Place the pie on a baking sheet and bake for 20 minutes, turning once halfway through.
5. Lower the temperature to 375 degrees and bake for 30 minutes more, or until the crust is golden. Cool on a rack at least an hour before serving. 

Note: Earth Balance and nondairy milk are subbed one-for-one for butter and milk in this recipe - feel free to use dairy ingredients if you can.

p.s. I'm halfway there - this is Pie #12! 
Tomato Pie
Strawberry Rhubarb Crumb Pie
Whole Wheat Zucchini Potato Pie
Traditional Blueberry Pie
Strawberry Basil Pie
Vegetarian Taco Pie with Cornbread Topping
Vegan Maple Pecan Pie
Chicken Pot Pie with Herb Crust
Very Berry Mousse Pie
Passover Chocolate Mousse Pie
Whole Wheat Maple Apple Pie
Vegan Shepherd's Pie

Like what you just read? Share it with a friend! You can also follow ktmade on TwitterFacebook, or Instagram so you'll never miss a post. And you'll earn my undying affection!

Project Pie: Whole Wheat Maple Apple Pie


Project Pie: I'll be baking 24 pies before Pi Day 2016 to get over my fear of baking pies. And to eat delicious things. You can join me by posting about your pies in the comments or tagging your twitter, instagram, or facebook posts with #projectpie. Make something gooey and delicious!

After I announced my pie-baking intentions last week, I got a super nice email from Elizabeth sharing a pie crust recipe that she promised was "crazy easy." It was so kind of her to send the email ("I figure if you find a recipe that works, share the hell out of it, because sometimes finding good yummy recipes is not always easy."), and it pushed me from thinking about baking another pie to actually baking another pie this weekend. 

And she was right. Crazy easy pie crust - even with whole wheat. 

I went with an apple pie for #2. And here's the thing about apples: I am super picky about apples for eating straight. An apple must be crisp, juicy, and sweet. Not tough or grainy or mealy or tasteless or soft or bitter. I simply won't eat it. And this time of year can be a little rough on that front. My favorites are Honey Crisp and Pink Lady, but those are difficult to come by. What I see a lot of are big bags of apples that I don't really love to eat - Macintosh, Macoun, Empire. Generally not good for eating (in my opinion), especially when they've been stored since the Fall, but they are excellent for cooking. 

Those bagged apples were just begging me to make an apple pie. 

And thank goodness because apple pie is freaking delicious. I forgot a little bit until my taste buds reminded me. 

Of course everything we make in this house is a little bit wacky, so our apple pie has a 100% whole wheat pie crust (delicious) and is sweetened with maple syrup and coconut palm sugar (also delicious) and no refined sugars. But I would happily feed it to guests with no food restrictions. It's that's good. 

Navah proclaimed it the best thing I've ever baked. 


Maple Apple Pie (whole wheat, without refined sugar)

100% Whole Wheat Crust


2.5 cups flour (I used white whole wheat)
2 sticks (or 1 cup) butter or margarine (I used earth balance)
2 ounces cold water
2 ounces vodka

1. Preheat the oven to 375 degrees. 
2. Cut your butter into chunks (best if they're not all uniform in size) and put in the freezer for at least 10 minutes.
3. Add the flour and butter to your food processor and pulse 8-10 times, or until the mixture looks a little crumbly. Stop before it starts to look like cornmeal. You want some different sized buttery chunks. 
4. Pour in the water and vodka and pulse again 8-10 times until the dough starts to come together. Stop before it forms a big ball. 
5. Take the dough out of the food processor. It should all stick together at this point. Separate the dough into two equal chunks. Using a rolling pin, roll out 1 chunk of dough on a lightly floured surface until it is about an inch wider than your pie plate all the way around. 
6. Pick the crust up by rolling it onto your rolling pin and place it into your pie plate. Cut off any excess around the edges and put the crust into the refrigerator to chill while you make the apple filling. 
7. Wrap the other chunk of dough in saran wrap and put into the refrigerator. 

Maple Apple Filling

5-6 apples (I used Macintosh)
1 tablespoon butter or margarine (again, I used earth balance)
2 tablespoons whole wheat flour (I used white whole wheat)
2 tablespoons maple syrup
1 1/2 teaspoons pumpkin pie spice
1/4 teaspoon sea salt
1 tablespoon lemon juice

1. Peel and cut up the apples - I used a simple corer/slicer and then cut each slice two more times lengthwise. 
2. Put the apples into a microwave-safe bowl and microwave for 5-6 minutes. 
3. Drain the liquid from the apples and then add in the rest of the ingredients and mix until incorporated. 

Putting the pie together

1. Pour the apple mixture into your chilled pie crust. 
2. Roll out your second chunk of dough until it's about 1/8 inch thick and use cookie cutters to cut out shapes. 
3. Place the shapes onto the pie crust in a pattern that suits your fancy. 
4. Bake the pie at 375 degrees for 1 hour. If the edges start to brown or burn, use tin foil to cover them and continue cooking. 
5. Serve warm. 


As you can see from the pictures, I'm not perfect at pie crust making - the edges of my crust don't go over the edge of the pie plate. I underestimated how much crust (and how many apples) I would need to fill up the deep dish pie pan. But the idea here was to bake more pies and to stop feeling intimidated, not to be perfect. Remember the rules?

1. Make some pies.
2. Don't cry if they're not perfect.

Anyone else out there baking a pie this week? What kind? I need ideas for pie #3!

p.s. This vegan apple crisp is another great way to use those bagged apples.


Cornmeal and Rye Whole Grain Waffles

Oh, Waffles. 

Waffles are at the same time easy and quite difficult.  On the one hand, you've got the appliance to make the things right there on your counter - a waffle maker.  Just pour the batter in, close the top, and presto! - a waffle.  But then what, really, is the quality of that waffle?

It takes just the right batter and just the right time in the waffle maker so that when you open the top, the waffle that comes out is tasty, a little crispy on the outside, and soft and spongy on the inside.  I can't claim to have invented that perfect waffle, but I can claim to know a good thing when I've found it.

It's not the first time I've relied on King Arthur's Whole Grain Baking and it won't be the last.  It's the only cookbook I've unpacked since we moved.  I can't figure out where to put the lot of them in the kitchen, but that one's sitting right on the counter.  This recipe in particular results in a waffle with a deep, nutty flavor and a moist crumb.  It pairs perfectly with berries, like the simple raspberry compote I made with frozen raspberries and a little apple cider.  It's my favorite waffle for a weekend morning.

But I don't stop with just the weekends on this one.  I always make a few extra, tear them into their four pieces, freeze them on a cookie tray, and then put them into ziploc bags in the freezer.  On a busy morning, I can pop them in the toaster oven and have them with a little almond butter and jam for a quick breakfast.  They're the weekend waffles that keep on giving.

And don't be turned off by the rye flour! The flavors meld together really nicely.  And while I was doing a little research for this post (to try to figure out what exactly rye tastes like because I had previously assumed it wasn't yummy), I discovered that the mix of rye and cornmeal is what makes up the Ingalls' families "rye n' injun bread" (her words, not mine) in the Little House on the Prairie series.  So, Laura Ingalls ate it, and that's always a good reason to try anything.  

Cornmeal and Rye Whole Grain Waffles
Adapted from King Arthur Flour Whole Grain Baking

3 cups non-dairy milk mixed with 3 tablespoons apple cider vinegar (or buttermilk)
2 eggs
6 tablespoons earth balance (or butter), melted
2 cups yellow cornmeal
1 cup whole rye flour
1/4 cup coconut palm sugar (or you can use regular sugar)
2 teaspoons baking powder
2 teaspoons salt
1 teaspoon baking soda

1.  Whisk together the non-dairy milk (I use almond milk) and apple cider and let sit.
2.  Melt the butter and whisk with the eggs in a medium bowl.  
3.  In a separate bowl, blend the dry ingredients.  Then mix the non-dairy milk mixture in with the butter and eggs.  Quickly and gently combine the wet and the dry ingredients.  
4.  This is important:  Let the batter sit for 10 minutes to allow the cornmeal to soften.  The resulting batter will be quite thick.
5.  Preheat your waffle iron and spray with a nonstick cooking spray if necessary.  When the iron is ready, drop the batter onto it by 3/4-cupfuls (depending on the size of your waffle maker) and bake until the iron stops steaming, approximately 3-5 minutes.  I like to err on the longer side so that my waffles are nice and crispy on the outside.  
6.  Serve with maple syrup or a fruit compote.  Or both!

100% Whole Wheat Baked Chocolate Donuts


A couple weeks ago on National Donut Day, I not only took myself out for a little breakfast at Dunkin Donuts.  I also came home and baked up some whole wheat donuts so that Navah could celebrate National Donut Day as well.

These aren't fried like what you'd get at a bakery, but I'm just going to go out there and say they're among the most delicious donuts I've ever had.  I had to hold myself back from eating them all right away.

I can't claim that they're wildly healthy, but I'm guessing they're significantly better for me than what I got in the drive-thru at Dunkin Donuts.

Of course, the greatest part of all is that they take about 20 minutes to throw together.  And with only a bowl and a donut pan to clean up, this is my type of sweet snack baking.

To fancy things up a bit, I followed this post and made powdered "sugar" from xylitol and arrowroot powder in my Ninja blender.  With a little of that sweetness sprinkled on the top, these were the donutiest baked donuts around.


100% Whole Wheat Baked Chocolate Donuts
Adapted from whole wheat cinnamon sugar baked donuts

2/3 cup whole wheat flour
1/3 cup unsweetened cocoa powder
1/2 cup xylitol (or sugar)
1 teaspoon baking powder
1/4 teaspoon baking soda
1/8 teaspoon salt
1 large egg
1/3 cup yogurt
3 tablespoons almond milk (or regular milk)
2 tablespoons canola or vegetable oil
2 teaspoons vanilla extract

1.  Preheat oven to 350 degrees. Spray a  6-donut pan with cooking spray.
2.  In a large bowl, combine the dry ingredients (flour through salt) and set aside.
3.  In a medium bowl, whisk together the remaining ingredients (egg through vanilla extract).  Add the dry ingredients to his bowl and stir, just until combined.
4.  Spoon the batter into the prepared pan, filling between 3/4 and full.
5.  Bake for 12 - 14 minutes or until a toothpick inserted in the middle of a donut comes out clean. Let the donuts sit for a minute and then turn out onto a wire rack to cool.
6.  Serve immediately or store in an airtight container for up to three days.
7.  Top with powdered sugar if you wish!

Healthy Decadence: Pumpkin Pancakes with Coconut Fried Bananas


One of my favorite things about the weekend is the breakfast.  Sure, I love my weekday smoothies or a nice bowl of oatmeal, but I get really excited when there's something decadent on the menu.  And that happens on the weekend.

We usually split the days:  one morning of making something delicious at home, one of heading out for brunch.  And though my brunch meal this weekend was great, I can say honestly that it wasn't as good as these homemade pancakes.


The hearty, subtly sweet flavor of the pancakes combined with the decadent, gooey bananas made this perhaps my most successful weekend breakfast ever.

And the good news is that these pancakes aren't only delicious - they're healthy.  Simple ingredients, one hundred percent whole wheat flour, and no refined sugar.


Whole Wheat Pumpkin Pancakes with Coconut Fried Bananas
Adapted from whole wheat pumpkin pancIn akes 

For the pancakes:
1 3/4 cups whole wheat flour
1/2 tablespoon maple syrup
2 teaspoons baking powder
1 teaspoon baking soda
1/2 teaspoon cinnamon
1/4 teaspoon nutmeg
1/2 teaspoon salt
2 cups milk (I used unsweetened almond milk)
1 cup pumpkin puree (I used canned pumpkin)
1 egg
1 tablespoon vanilla extract
coconut oil for frying

For the bananas:
Follow the instructions found here

1.  Mix together the wet ingredients in a large bowl (including the pumpkin).
2. Quickly wisk together the dry ingredients in a separate bowl, and then pour the dry ingredients into the wet, mixing completely.
3.  Pour 1 tablespoon of coconut oil (or melt 1 tablespoon in the pan if your coconut oil is in a solid state) into a frying pan over medium heat.
4.  Scoop about 1/4 cup of batter into the pan for each pancake.
5.  When large bubbles appear in the center of the pancakes and they start to lose the shiny look of batter, flip them over.  (Note: Because of the pumpkin, these will likely need to cook a little longer and on a lower heat than your average pancakes so that they're not too gooey on the inside.)
6.  While the pancakes are cooking, prepare the bananas as instructed here
7.  Create a stack of finished pancakes, topping with the carmelized bananas, a sprinkle of coconut, and a drizzle of maple syrup. 
8.  Enjoy!


Thai Red Curry


I go through fits and spurts with cookbooks.  I tend to find most of my recipes from blogs, but every now and then I get a longing to lay a book out on the counter and splatter it with all sorts of ingredients.  There are two that I turn to most - my beloved King Arthur Whole Grain Baking and Moosewood Restaurant Cooking for Health.  They rarely disappoint.


I made this recipe for the first time last week, and I was completely wowed by it.  I wish you could smell through the computer because even before you taste this, the smell is divine.

The Most Valuable Player award goes 100% to the lime leaves.  Do not leave those out.  (I bought them in the produce area with the herbs.)  Just by floating in the coconut milk as it cooks, they give the dish that distinctive Thai flavor.  And I might have developed a habit of randomly pulling the bag of them out of the refrigerator, snicking my nose in, and inhaling deeply.  Might have.


Thai Red Curry
From Moosewood Restaurant Cooking for Health

8 ounces firm tofu, cut into cubes
2 tablespoons soy sauce
1 1/2 tablespoon grated, peeled ginger root
4 teaspoons coconut oil
3 garlic cloves, minced
1/4 cup minced shallots or onions
1 tablespoon red curry paste
1 14-ounce can coconut milk
1 cup water
2 Thai lime leaves
1 cup sliced carrots
3 cups bite-sized cauliflower florets
1 cup cut green beans (I used frozen)
1 red bell pepper, diced
1/2 cup chopped fresh basil
1 tablespoon lime juice
Grain of choice for serving (I used quinoa)

1.  Toss the tofu cubes, soy sauce, and 1/2 tablespoon of the grated ginger (I actually use minced ginger that I get in a har - it's one of my time-savers and means I'm not constantly throwing away dried up nubs of ginger that I forgot about).  Set aside for at least 15 minutes while you chop the vegetables.

2.  Prepare your grain of choice according to the package directions.

3.  Warm 2 teaspoons coconut oil in a soup pot on medium heat.  Drain the tofu and reserve the liquid.  Cook for 5-10 minutes, stirring occasionally, until the tofu is golden.


4.  After the tofu is golden, remove it from the soup pot and put it back in the bowl with the marinade.  To the soup pot, on medium-high heat, add the remaining 2 teaspoons of oil, the remaining tablespoon of ginger, the garlic, shallots or onions, and red curry paste.  Cook for about a minute, stirring constantly to prevent scorching.  Stir in the coconut milk, water, and lime leaves and bring to boil on high heat.

5.  Stir in the carrots and cauliflower, bring back to a boil, then reduce the heat and simmer for 5 minutes.  Add the green beans and simmer for 2 minutes.  Then add the bell peppers, basil, tofu cubes, and reserved marinade.  Return to a simmer for 2-3 minutes until all the vegetables are crisp-tender.  Finally, stir in the lime juice and serve with the quinoa (or other grain).


Beer and Sausage Pasta


A few months ago, Ashley of (never)homemaker posted a recipe for crockpot vegetable soup, and she used beer in place of the vegetable stock.  I tried her recipe when my family was here for the holidays, and my mind was blown.  The turkey stock in my freezer may never get used.  It's beer from here on out.


The richness of flavor that the beer brings an otherwise average meal is just unbeatable.  So I've been trying it in everything imaginable.  And this one is by far my favorite.  We've had it twice in the last month, which doesn't seem like that much but is a lot for me.  I'm generally pretty flighty with my food choices.  But I was actually craving this dish after we had it.  The mix of all the different flavors - the smoothness of the sweet potatoes, the spicy sausage, the tangy sun-dried tomatoes, the beer.  Absolutely delicious.


Though there's a little prep time, this pasta is a cinch to make, and it could easily be a dish you serve over rice or quinoa or with mashed potatoes if that's your thing instead of pasta.  I think we'll be having it with quinoa at some point in the future.  Probably not too far in the future, actually...


Beer and Sausage Pasta

1 medium yellow onion, diced
1 sweet potato, diced
1 pound sausage (I used Bilinski's chicken andouille-flavored sausage), chopped
4 large leaves curly kale, thinly chopped
4 cloves minced garlic
6 sun-dried tomatoes, diced
1/2 pound pasta of your choice (I used fusilli)
1 can beer of your choice (I used Budweiser)
1 teaspoon dried oregano
1 teaspoon dried thyme
Olive oil
Salt and pepper to taste

1.  In a pan over medium heat, saute the onions in olive oil.  Add oregano, thyme, and salt and pepper to taste.  Stir occasionally and cook until the onions begin to soften, about five minutes.
2.  While the onions are cooking, steam the diced sweet potato until soft (about ten minutes) and put the pasta water on to boil.
3.  Once the onions are soft, move them to the edges of the pan and put the sausage in the middle of the pan.  Turn up the heat just a bit and resist the urge to stir too much!  Let the sausage brown a bit before turning it and letting it cook a bit more.
4.  When the sausage has browned a little on the outside, add in the garlic and the sun-dried tomatoes and pour in the beer.  Turn down the heat to medium low and let it all simmer and get good and beer-y. This is probably around the time your pasta water will be boiling and ready for the pasta.
5.  Once about half of the beer has reduced down, add in the kale and put the top on to allow the kale to wilt for about five minutes.
6.  When the pasta is finished cooking, drain it and mix the pasta with the sausage.  Serve immediately with a good, hearty whole wheat bread.


*The first time I made this dish, I mixed in a couple of tablespoons of nutritional yeast at the end of the sausage mixture cooking time.  It adds a bit of creaminess that I liked.  I'll probably make it both ways in the future.  


100% Whole Wheat Bread


I've taken to baking bread on the weekends - a simple loaf  made of 100% whole wheat flour.  The recipe* comes from the gods of whole grain baking, the King Arthur Flour company.  
 
I love the feel of the dough under my hands, the way I end up measuring time by the number of minutes left for rising, the smell from the oven.  And then finally, after a day of waiting expectantly, the  luxurious act of spreading butter (or earth balance) on a warm piece of bread.  We always cut it before we're supposed to.  We never let it cool enough.  How could we? 
 
We eat those first warm bites with our eyes closed, sighing in gratitude for the way a little bit of yeast can turn flour and water into this nutty goodness.  For days, we eat the bread in unfortunate quantities - slathered in butter, covered with a bit of cheese, or just plain, sneaking off a slice before dinner.   And then it's gone and we look forward to the next weekend and another day that ends with a warm loaf from the oven.


*  I make a few changes to the recipe for our needs.  I use dry soy milk instead of regular dry milk, and I use 1/4 cup orange juice in place of part of the water, which tempers the bitterness of the whole wheat a bit.  I sweeten ours with maple syrup.

Apple Crisp - Vegan, Sugar-Free, Whole Wheat


Picking your own fruit is always a big commitment, a fact that can sometimes get lost in the excitement of getting out into the field and wielding a giant apple-picking implement.


Oh that doesn't happen to you?

I've never used one of these contraptions before, but you can bet that when the woman at the barn pointed them out, we (my friends and I) snatched them up and delighted in trying to get the apples at the tippy tip top of the trees.


And we got tons of them.

These are just the ones I brought home!

Which brings me back to the commitment.

I spent Sunday afternoon cutting apples, peeling apples, and cutting more apples.  I filled my crockpot to the brim and made one big batch of applesauce.  I made an apple crisp, and I still have more than half of the apples left. 


Those are awaiting the chopping block - to be made into apple muffins and apple butter and maybe one more of these apple crisps because it's just that good.


Apple Crisp - Vegan, Sugar Free, Whole Wheat
Adapted from Betty Crocker

5-6 medium apples, peeled, cored, and sliced very thinly
2/3 cup coconut palm sugar (or 3/4 cup brown sugar)
1/2 cup whole wheat pastry flour
1/2 cup old-fashioned oats
1/3 cup earth balance (or butter or margarine), softened but not melted
3/4 teaspoon ground cinnamon
3/4 teaspoon ground nutmeg

1.  Layer the apple slices overlapping each other in rows in a baking dish.  I used a 9 x 13, and I got 4 rows, alternating the direction of the apples with each row.  You could also use a 9 x 9 or a go wild and use a circular dish!
2.  Preheat your over to 350 degrees while you mix the rest of the ingredients in a small bowl until it's all nice and sticky.
3.  Crumble the mixture over the top of the apples, making sure to cover evenly.
4.  Bake for 35-30 minutes. Serve warm.

Yum.


Katie


PS - I tried to take a photo of the apple crisp in action - i.e. on a plate with some ice cream, but every single one turned out looking like...well, I won't say what it looked like.  Delicious, but not beautiful!

Freezer Vegetarian Chili


Several years ago Navah and I read Barbara Kingsolver's Animal Vegetable Miracle, where the author narrates her family's year of local-eating.  They limited themselves to only food grown within one hundred miles of their Virginia homestead, so it makes sense that their kitchen was very season-specific.  Summer found it overflowing with a bounty of fruits and vegetables, literally drowning in piles of zucchini.  In Fall, they enjoyed crisp apples and some of the later vegetables and checked their pantry and freezer to make sure they had enough stored away for the winter.  

I adored the book and finished it with an overwhelming desire to hang garlic up to dry over my kitchen sink and hunt for morels on a hillside and buy bushels of tomatoes to freeze or can, to draw on all those years relishing the chore-filled, season-driven lives of the Little House on the Prairie clan.  

But at the time I was reading it, I was lying on a beach in Costa Rica, buying rice and beans for every meal from tiny little restaurants.  And by the time we were back home in our DC highrise apartment, I had forgotten.  

Perhaps one day I'll lead a life so close to the earth that my kitchen will follow the seasons, and I'll finally become one with my inner Laura Ingalls Wilder.  But now the days fly by me so fast most of the time.  A season's gone before I realize that my canning pot hasn't moved from the top of the refrigerator.  

So when I stepped outside to walk Jammer about a week ago and had to run back in for a warmer jacket, the thought that came right after "ooh, it's FALL!" was "ooh, I need to FREEZE something!"

With a potluck on the calendar for that evening, a giant pot of chili seemed like a winner.  I could make a big enough batch that I'd have enough to bring to the potluck and enough to freeze for some cold winter night down the road.


And a big batch it was.  We brought about seven servings to the potluck and were able to put at least that many in the freezer.

Freezer Vegetarian Chili

2 tablespoons olive oil
1 onion
1/2 tablespoon salt
1 teaspoon ground pepper
2 teaspoons cumin
1 1/2 teaspoons chili powder
1/4 teaspoon chipotle chili power
1/4 teaspoon paprika
4 cloves garlic 
2 fifteen-oz cans of kidney beans
2 fifteen-oz cans of black beans
2 fifteen-oz cans of navy beans
1 fifteen-oz can of Amy's medium chili with vegetables (my "secret" ingredient)
1 eight-oz can of tomato sauce
four tomatoes
1 each green, red, and yellow pepper
1/2 bag frozen corn
1 cup bulgur wheat

1.  Dice the onion and saute in a large pot over medium heat in the olive oil.  Add in the salt, pepper, chili powder, garlic, and half the cumin.  Cook, stirring occasionally, for about five minutes, or until the onions begin to soften and turn clear.  

2.  Add in the chopped peppers and tomatoes.  Cook together for about five minutes.

3.  Add in the beans, tomato sauce, corn, bulgur wheat and remaining spices (including the other half of the cumin).  Bring to a boil and then reduce to a simmer.  Let cook with the top on for 1-2 hours, checking occasionally to be sure the bottom isn't burning.  

It's so simple but really delicious.  Once the soup cools, ladle it into your freezer-safe containers and look forward to pulling some out on a cold night this winter!


Katie 

Taco Salad: Make Your Own Taco Bowl


When I go out for Mexican food (generally Tex-Mex, actually), my favorite things to order are nachos, burritos, and taco salads.  Nachos and burritos are pretty frequent at home too - they're easy to put together, and we try to keep the ingredients around. 

But a taco salad?

The best part of that is obviously the crispy taco bowl, and the ones you can buy in the store always taste a little stale.  So, for my money, they're not worth it.  And Navah wouldn't be able to eat them anyway since they have white flour and usually high fructose corn syrup or sugar, so that just seems cruel.  

What to do?  I noodled around on the interwebs a bit and found a tutorial here on how to make your own fried taco bowls.  I came across some baked ones as well, but I wasn't sure whether those would really get crispy.  And we love fried things.  


I'm sorry to report that I only have one somewhat sad photo of the process of creating the taco bowls because I started a bit of a grease fire in the process.  Everything is quite alright, and I don't have any great tips for how to not make that happen except that it's probably not a task you'd want to assign to your child.  

Vegetarian Taco Salad with Fried Taco Salad Bowls

Taco salad bowls 
Adapted from Creating Through Life

10 inch flour tortillas (we used whole wheat tortillas)
1 empty can (I used the one from the beans for the salad)
small pot (smaller in diameter than tortillas)
vegetable oil

The one sad process photo.  I had to use the tongs to flip that floppy bit out so it would form a bowl.

1.  I didn't remove mine, but you should probably remove the label off your can and wash and dry it.
2.  In your pot, heat the oil - about 2 inches deep - until it's 375 degrees.  You can, of course, test this with a thermometer, but you can also put the bottom off a wooden spoon in.  If it bubbles, it's ready.
3.  Optional step:  Dip the tortilla for just a second into a pan of water to soften it.  This may be why I started a grease fire, so beware.
4.  Place a tortilla on top of the oil.  Holding the can with the tongs, place it in the center of the tortilla and push the tortilla gently down into the oil.
5.  Hold the can there for about 5 seconds, or until the tortilla shape is set.  Then remove the can and move the tortilla around in the oil with the tongs until it's all as crispy as you'd like.  (Because we only have very tiny or very big pots, my tortilla wouldn't totally fit in the pot, so I did a lot of moving it around afterwards to get all the bits crispy.)
6.  Remove the tortilla with the tongs and place upside down on paper towel to cool.


The Vegetarian Taco Salad Filling

1 can beans (we used kidney, but black beans, or white beans would also work)
1 onion
2 sweet potatoes
2 cups romaine lettuce
1 tomato
1 1/2 tsp chili powder
1 tsp cumin
3/4 tsp paprika
salt and pepper to taste
optional toppings (cheese, avocado, salsa, sour cream, olives, etc)

1.  Put a small pot of water on to boil.
2.  Chop the sweet potatoes into small cubes (about 1/4 thick).  Place in the pot of water and boil until just soft.
3.  While the sweet potatoes are boiling, chop up the onion and place in a frying pan with a tablespoon of olive oil.  Cook on medium heat until the onions turn clear.  Add salt and pepper to taste. 
4.  Drain the sweet potatoes and add to the onions, along with the can of beans and the chili powder, cumin, and paprika.  
5.  Cook over medium-low to medium heat for about 5 minutes, stirring occasionally. 
7.  While the bean and potato mixture is cooking, prepare your salad bowls with lettuce, chop up a tomato, and get out any toppings you would like.
8.  Remove the bean and potato mixture from the stove and place a generous spoonful on top of the lettuce in your salad bowl. 
9.  Top with tomatoes and whatever toppings you've chosen.


Enjoy!

Katie 


Beet Risotto

I love beets.  


And I love any opportunity to incorporate beets into my diet in interesting ways.  I'm even hoping to use some beets in a dye sometime - they're certainly an exquisite color.


This beet risotto gives me a little of both worlds.  


How often do you get to eat a savory fuchsia dish?!  Sometimes I try to avoid the beet color infusing my entire meal, but with this risotto, it's just plain fun!


And delicious to boot.


The sweetness of the beets combined with the creamy coconut milk and the nutty flavor of the brown rice makes for a complex dish that could work as a side or on its own.  


I had it as my entree for lunch today, but I've also served it alongside a salad and some grilled chicken.


Beet Brown Rice Risotto
Adapted from Group Recipes


1/4 cup Earth Balance (or butter)
6 small beets or 3 medium beets, peeled and chopped
1 medium chopped onion
1 cup short grain brown rice
1 cup vegetable broth
1/2 cup water
1 can coconut milk
1 tbsp balsamic vinegar
salt and pepper, to taste


1.  Melt earth balance in large pot over medium heat.
2.  Add onions and beets, salt and pepper to taste, and cook approximately 10 minutes until onion is soft.
3.  Mix in rice and all liquid ingredients and reduce the heat to medium low.  
4.  Simmer gently uncovered until beets and onions are soft and risotto is creamy, stirring occasionally. Probably about 20-30 minutes. 


Enjoy the colorful deliciousness!

Katie

Artichoke and Asparagus Quinoa Risotto (GF, vegan, sugar-free)


Quinoa's on the menu at our place a lot these days. As a complete protein, it's an excellent way to get extra nutrients into a simple and delicious meal like a risotto. For a potluck we attended last night, I whipped this up so I'd be sure we had something healthy to put on our plates.


It was a hit with everyone - we didn't have a smidge to bring home!


It's a pretty easy but time-intensive dish, so you'll need to leave yourself at least an hour to prepare it when you can be close to the stove. 


If you've never cooked with quinoa before, give it a try. It packs more nutrients than rice - even brown rice - and the subtle nutty flavor is really excellent.


Artichoke and Asparagus Quinoa Risotto


1 can of artichokes in water
1 bunch of asparagus
1 cup of quinoa, dry
1 tablespoon coconut oil (or other oil)
1/2 teaspoon oregano
1/2 teaspoon thyme
1 cup vegetable broth
1 cup almond milk 
1/2 cup nutritional yeast
1/2 tablespoon white miso
1 tablespoon lemon juice
salt and pepper to taste 


1.  Chop and steam the asparagus until bright green and slightly tender.
2.  While the asparagus is steaming, add the quinoa, spices, and coconut oil to a pan over medium heat. Stir it all in the pot to ensure that the quinoa is coated, especially if the coconut oil is still hard.
3. Once the quinoa starts to sizzle and pop a bit, add in the broth, almond milk, nutritional yeast, miso, and salt and pepper.  Allow to come to a rolling boil, and then reduce to a sizzle and cover. Stir again ever 5-10 minutes. This is a good time to do some dishes or putter around the kitchen. Music helps. Resist the urge to leave or it might burn.
4. Once the quinoa starts to soak up a lot of the liquid and you notice there's not much left in the pan, do a quick taste test to see whether it's soft. If the quinoa seems too crunch, you might want to add a little more liquid. You can add in more broth or milk or a little water in 1/4 cup increments. You don't want it to be soupy or mushy - just creamy and soft. 
5. Once the quinoa is finished - all the liquid is incorporated and the quinoa itself is soft and perhaps slightly chewy (not crunch) - mix in the asparagus and the drained can of artichokes along with the lemon. Add a little more salt and pepper if necessary and serve. 


Enjoy!

Katie

{UPDATE:  Check out my friend Tori's comment below if you're interested in some non-vegan substitutions!}

Creamy Quinoa Salad


We've thrown open the windows to let in the warm air and the cool breezes. It feels good, like we're cleaning out the old - the solitude of winter - to make way for the new - communion with birds and flowers, neighbors and friends. 


It's not yet June, but it's summer. 


With the windows up in the living room, our front screened porch has extended our apartment, and we spend as much time in our plastic adirondack chairs as possible. 


I don't want to cook when I get home in the evenings. I want to whip up something refreshing and full of vegetables and eat it on the porch.  


This creamy quinoa salad packs all the nutrients you need into one bowl, and the dill dressing from Oh She Glows is my newest obsession. 


Dill tastes like summer, and I want to eat it on everything. Dishes have become vessels for dill.


This one is less of a recipe and more of an invitation to open the door of your refrigerator and start chopping whatever you find. You can't really go wrong with this salad. 


Creamy Quinoa Salad


2 cups uncooked quinoa
One batch dill dressing from Oh She Glows
Vegetables (I used tomatoes, a yellow pepper, sugar snap peas, edamame, and some arugula as a garnish)
Anything else your heart desires (chickpeas, artichokes, hearts of palm, raisins, almond slivers, sunflower seeds - seriously, go crazy)


1.  Cook quinoa according to package instructions.
2.  Put the cooked quinoa in the refrigerator for about 15 minutes while you chop up the vegetables.
3.  Add the chopped veggies (or other additions) to the quinoa. 
4.  Prepare the dill dressing and mix it thoroughly into the quinoa and vegetables.
5.  Serve! I topped mine with some arugula and feta cheese. Yum!

Katie 

Whole Wheat Fried Dough


One of my all-time favorite treats as a kid was fried biscuits from a can. I felt like they were something special my family did to approximate beignets because we were cajun but not great with the beignet-making. Ours never puffed up.


I've since learned that lots of people make them, but it hasn't lessened my enjoyment one bit. I've made them for other folks on various occasions, and it has won me undying devotion in certain circles. You think I'm kidding, but I'm not.


Of course, I don't think there's a single ingredient in a can of Pillsbury biscuits that Navah can eat. I still make them for myself sometimes, but fried dough is something she's never gotten to enjoy.


Until this past weekend.


When I made the honey whole wheat biscuits a few weeks back, I had a bit of dough leftover that wasn't big enough to make into a full biscuit. While the others were baking, I heated up some oil and plopped the little bit in and...Kabam! A little ball of puffy, fried dough!


So this weekend, I whipped up a batch of the biscuit dough - using a flax egg in place of the real egg, rolled it out, cut it into little squares and made us some fried biscuits. I sprinkled them with cinnamon and "sugar" (xylitol) to take the place of the powdered sugar that I would normally sprinkle on fried biscuits.


They look a little like chicken nuggets here, but I assure you they are not. They're sweet and delicious. I also recommend making them when you have friends around. Or only making a half batch. We had a little self-restraint issue, which led to a big food coma issue.

Honey Whole-Wheat Fried Dough
Adapted from King Arthur Flour Whole Grain Baking


3 cups whole wheat pastry flour
2 1/2 teaspoons baking powder
1/2 teaspoon baking soda
3/4 teaspoon salt
1/2 cup (or 1 stick) cold earth balance
1 flax egg (1 tbsp ground flax seeds mixed with 3 tbps warm water)
3/4 cup almond milk (or soymilk or buttermilk if you can have it)
3 tablespoons honey


1. Whisk together the dry ingredients in a large bowl.
2. Cut the butter into the dry ingredients with a pastry cutter, a fork, or your hands until it's a dry, crumbly mixture. Set aside.
3. In a separate bowl, whisk together the flax egg, almond milk, and honey. Then pour into the dry ingredients and mix until just moistened.
4. Turn the dough out onto a lightly floured surface, and fold over onto itself several times to bring it together. A dough scraper is great for this, but if you don't have one, just use your hands.

5. Now's about the time to start heating up your oil. Pour canola (or other mild vegetable oil) about 1 inch deep into a pot. Using a candy thermometer, heat the oil until it's between 360 and 375 degrees. If it's too hot, the outside of the dough will burn before the inside gets cooked. If it's too cold, the dough will soak up the oil - not good, I promise. You'll have to monitor the temperature throughout, as it will fluctuate once you start putting the dough in.5. With a lightly floured rolling pin, roll the dough out until it's about 3/4 inch thick.
7. Using a sharp knife or pizza cutter, cut the dough into squares.
8. Depending on the size of your pot, drop the dough into the oil a few pieces at a time. Turn each piece over when it starts to get slightly golden on the top. 
9. Scoop out with a slotted spoon and place on a plate that's been covered with paper towels. Sprinkle with cinnamon and sugar, or xylitol for a sugar-free version. 


Katie 

Honey Whole Wheat Biscuits


On that glorious internet-free Saturday last weekend, I whipped up a batch of whole wheat biscuits from my new favorite, the King Arthur Flour Whole Grain Baking cookbook. My audience is pretty easy since, being lactose intolerant, Navah's never really been able to eat biscuits. She's got no gauge for comparison, so she's pretty happy with anything that tastes yummy. But even I thought these were delicious. 


I'm still perfecting whole grain baking. I do it a lot, but there's a great deal of trial and error. I don't always know why things turn out the way they do. Whole wheat creations are always a little crumbly, and I'm hoping that continued baking out of this book will help me figure out how to make my baked goods fluffier and lighter. 

While these biscuits were a bit crumblier and less fluffy than my mom's biscuits, the taste was fabulous. Especially since they were 100% whole wheat and dairy-free. And we gobbled them up. 


Honey Whole-Wheat Biscuits
Adapted just slightly from King Arthur Flour Whole Grain Baking


3 cups whole wheat pastry flour
2 1/2 teaspoons baking powder
1/2 teaspoon baking soda
3/4 teaspoon salt
1/2 cup (or 1 stick) cold earth balance
1 large egg
3/4 cup almond milk (or soymilk or buttermilk if you can have it)
3 tablespoons honey


1. Preheat the oven to 400 degrees and line a baking sheet with parchment paper
2. Whisk together the dry ingredients in a large bowl.
3. Cut the butter into the dry ingredients with a pastry cutter, a fork, or your hands until it's a dry, crumbly mixture. Set aside.
4. In a separate bowl, whisk together the egg, almond milk, and honey. Then pour into the dry ingredients and mix until just moistened.
5. Turn the dough out onto a lightly floured surface, and fold over onto itself several times to bring it together. A dough scraper is great for this, but if you don't have one, just use your hands.
6. With a lightly floured rolling pin, roll the dough out until it's about 3/4 inch thick.
7. Using a biscuit cutter, cut out the biscuits and place them onto the prepared parchment paper. (King Arthur Flour recommends using a biscuit cutter and not a glass because the biscuit cutter cuts the dough cleanly, allowing the layers to fluff up when baking, rather than smashing them all together like the blunt edge of a glass does. I didn't have a biscuit cutter, but I think I'll get one and try it again since I'm going for fluffy.)
8. Fold over the extra bits and roll out again to cut more biscuits.
9. Bake for 11-14 minutes and serve hot. 


Katie 

Butternut Squash Polenta Casserole with Greens


Some recipes are worth the extra time and the number of dishes. You know the ones I'm talking about. 


The ones that have you in the kitchen two hours before you're going to serve them. The ones that leave you staring in dismay at a sink filled with pots and pans and spatulas. The ones that make your counter look like a small army of kindergartners were doing experimental finger painting with food. 


For a recent potluck with friends, I pulled out a favorite recipe from one of the Moosewood cookbooks and gave myself plenty of time and an empty sink. 


For me, casseroles are comfort food. I have so many wonderful memories from back as far as I can remember that are wrapped up in potlucks and casseroles and plates brimming with a little of this and a little of that. There's a coziness to sharing a meal that everyone in the room helped prepare. Of course, I think I felt that even before I was old enough to help in the kitchen. Perhaps potlucks are just cozy affairs no matter what.


Some casseroles are quick and easy - just throw all the ingredients into a dish, swish 'em around, and bake. 


You've probably gathered that this isn't one of them. With three layers that each need to be cooked and prepared separately, it's labor (and dish) intensive. But it's so delicious and hearty that I keep making it anyway. 


Butternut Squash Polenta Casserole with Greens
From Moosewood Restaurant Cooking for Health


Polenta Layer
2 1/3 cups water
2/3 cup whole grain cornmeal 
2 sun-dried tomatoes, chopped
1/4 teaspoon salt
1/4 teaspoon dried thyme
1/2 cup grated sharp cheddar cheese (we used soy cheese)


Greens Layer
2 tablespoons olive oil
3 garlic cloves, minced or pressed
8 cups stemmed and chopped collards (or kale or swiss chard)
1/4 cup water
1/4 teaspoon salt


Squash Layer
1 1/2 cups steamed and mashed butternut squash
1 large egg, beaten
1/4 teaspoon salt
1/8 teaspoon ground black pepper
2/3 cup grated sharp cheddar cheese (we used daiya cheese)


1. Preheat the oven to 350 degrees. 


2. Polenta layer:  Bring the water to a boil and quickly whisk in the cornmeal. Add the sun-dried tomatoes, salt, and thyme and cook on low heat, stirring often, until the polenta is thick and creamy (about 10 minutes). Stir in the cheese. Pour into a lightly oiled 8 or 9-inch square baking pan and set aside. 


3. Greens layer: Warm the oil in a pan over medium heat. Add the garlic and cook briefly, stirring constantly. Add the greens, water, and salt. Cover and cook, stirring occasionally, until the greens are tender and bright green (about 5-7 minutes). Drain and spread the greens over the polenta.


4. Squash layer: Chop and steam the squash until tender and then mash in a large bowl (canned would work as well). Stir in the egg, salt, pepper, and half of the cheese. Spread the squash mixture over the greens and then sprinkle the rest of the cheese on top.


5. Bake covered for 35 minutes. Uncover and bake for 10-15 minutes. Let sit for 5-10 minutes before serving. 


Enjoy!

Katie 

Pita Pizza


As a child, one of my favorite meals was English muffin pizzas. They were a special occasion sort of thing - on a Friday night while we watched a movie or for my eighth birthday slumber party. I was delighted, as I suspect most children are, by having on the plate in front of me My Very Own pizza (or 2) with My Very Own toppings that I Chose (pepperoni and lots of cheese). 


For a while I forgot about English muffin pizzas, opting for the quick and easy individual frozen pizzas when I was in college and graduate school. But they're boring. And they never have enough cheese. And as I aged, I was less into the pepperoni or basic veggies that came on a store-bought pie and more into interesting ingredients. 


In the last few years, I've started to try to figure out how to make good pizza dough that Navah can eat so that we can have pizzas at home with whatever yummies on top that we want. Making whole grain pizza dough is a tricky affair. There have been some basic successes (though nothing that's good enough to warrant a posting here), but there have been some failures. And it's a time-intensive process. You can't get home from work on Tuesday night and say Hey, let's make some pizzas! unless you made the dough on Monday night. 


When I would make dough, I usually separated it into two crusts so that Navah and I could put our own ingredients on since she's lactose intolerant and uses vegan cheese. Which got me thinking about English muffin pizzas. We couldn't find English muffins that Navah could eat, but we happened happily upon whole grain pita bread from Food for Life. And it hit us - Pita Pizzas! The perfect adult-sized version of English muffin pizzas. 


These have become a staple meal for us - usually at least one night a week - and we healthy them up by using lots of veggies and sometimes pairing them with a salad. 


These beet and arugula pizzas with dried basil did not disappoint. 
That happened when I was peeling the beet! 
The pitas are perfectly crunchy around the edges and firm in the center, like a good thin crust. I boiled the beets for about 30 minutes beforehand just to soften them up and then sliced them very thin on top of the cheese. I threw the arugula on about 3 minutes before I took them out of the oven for good. I don't like it to get too wilted, but I want it to be warm. 


Some of our other favorite combos are (1) broccoli, onion, and olive or (2) onions, yellow peppers, and artichokes. Delicious! 


Sitting down with my Very Own pizza in front of an episode of Downton Abbey? Please. It doesn't get better than that.


Do you ever make individual pizzas? What are your favorite interesting toppings?

Katie